Yeah I know that Ulthuan is under water after the Khaine ET book.
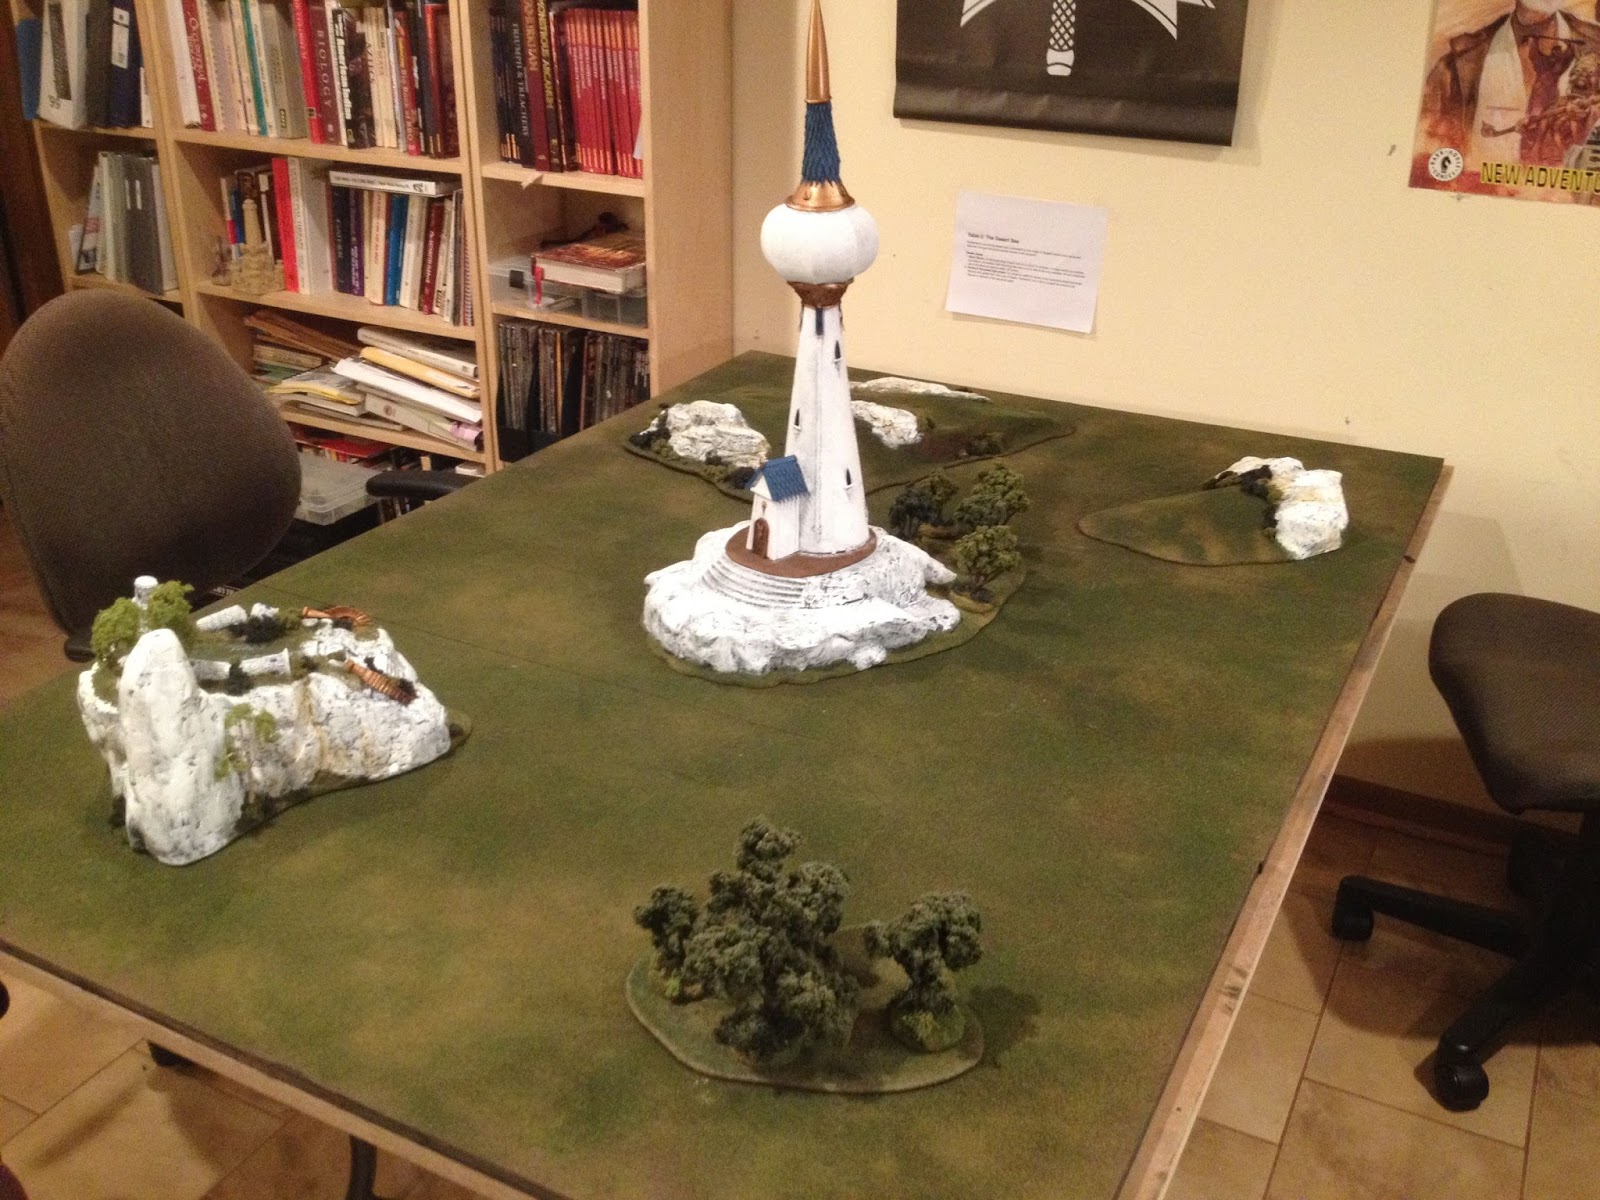
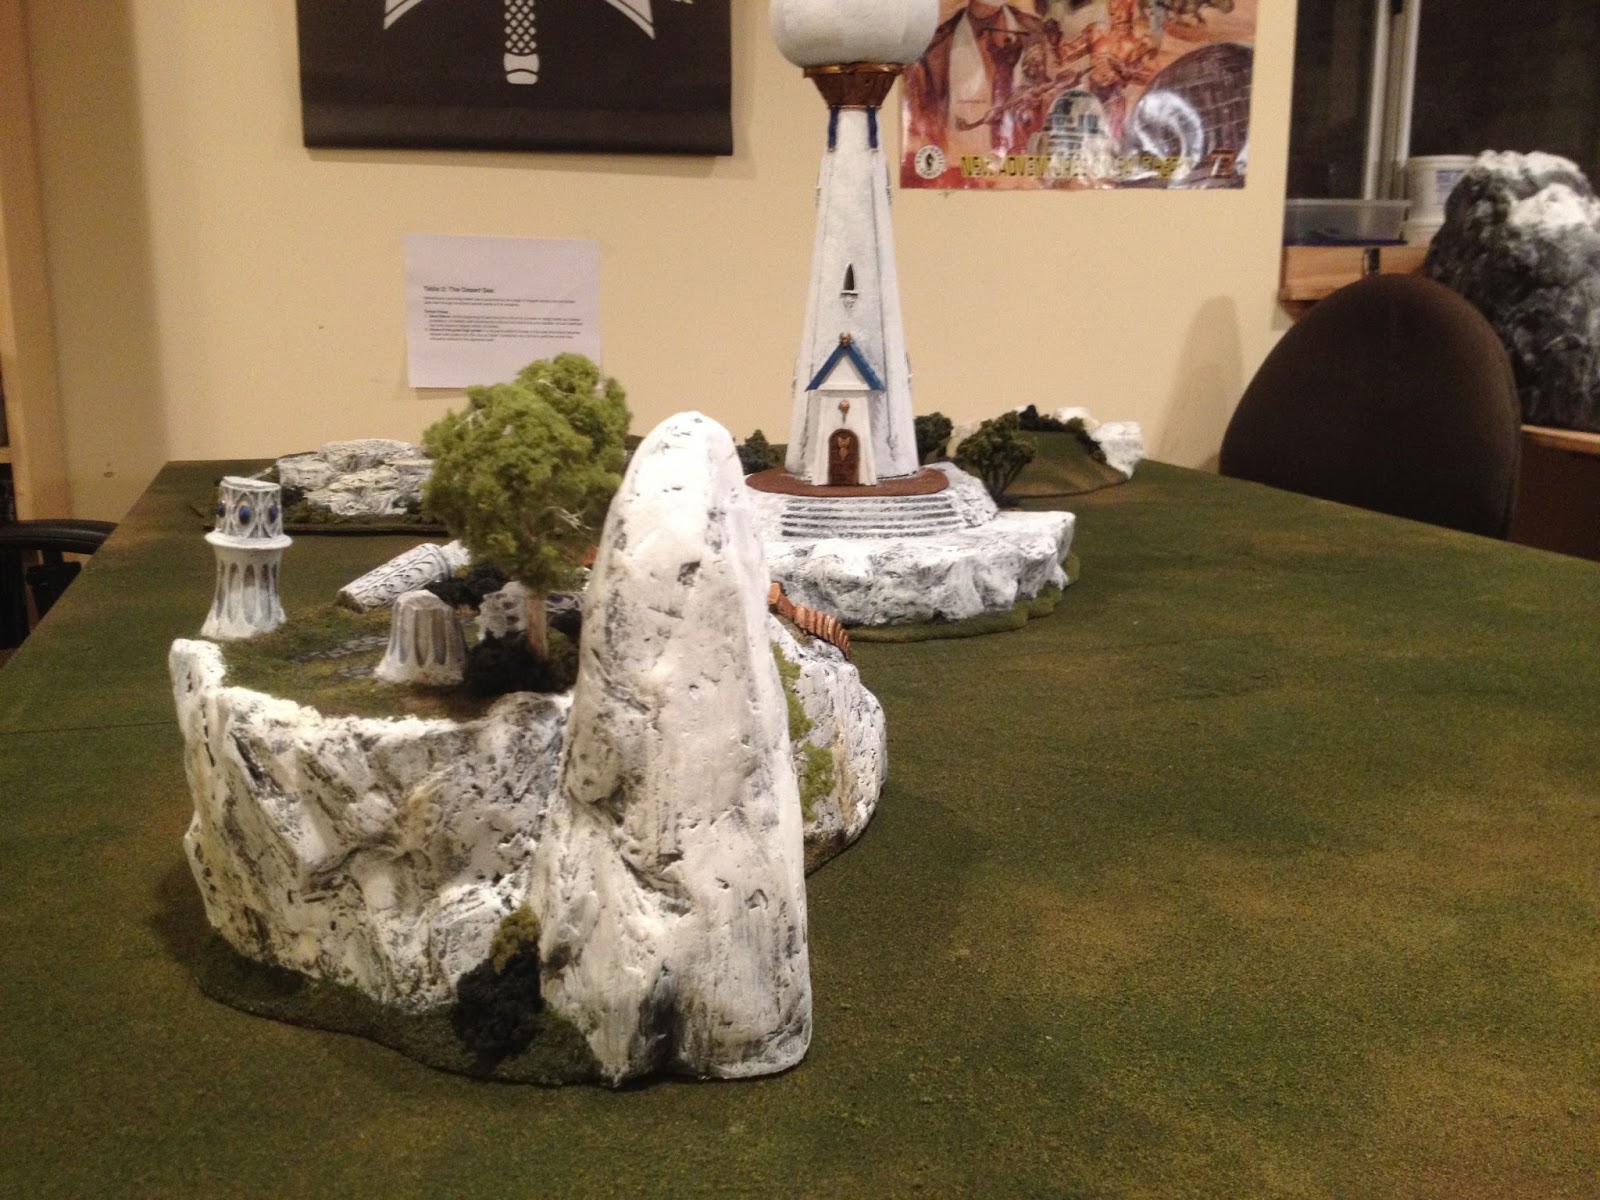
Looking back at my photos all the way back to August I realized that The High Elf board and The Shrine of Hoeth was one of the first concepts I conceived. Crazy considering I’m a Wood Elf and Skaven player. 🙂
When I think of Ulthuan I imagine the white cliffs rising above the land.
I was inspired by the Cliffs of Dover and I wanted to reflect those amazing white cliffs on this board somehow.
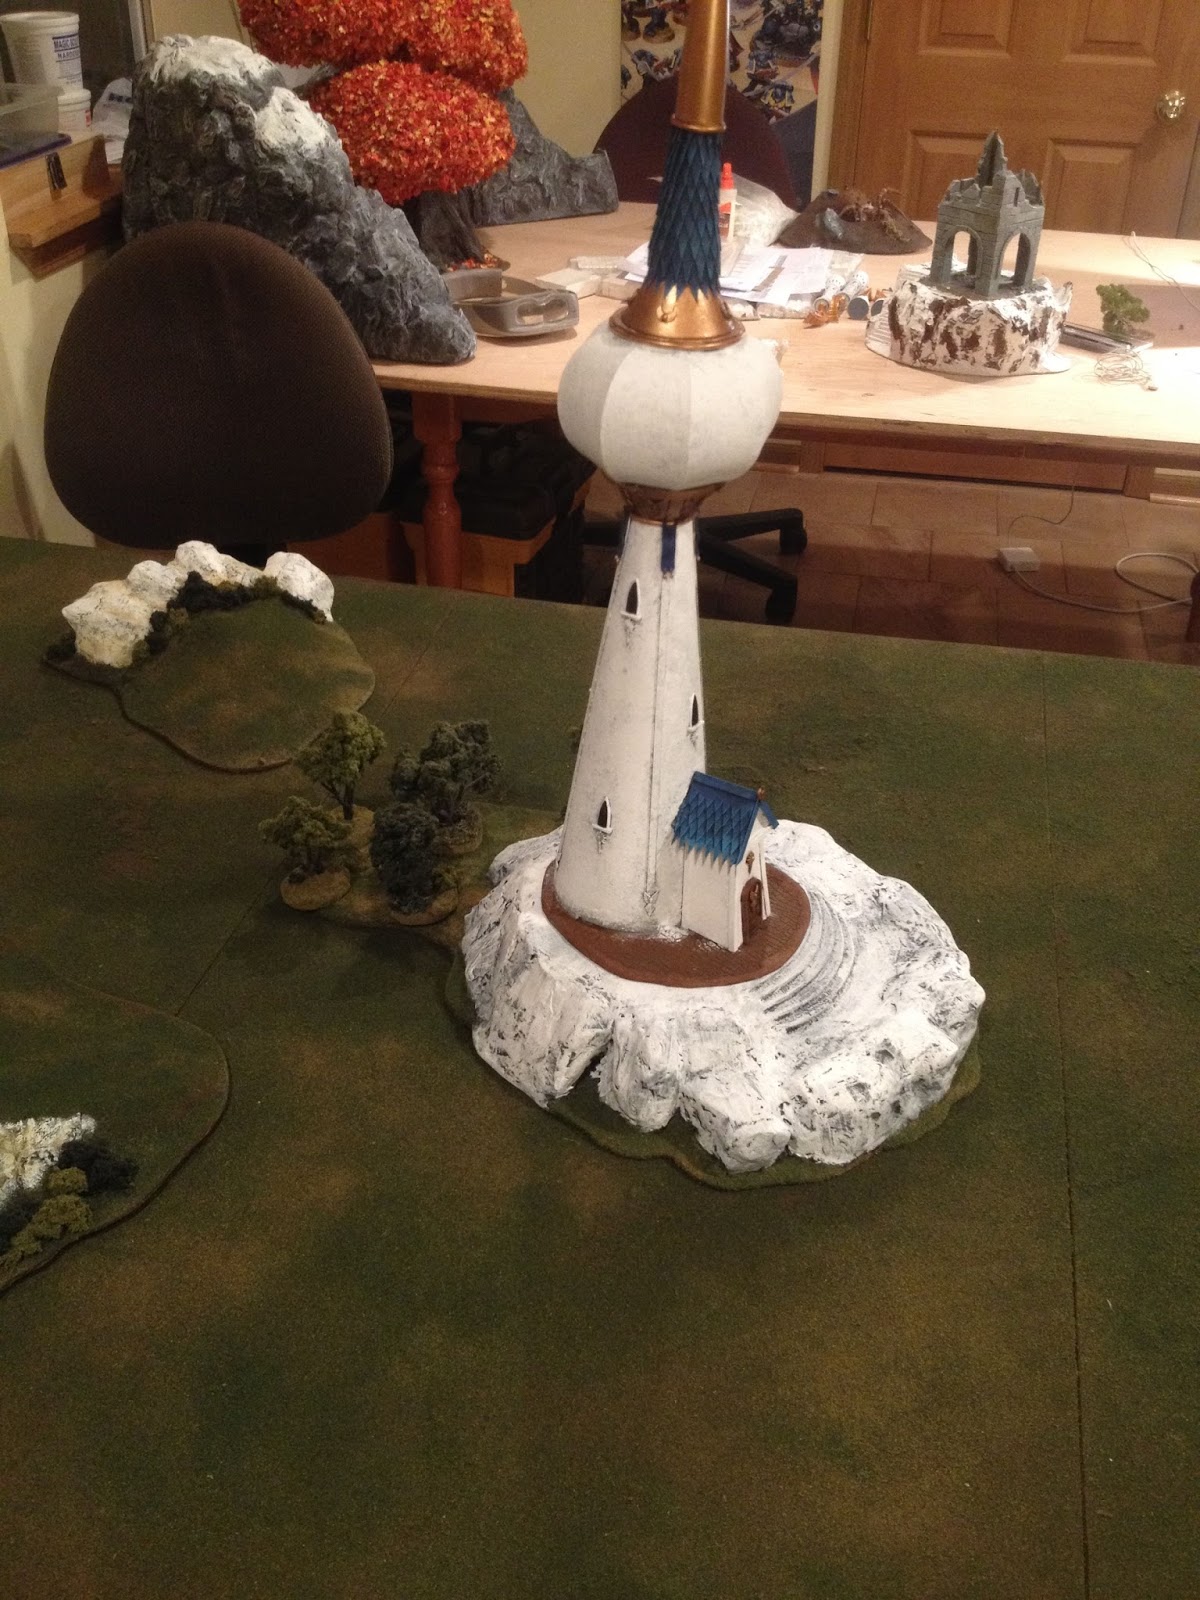
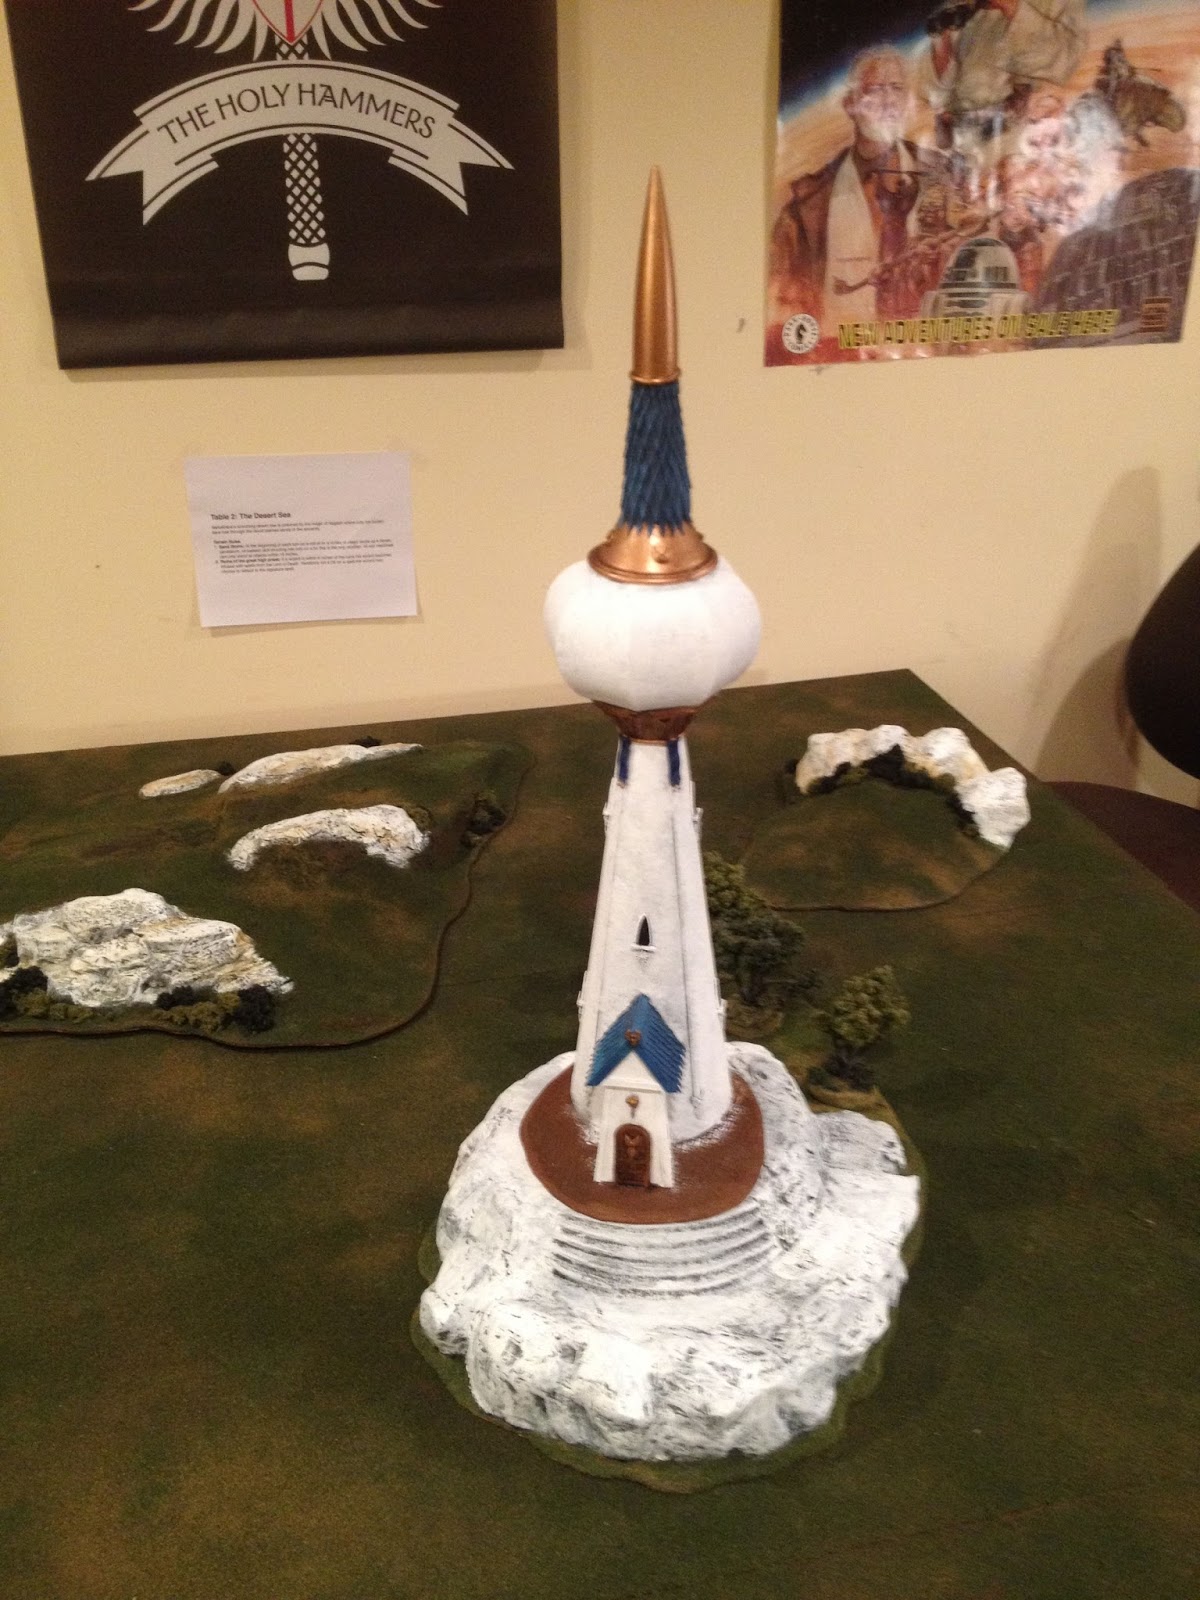
The Shrine of Hoeth
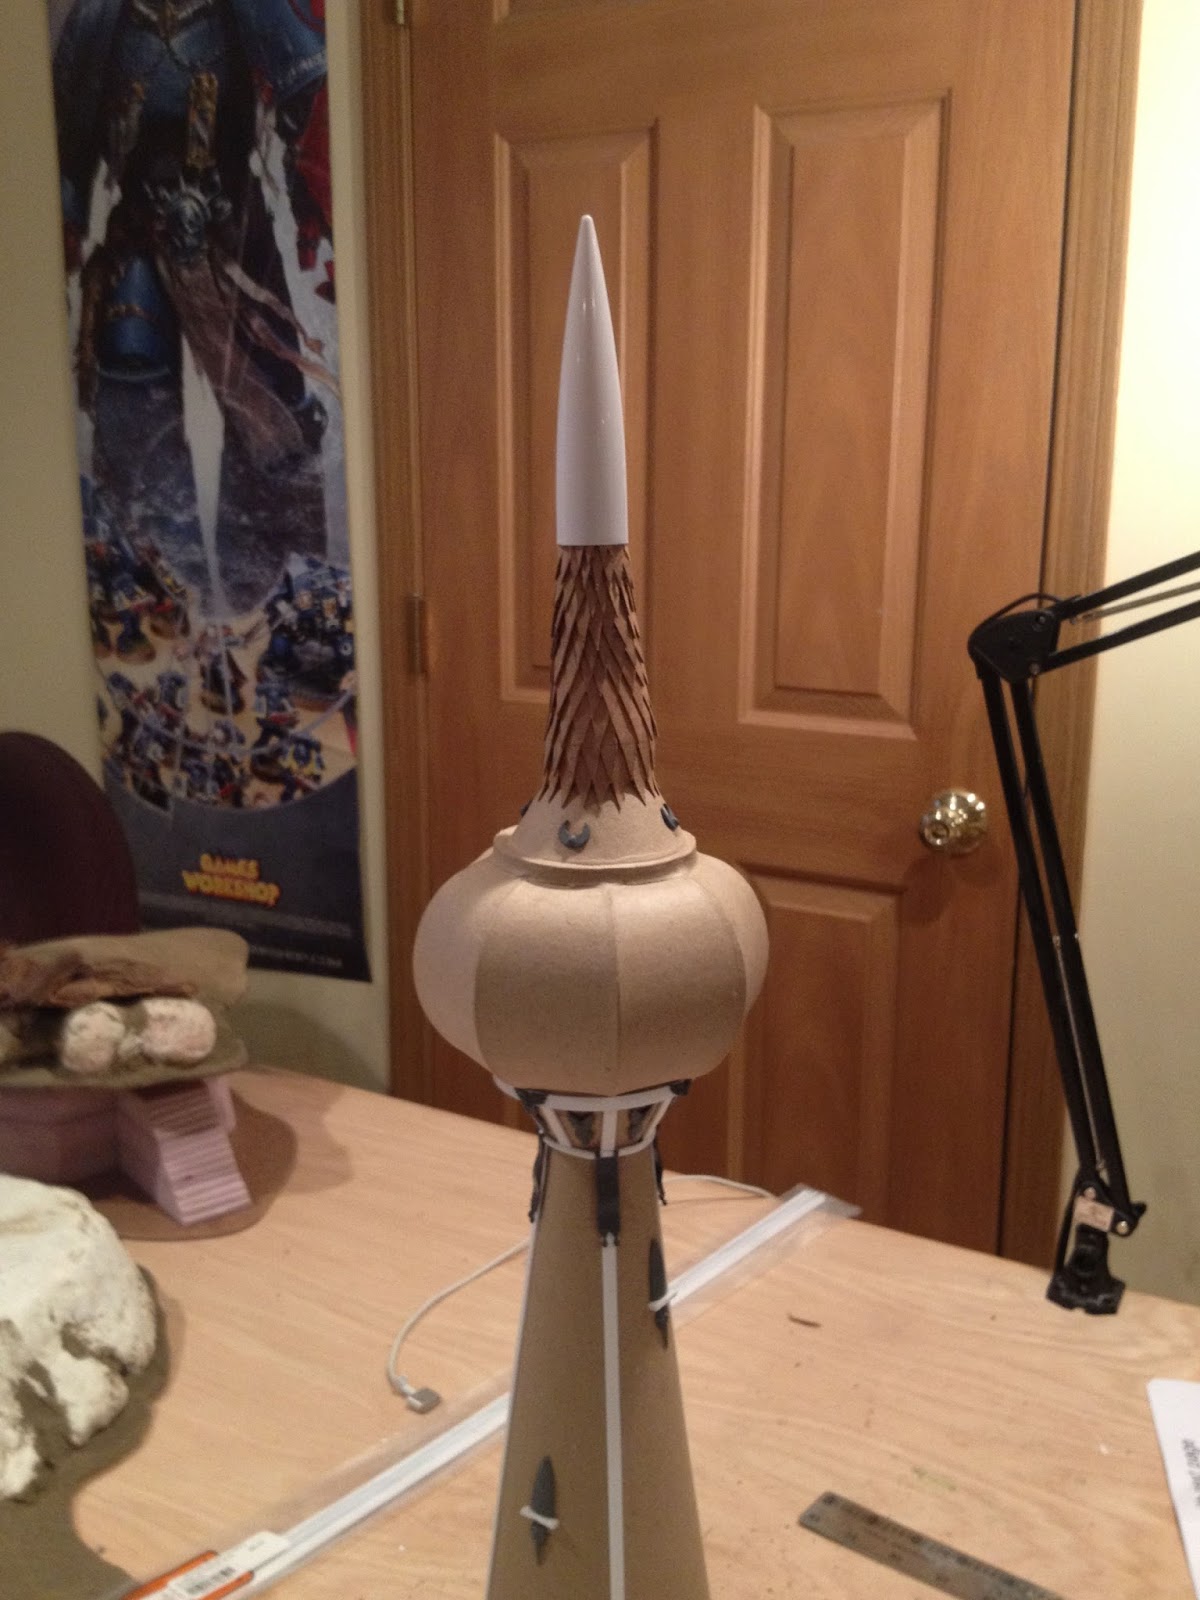
I had an image in my mind of what how the shrine would look but wasn’t entirely sure how to make it work. While walking through Hobby Lobby I spotted the solution. Cardboard Christmas decorations! The tower itself is a cardboard Christmas tree the top of the tower was an cardboard ornament.
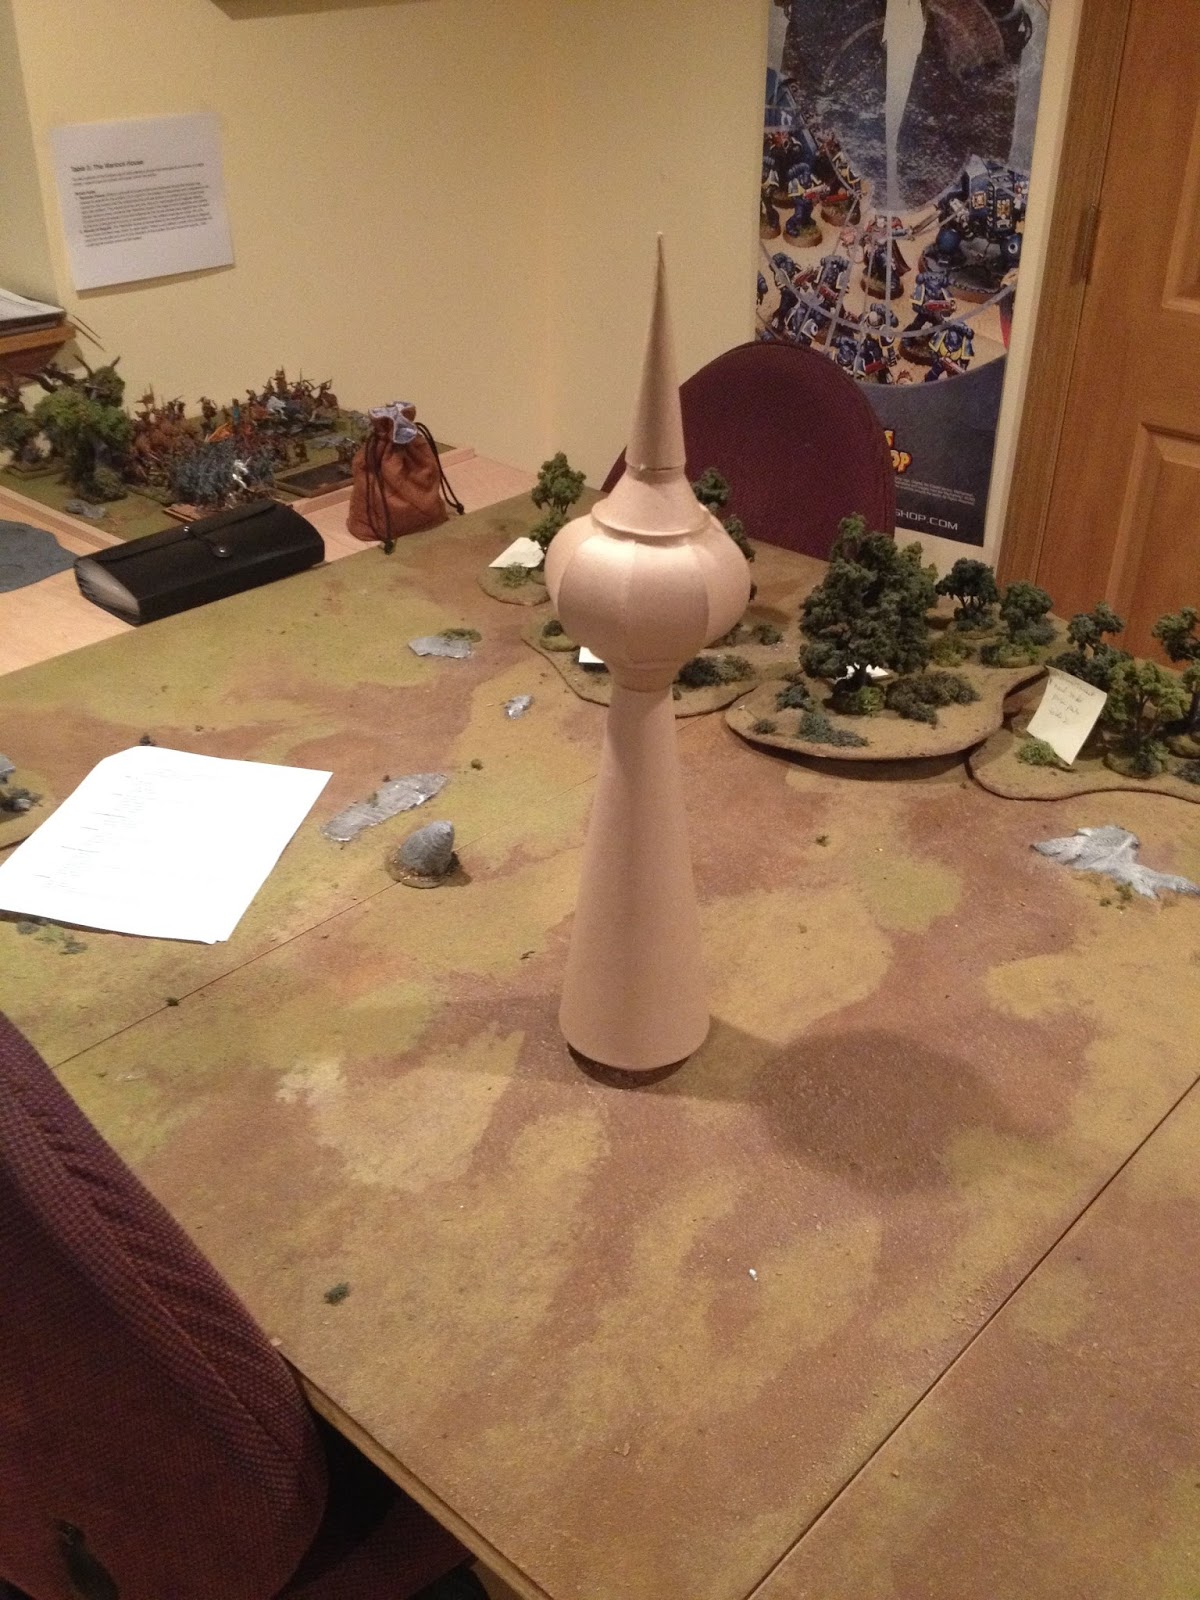
I thought after finding this the rest would be pretty simple. Not so much. The bigger question that needed answering was how to turn these into the Shrine of Hoeth?
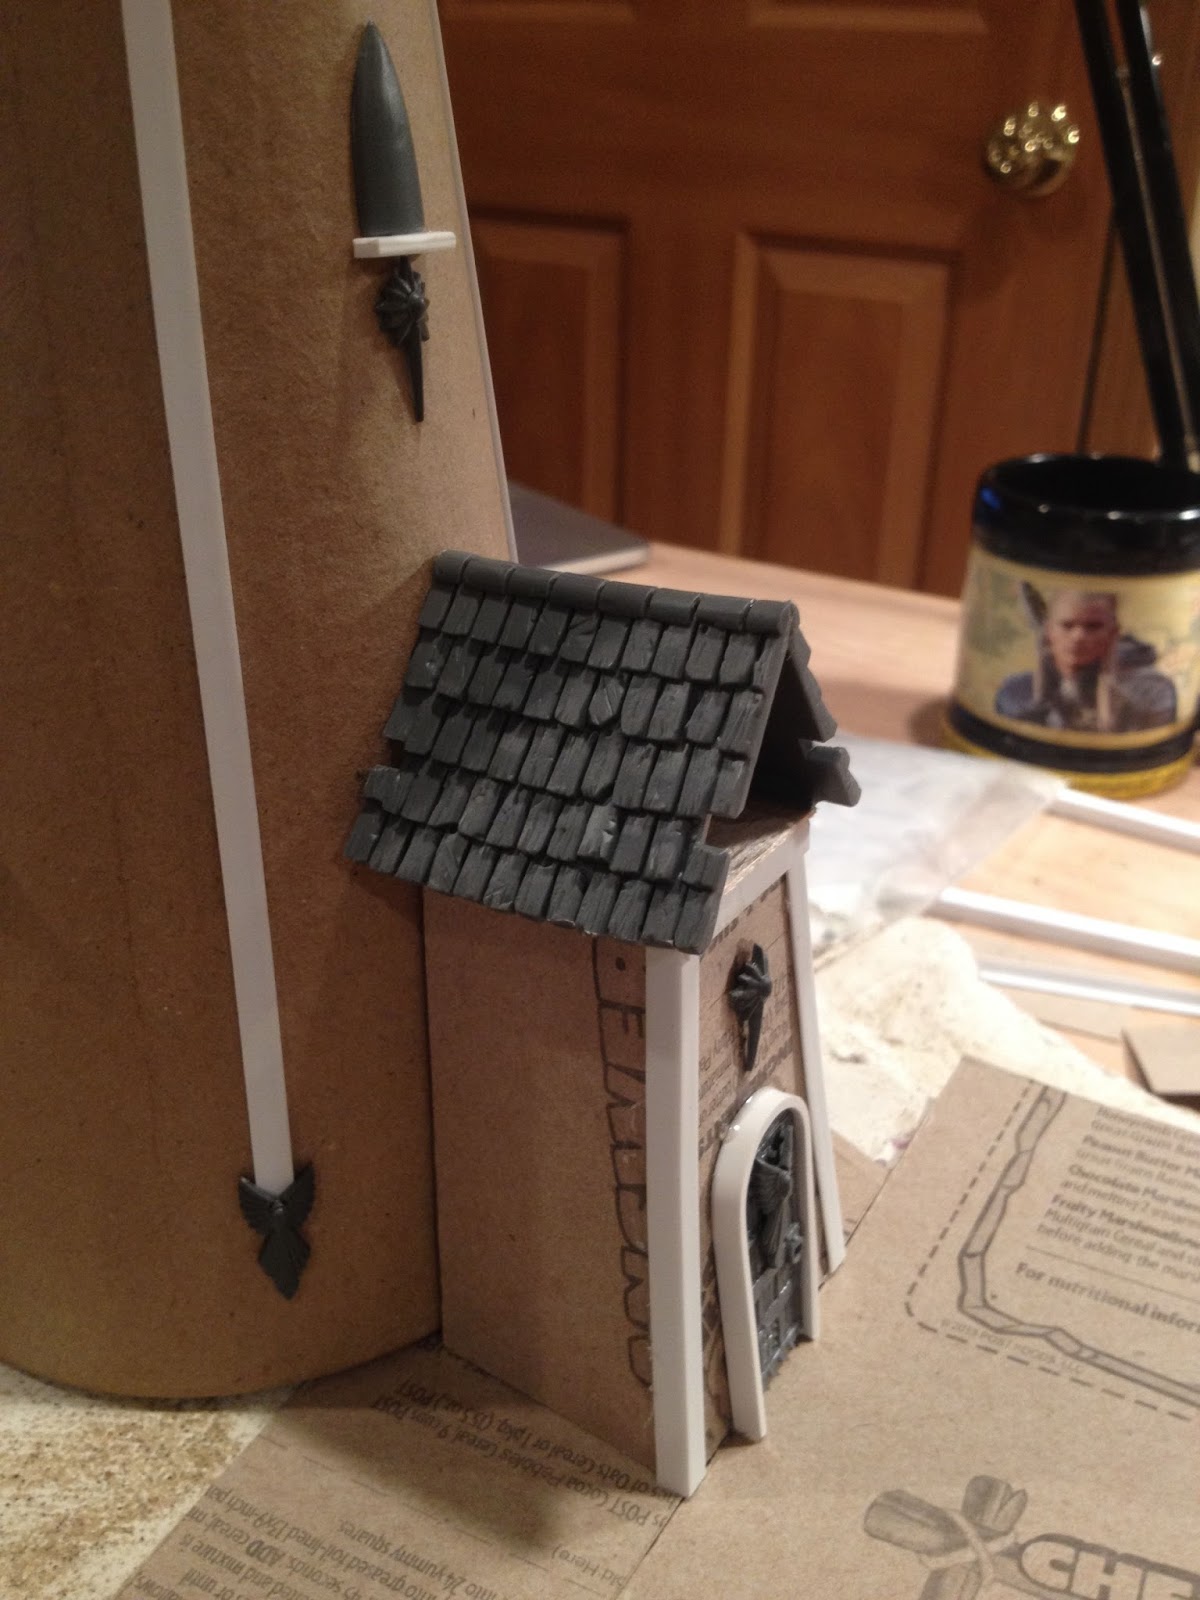
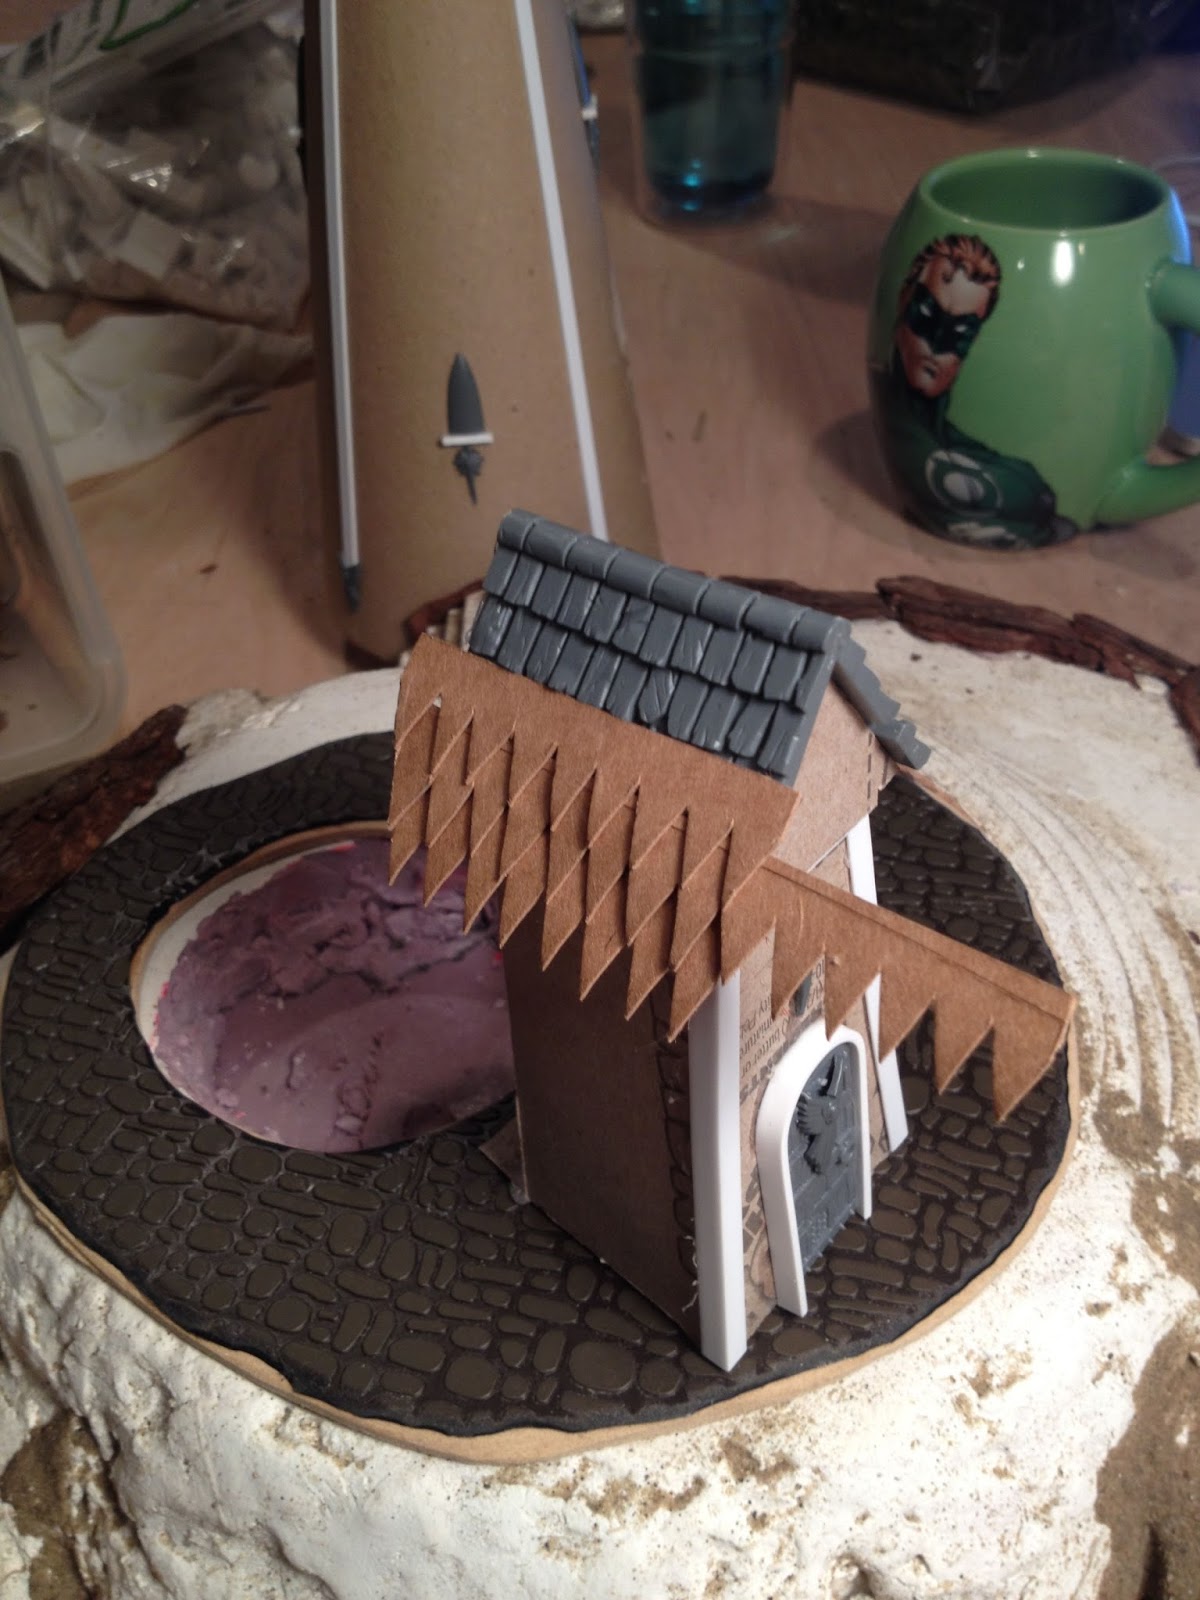
The answer? High Elf, Empire bits and Plastruct of course. First, I wanted to have arched windows on the Shrine but didn’t want the headache of cutting from plastic or card board. So I used HE shields with a bit of Plastruct for a sill. Once these are painted up they’ll look pretty good.
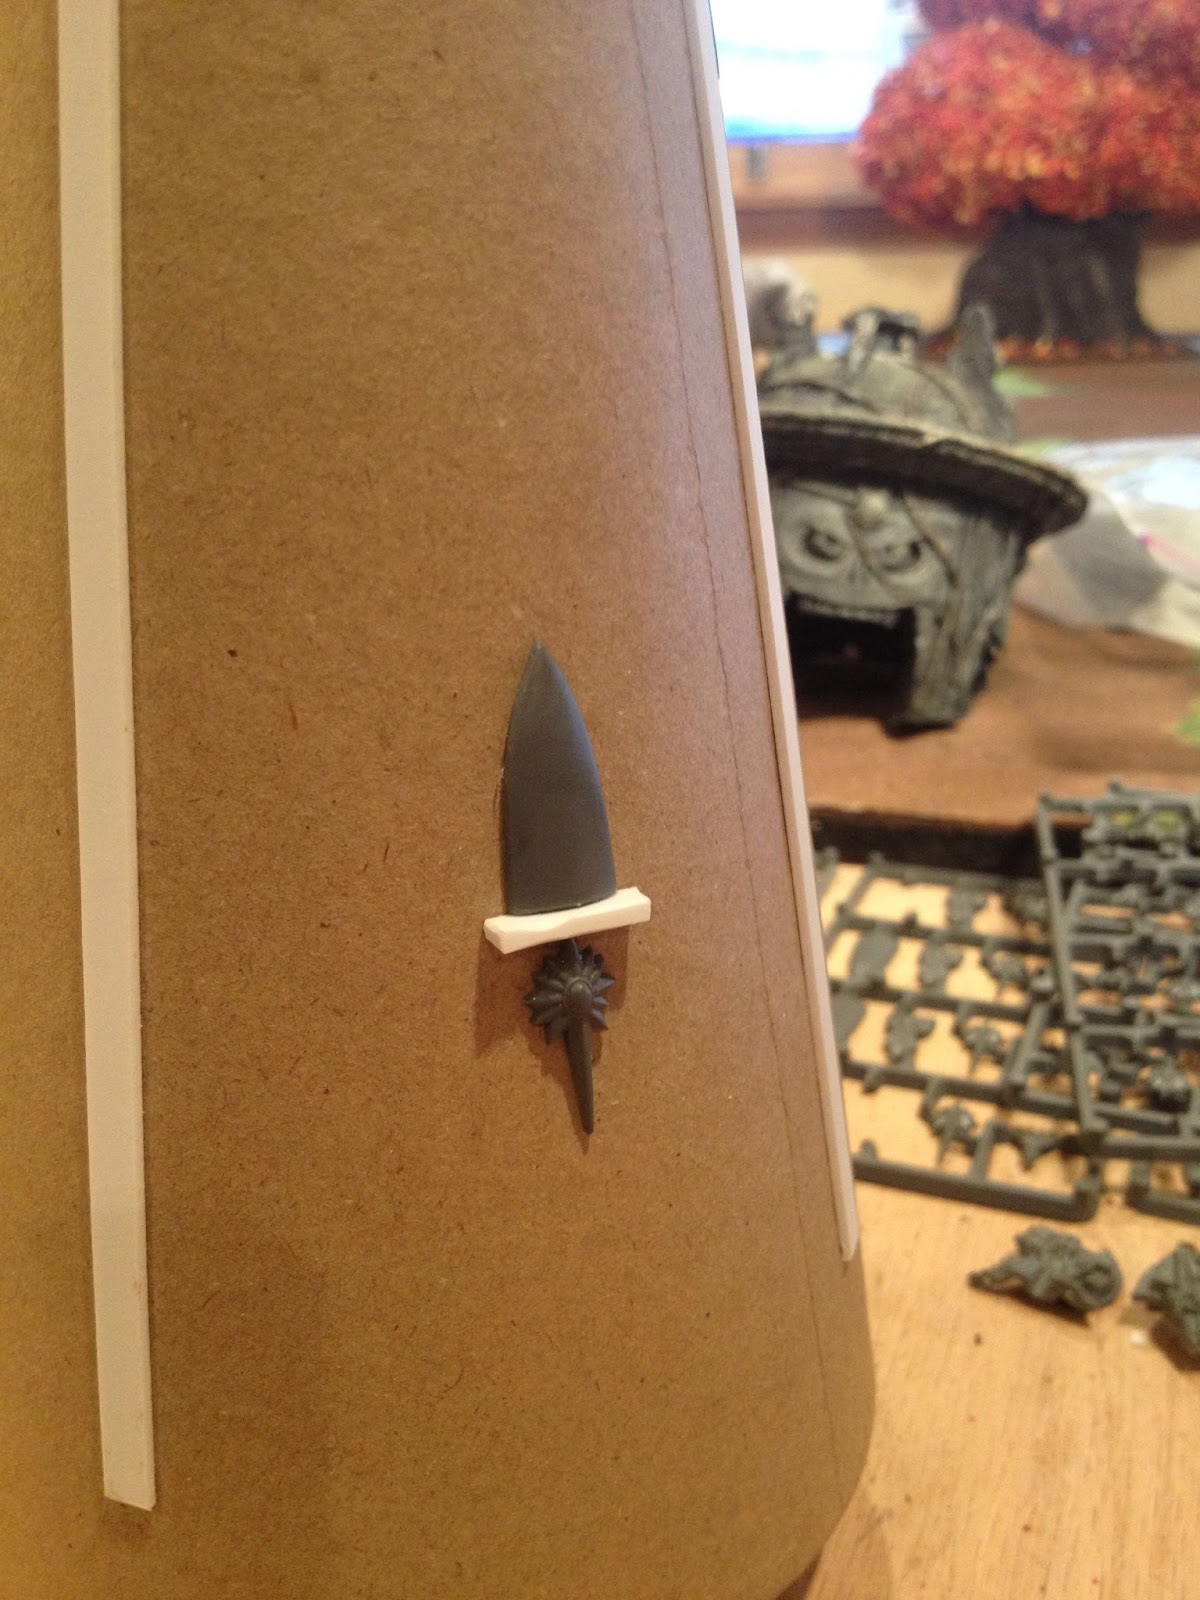
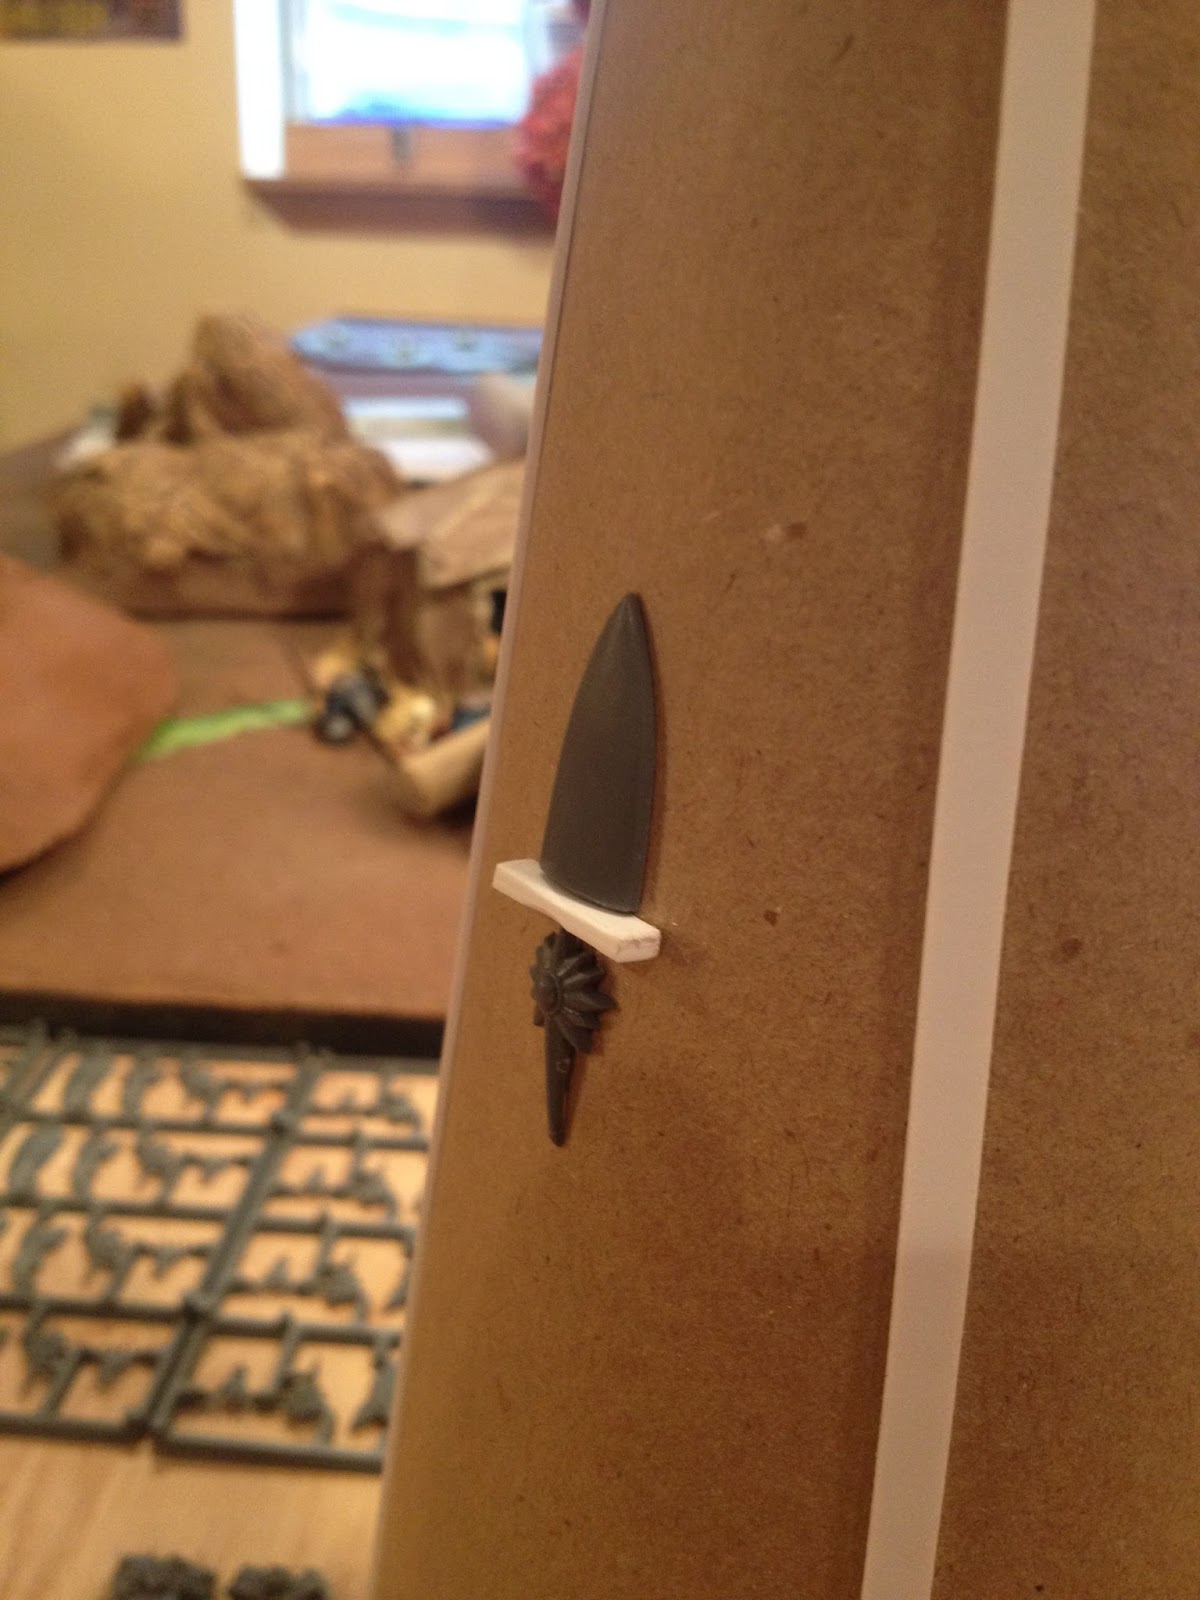
Soon after applying the windows I quickly realized that the Shrine need more enhancements so I used more Plastruct to add a few more decorative bits around the edges and then sides of the Shrine. This really broke up the large flat areas.
The shingles on the spire were cut from a Honey Nut Cherrios box, BIG thanks to Jason Vargas a fellow hammer who cut up the shingles. The shingles just wouldn’t lay cleanly against the top of the spire point so another solution was needed. During a trip to the LGS I wandered about the store looking for something to use as a cap for the spire. I found model rocket nose cones. These worked perfectly and they come in all shapes and sizes so I have more for more HE terrain!
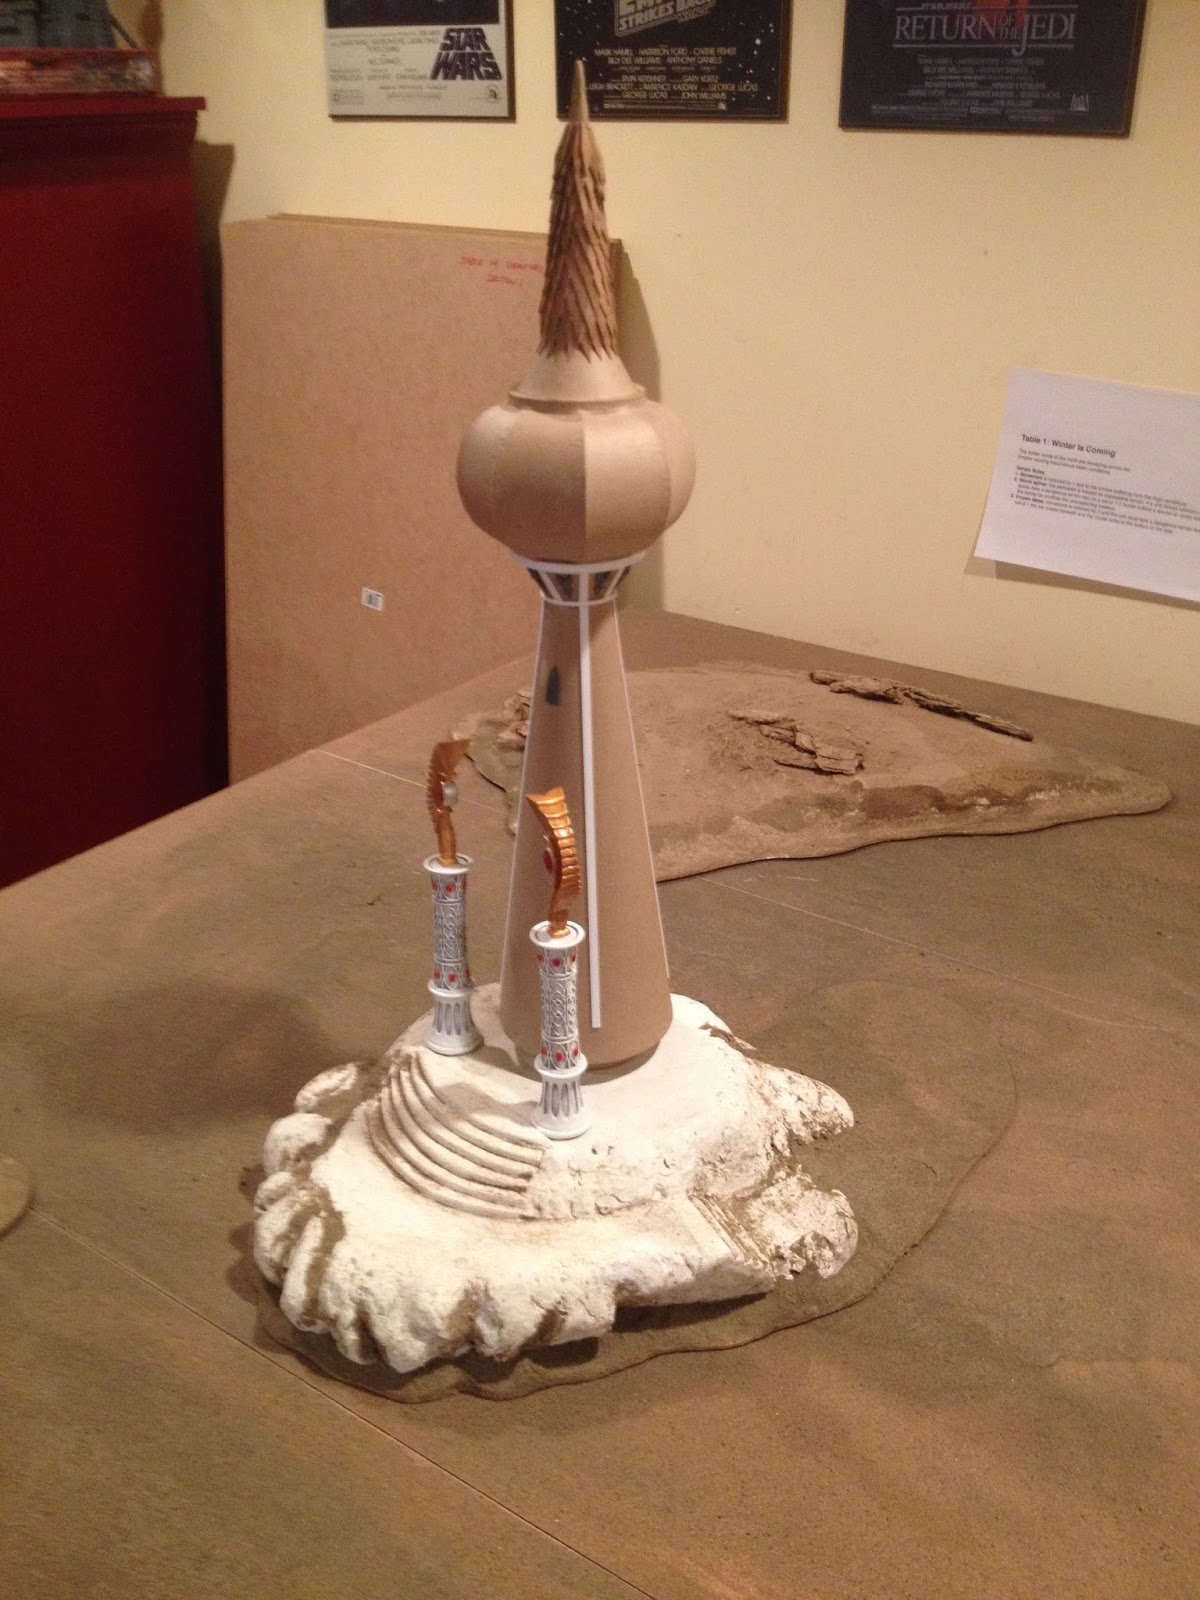
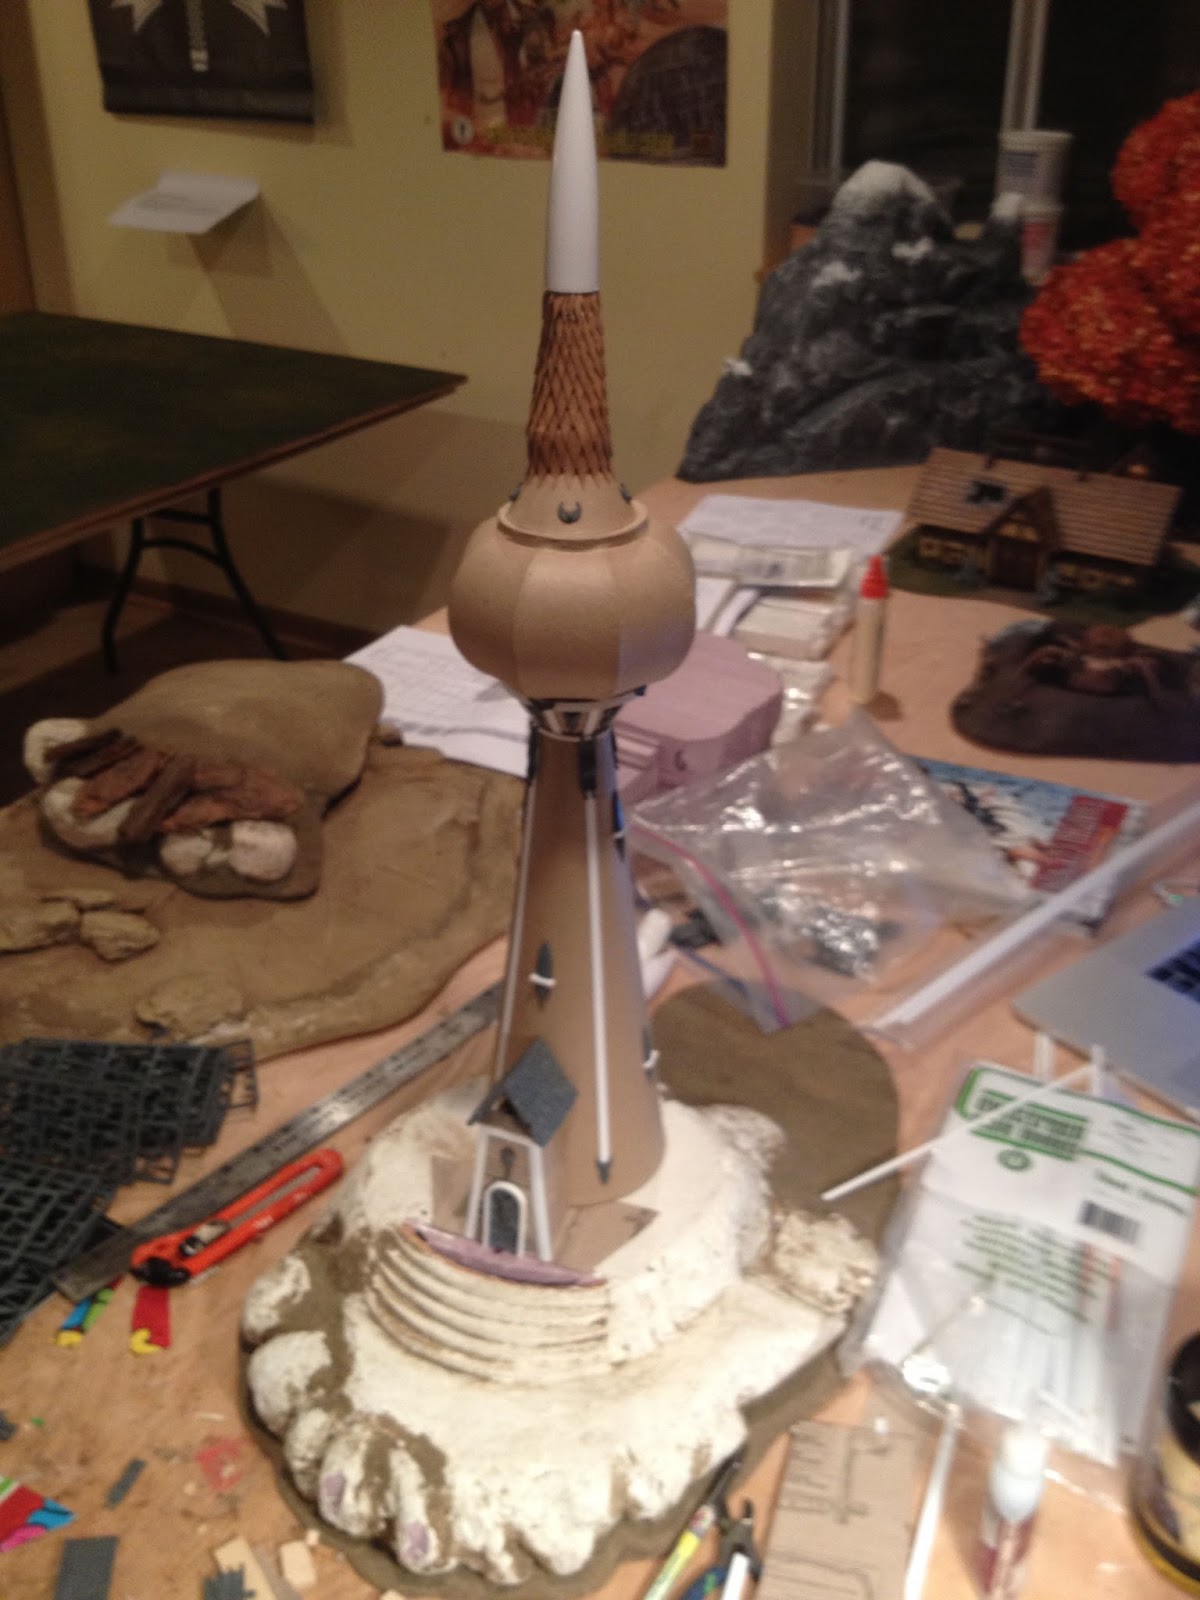
The vestibule was up next this was once again made from cardboard cereal boxes and Plastruct and some Empire bits and pieces. This time the shingles went on so easily. The Empire roof top for a substructure worked like a charm.
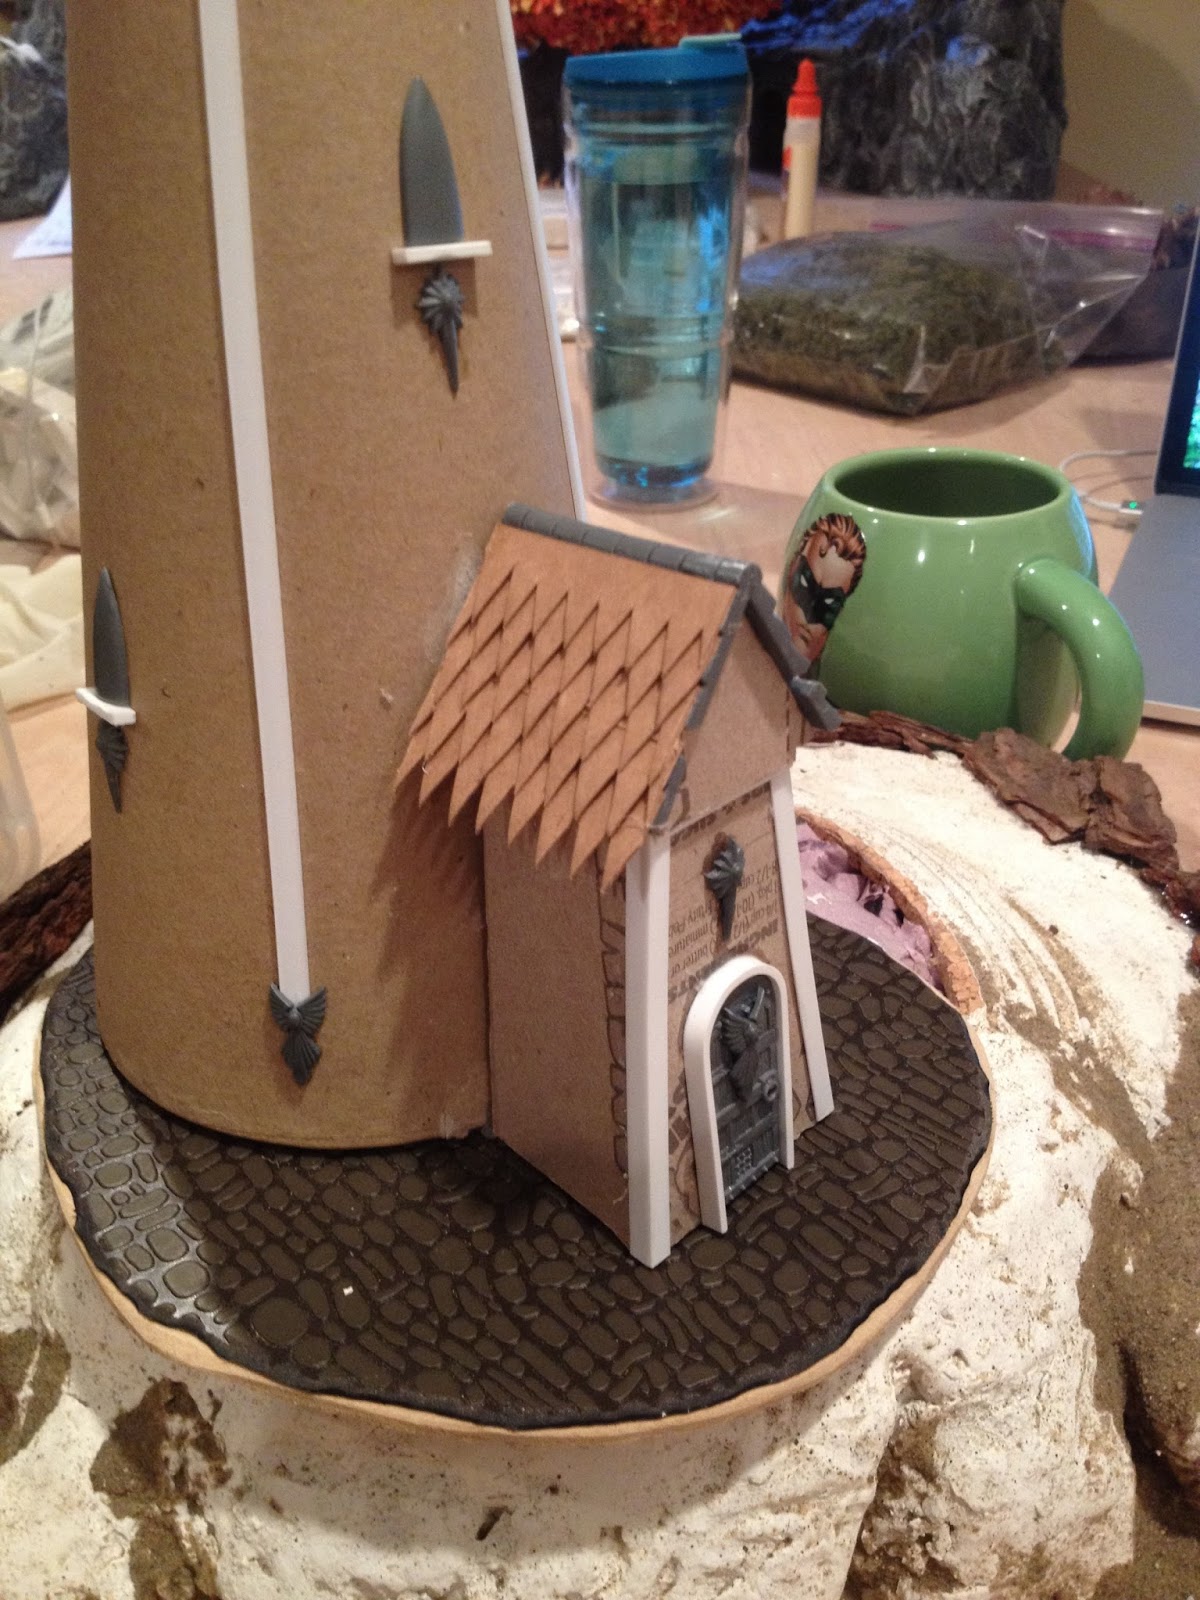
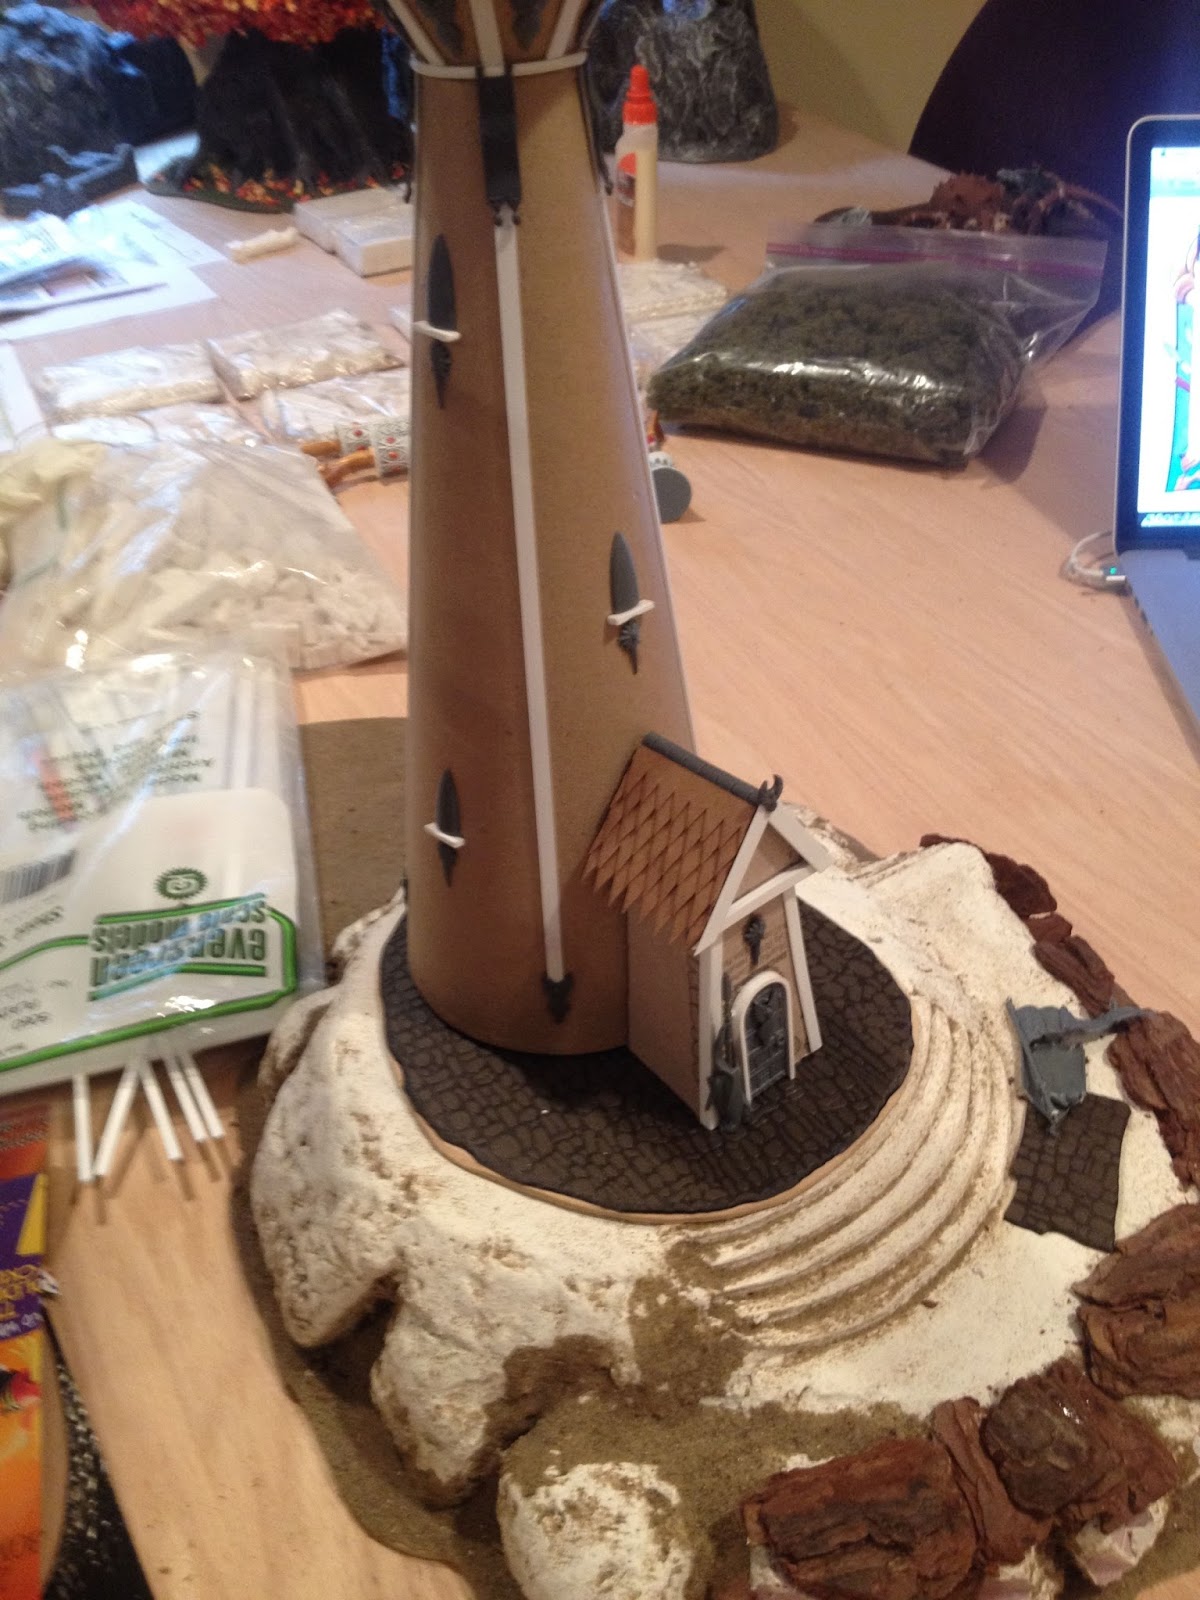
The base for the shrine was made from foam and mdf. The foam had a hole cut so the tower could be inset into the foam for added stability.
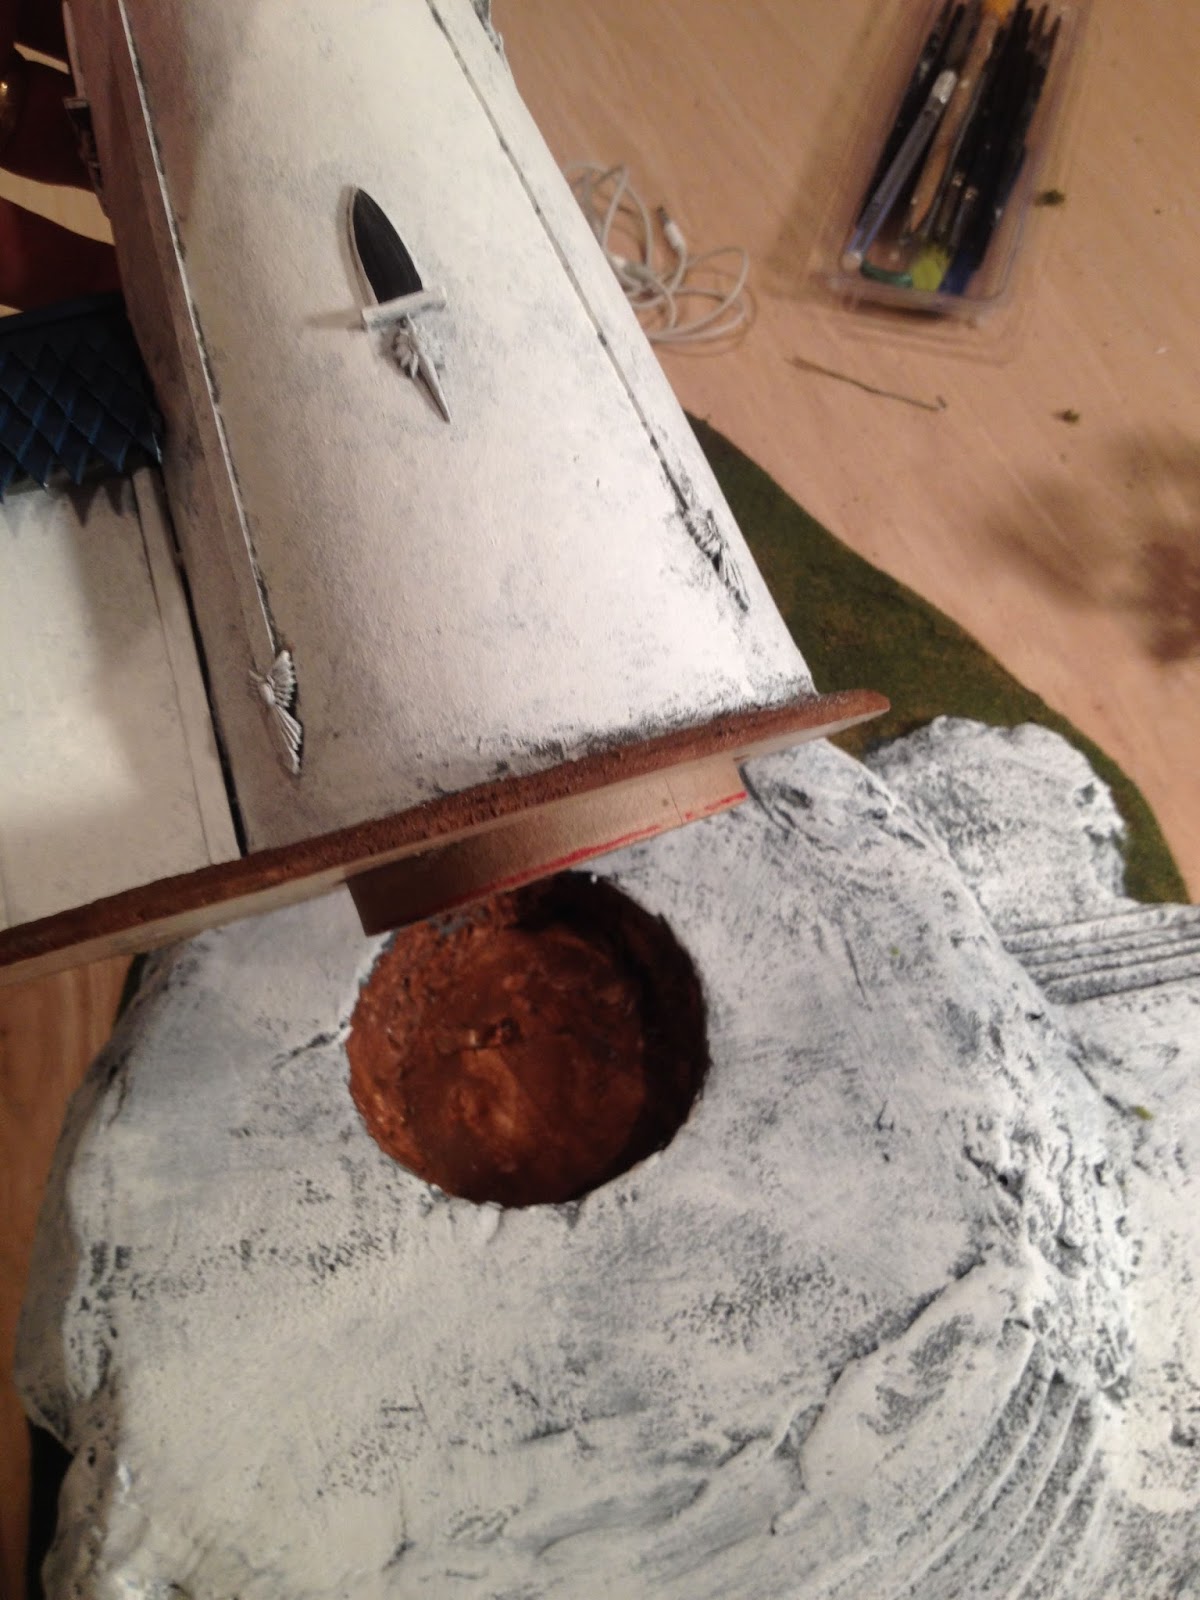
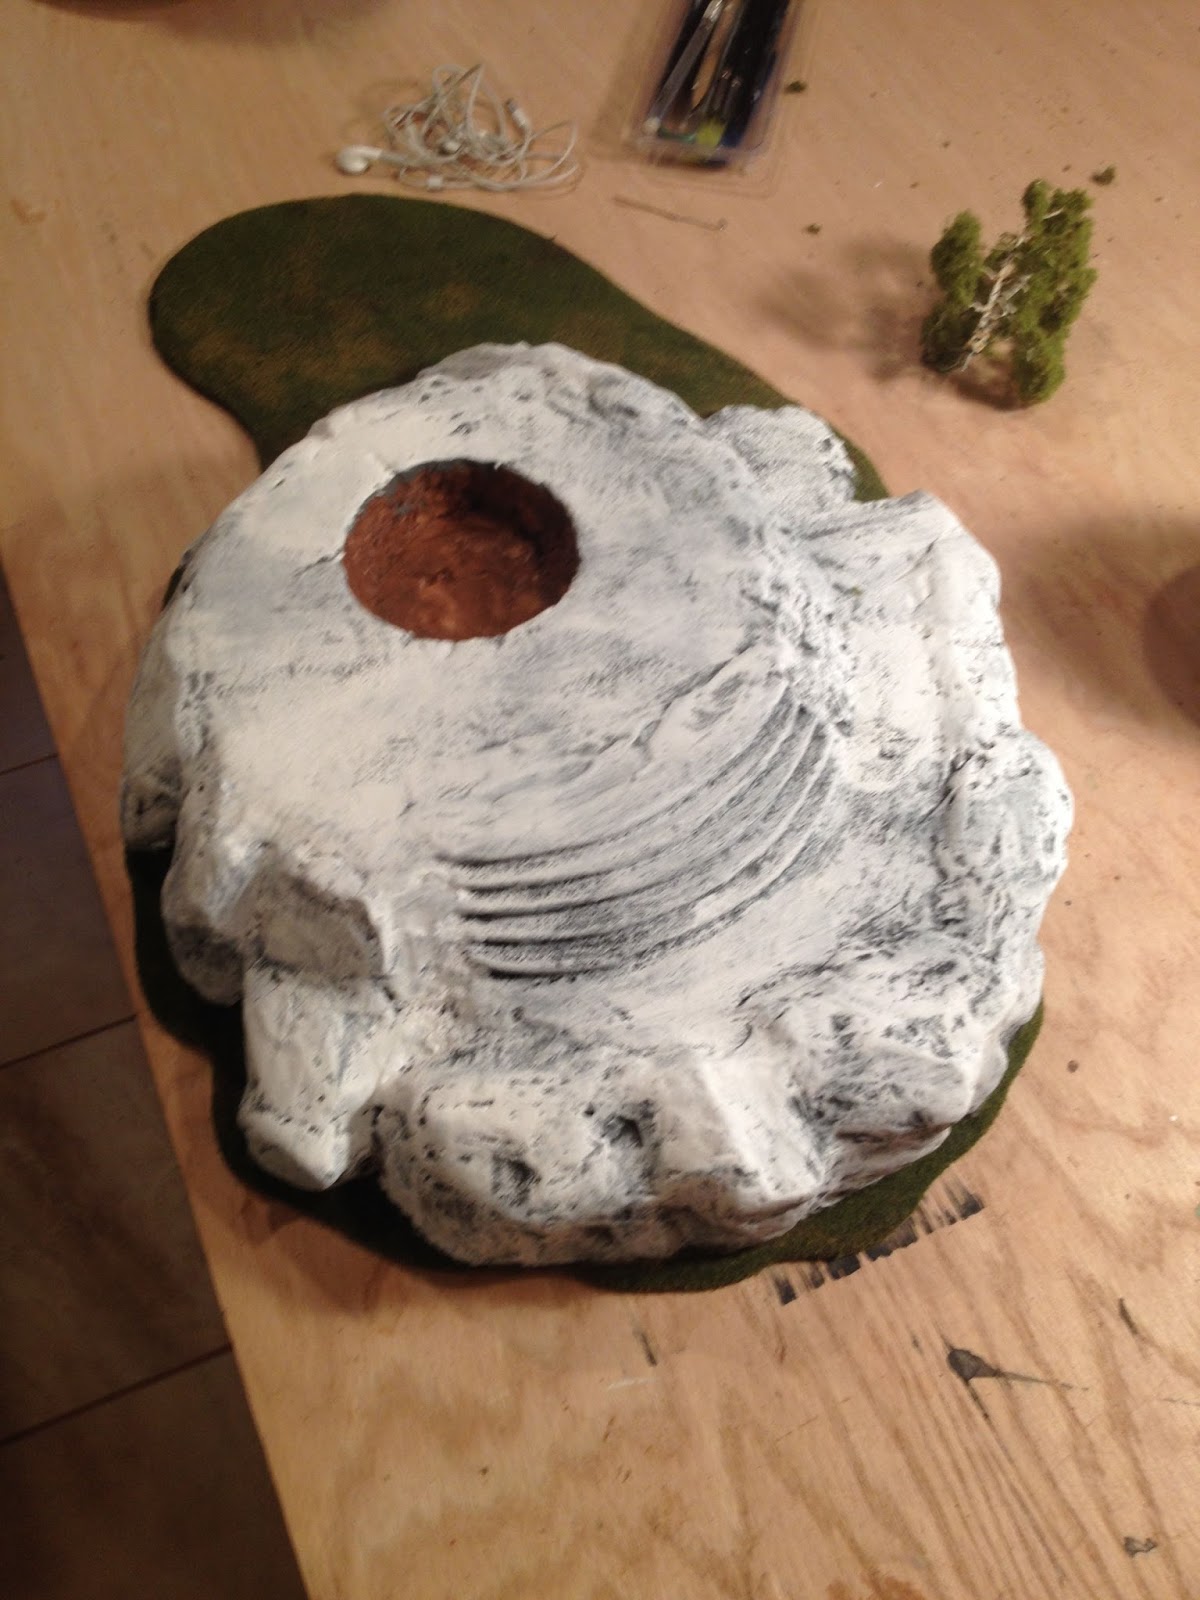
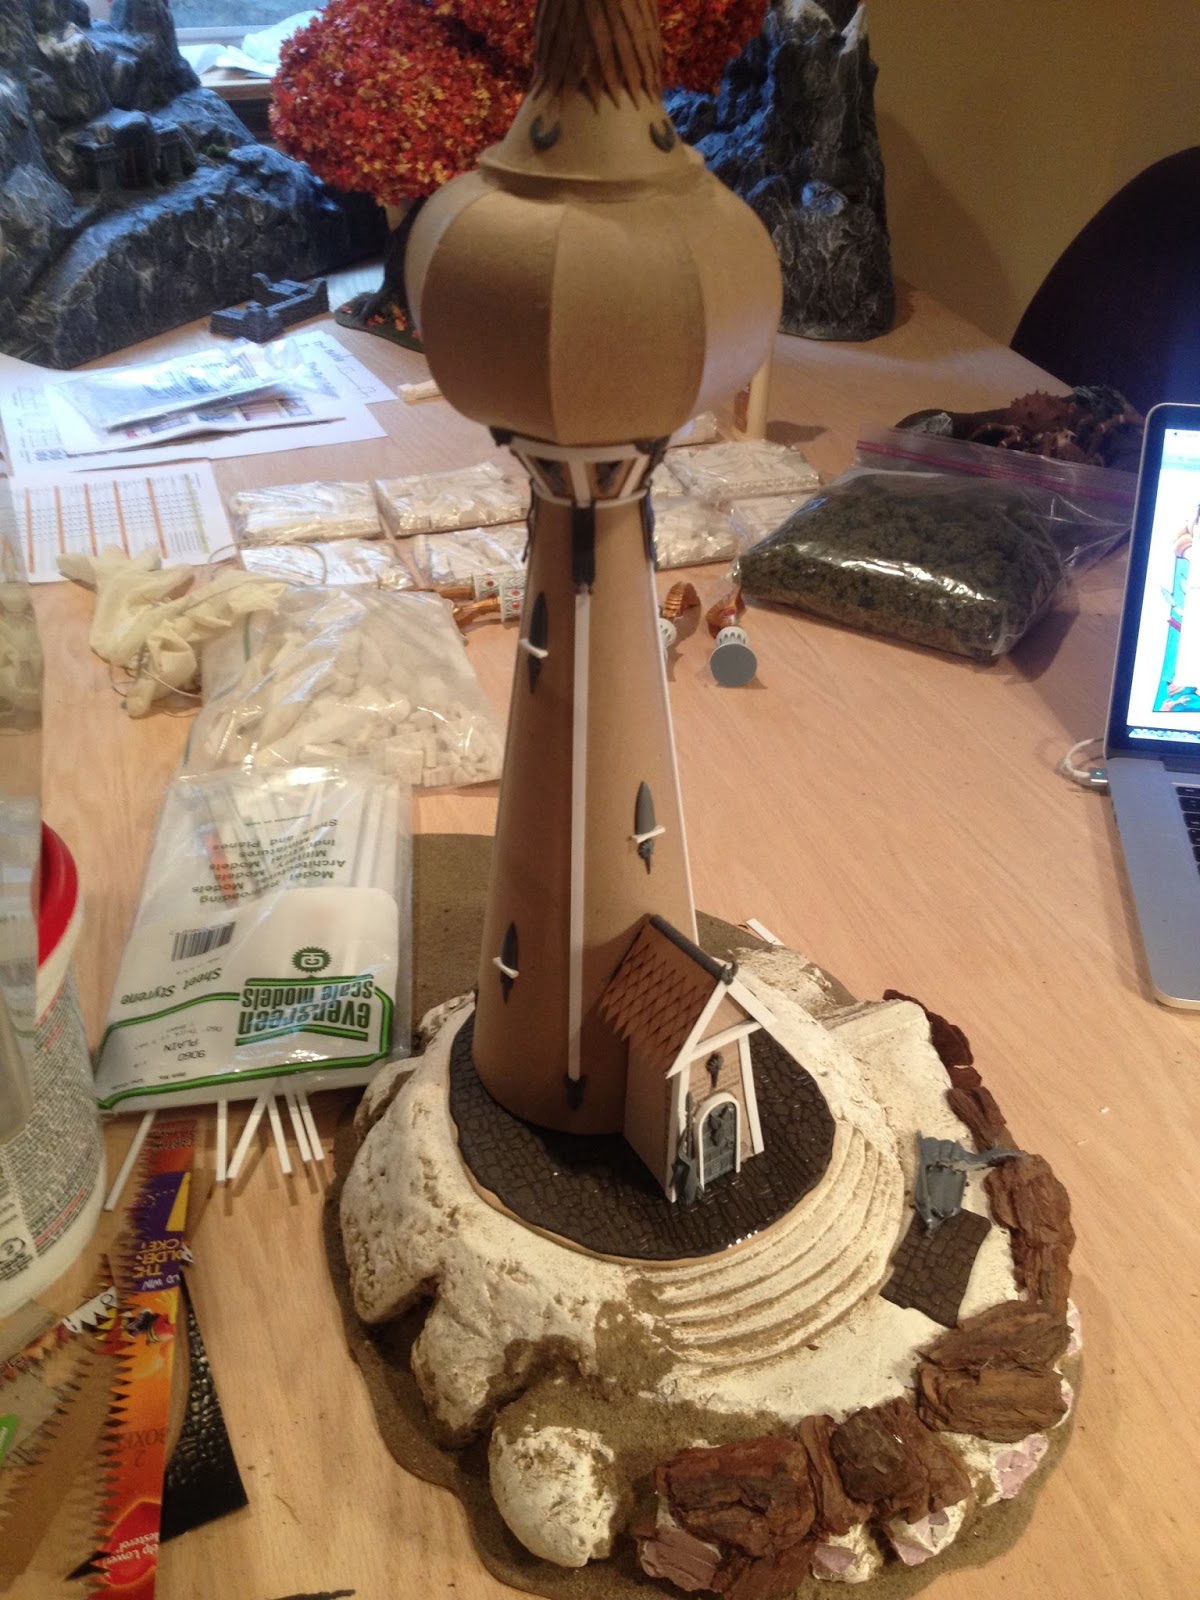
The tower was then primed up and ready for paint. I primed it using grey paint and then Belle (my warhammer widow) suggested painting a stucco effect using white. It gives the window sills, frames and decorations a carved from stone feeling.
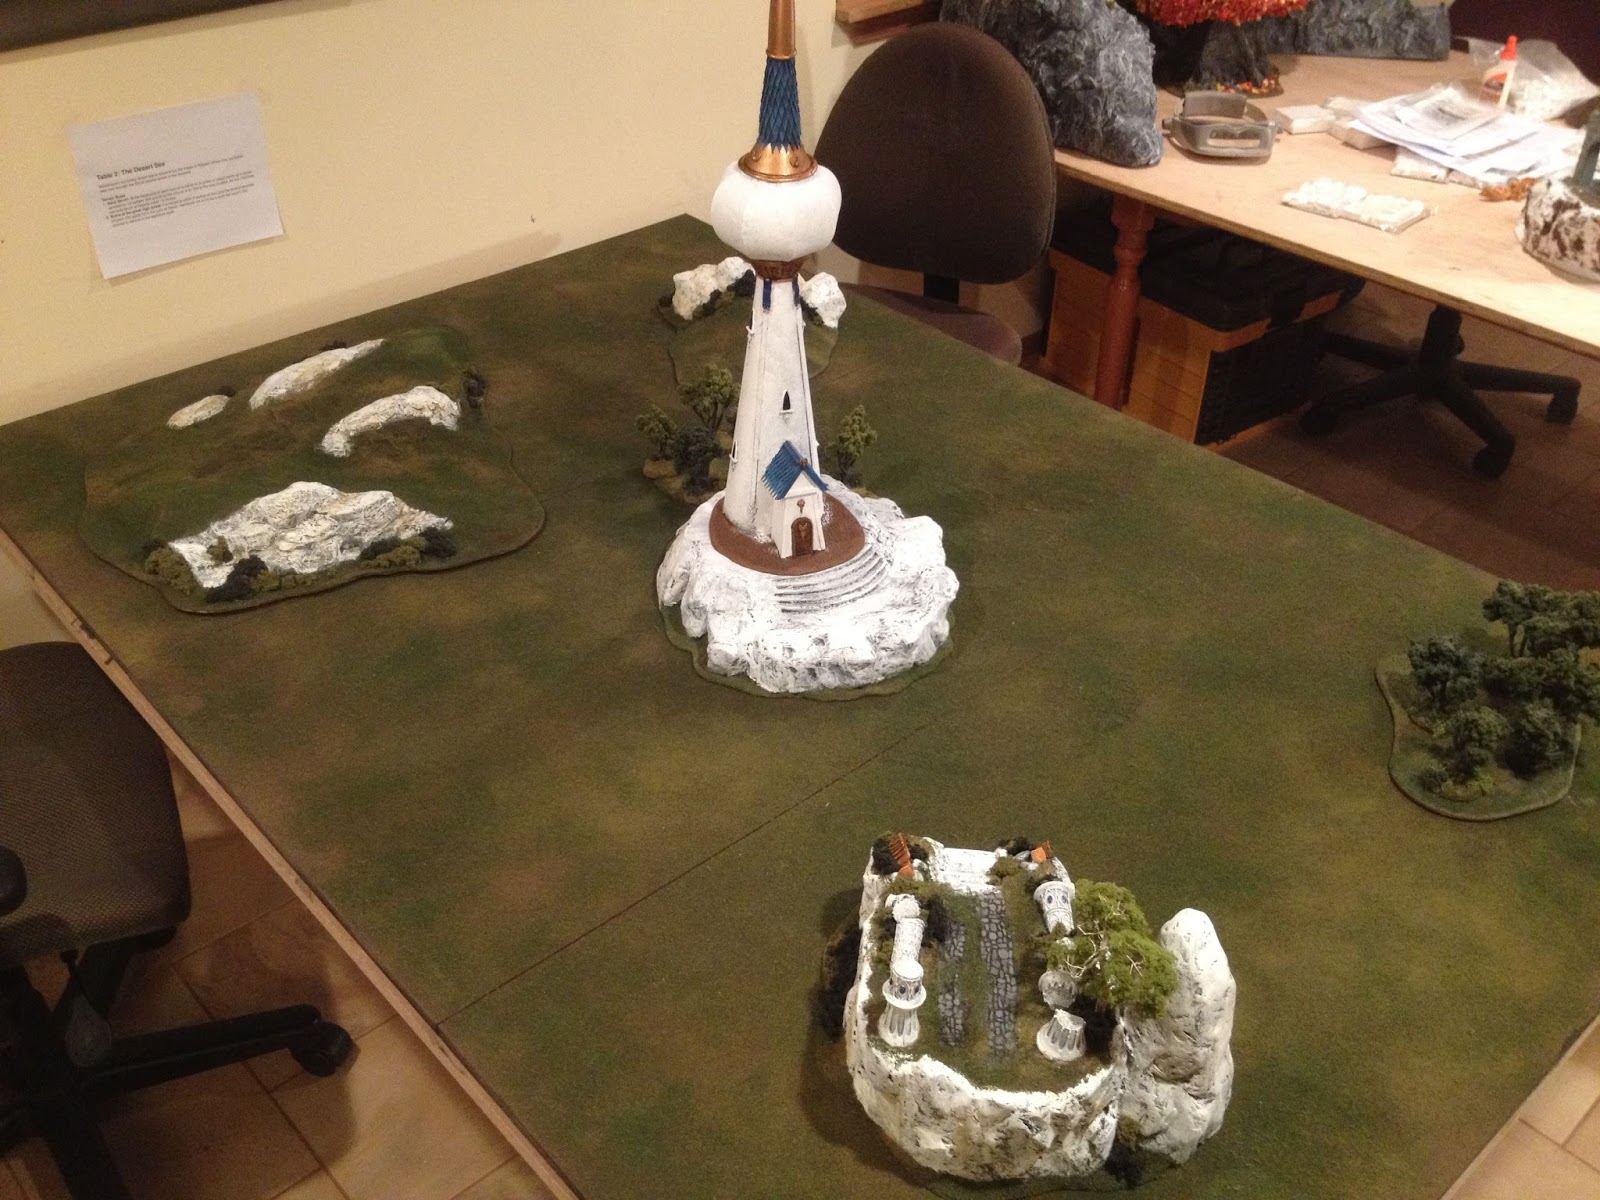

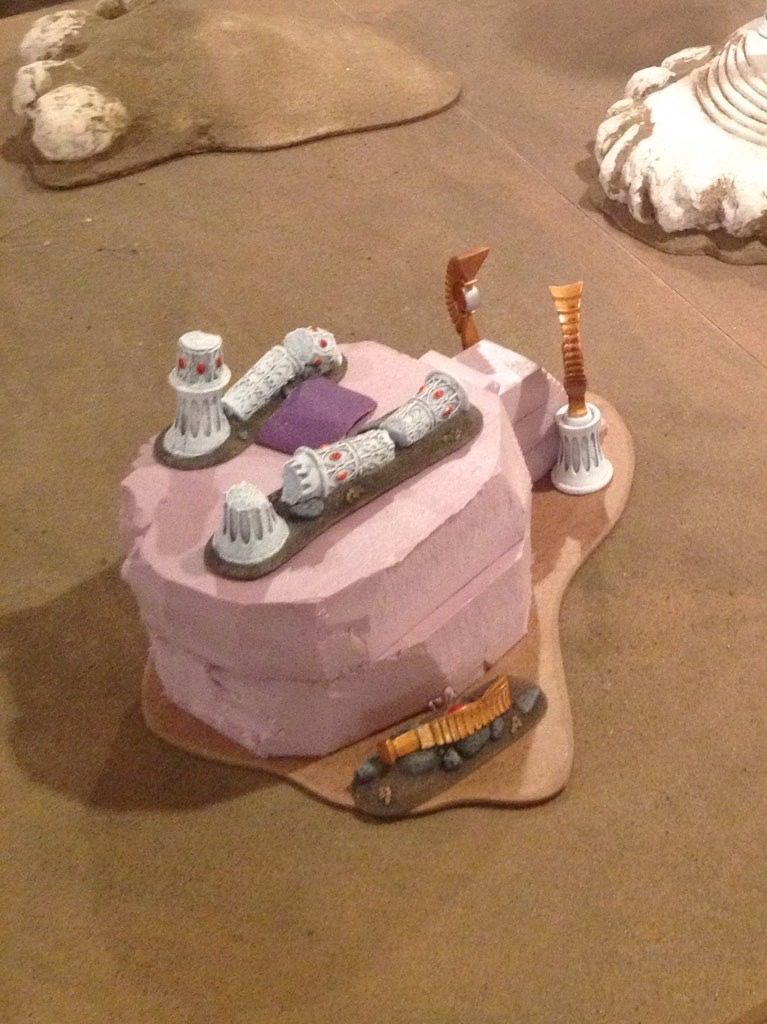
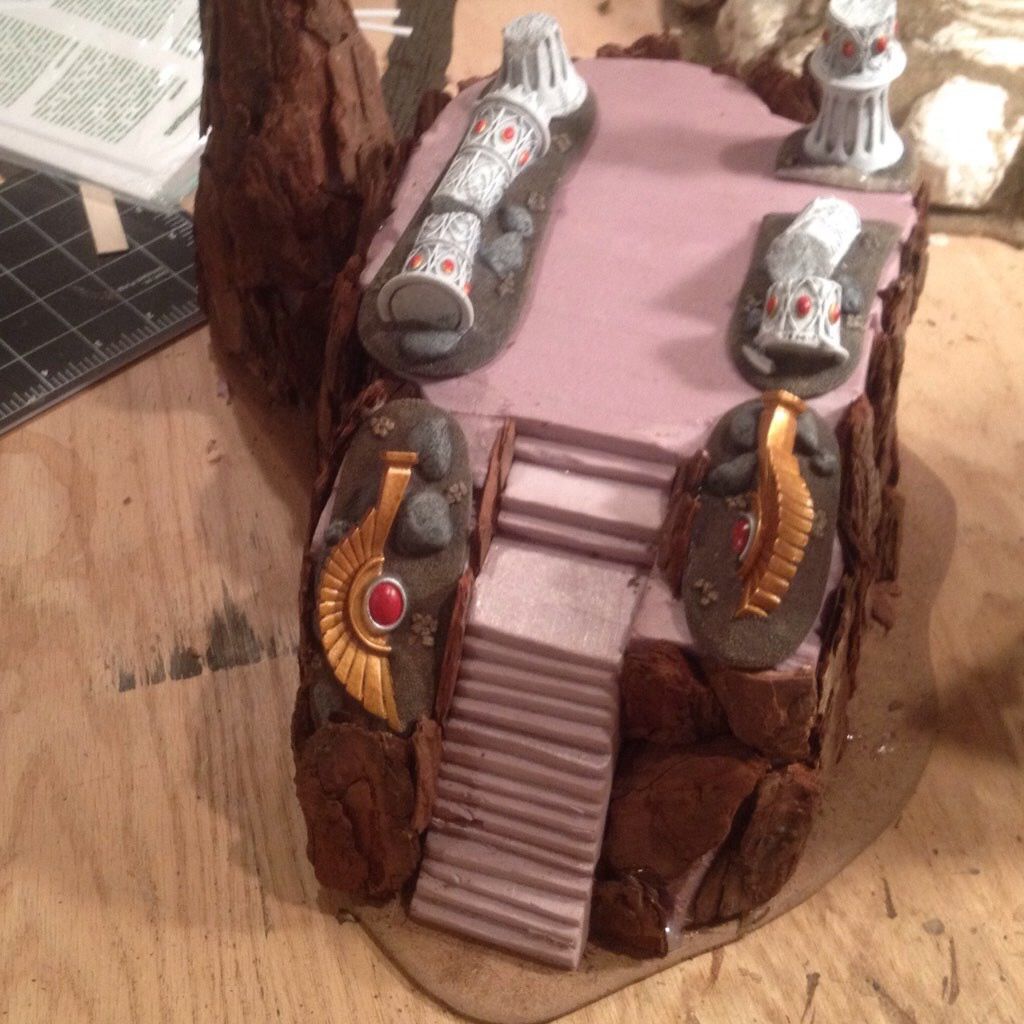
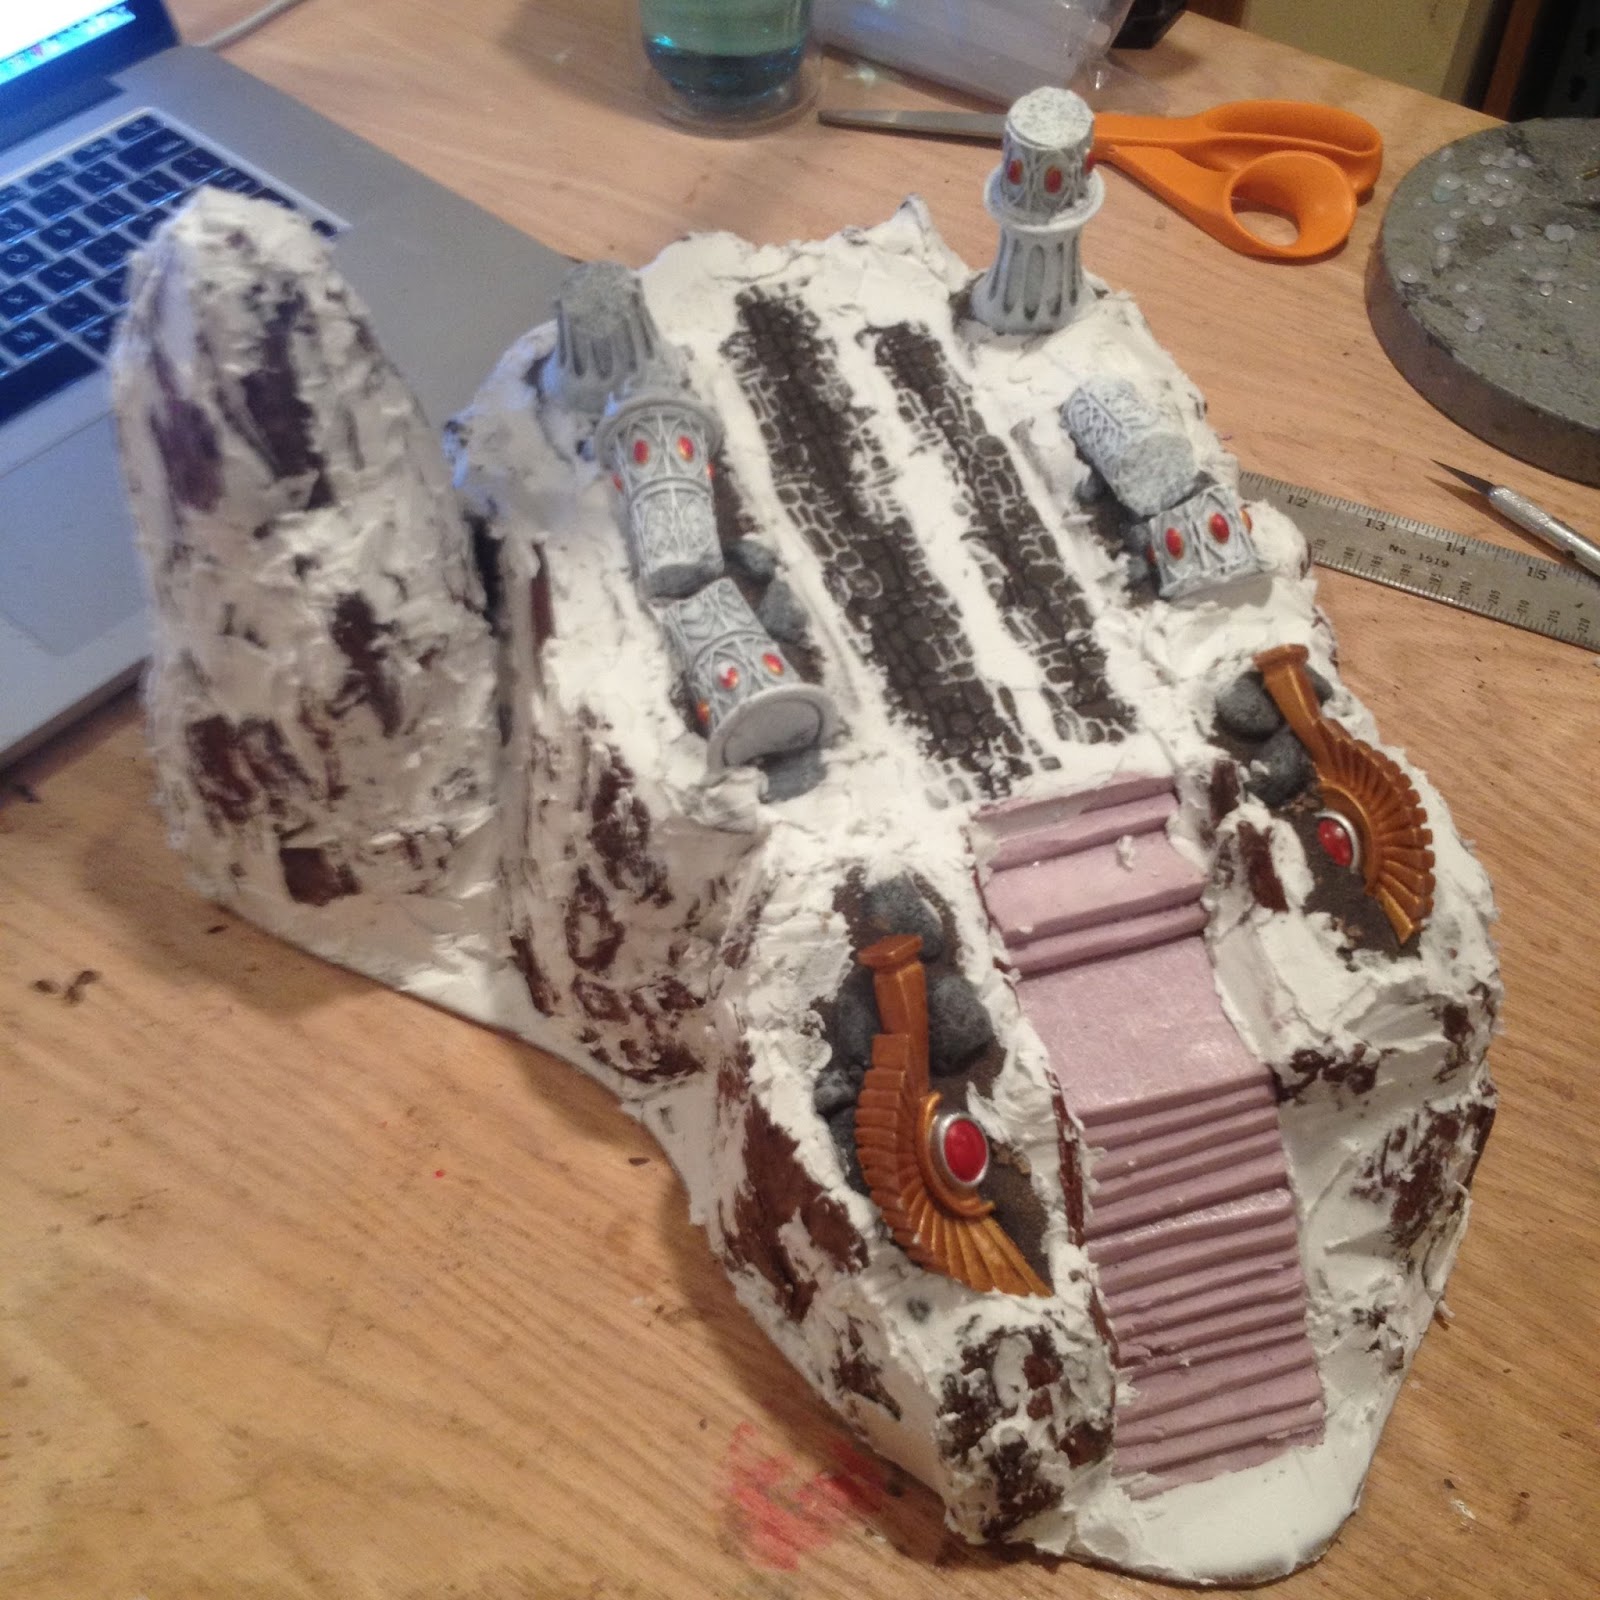
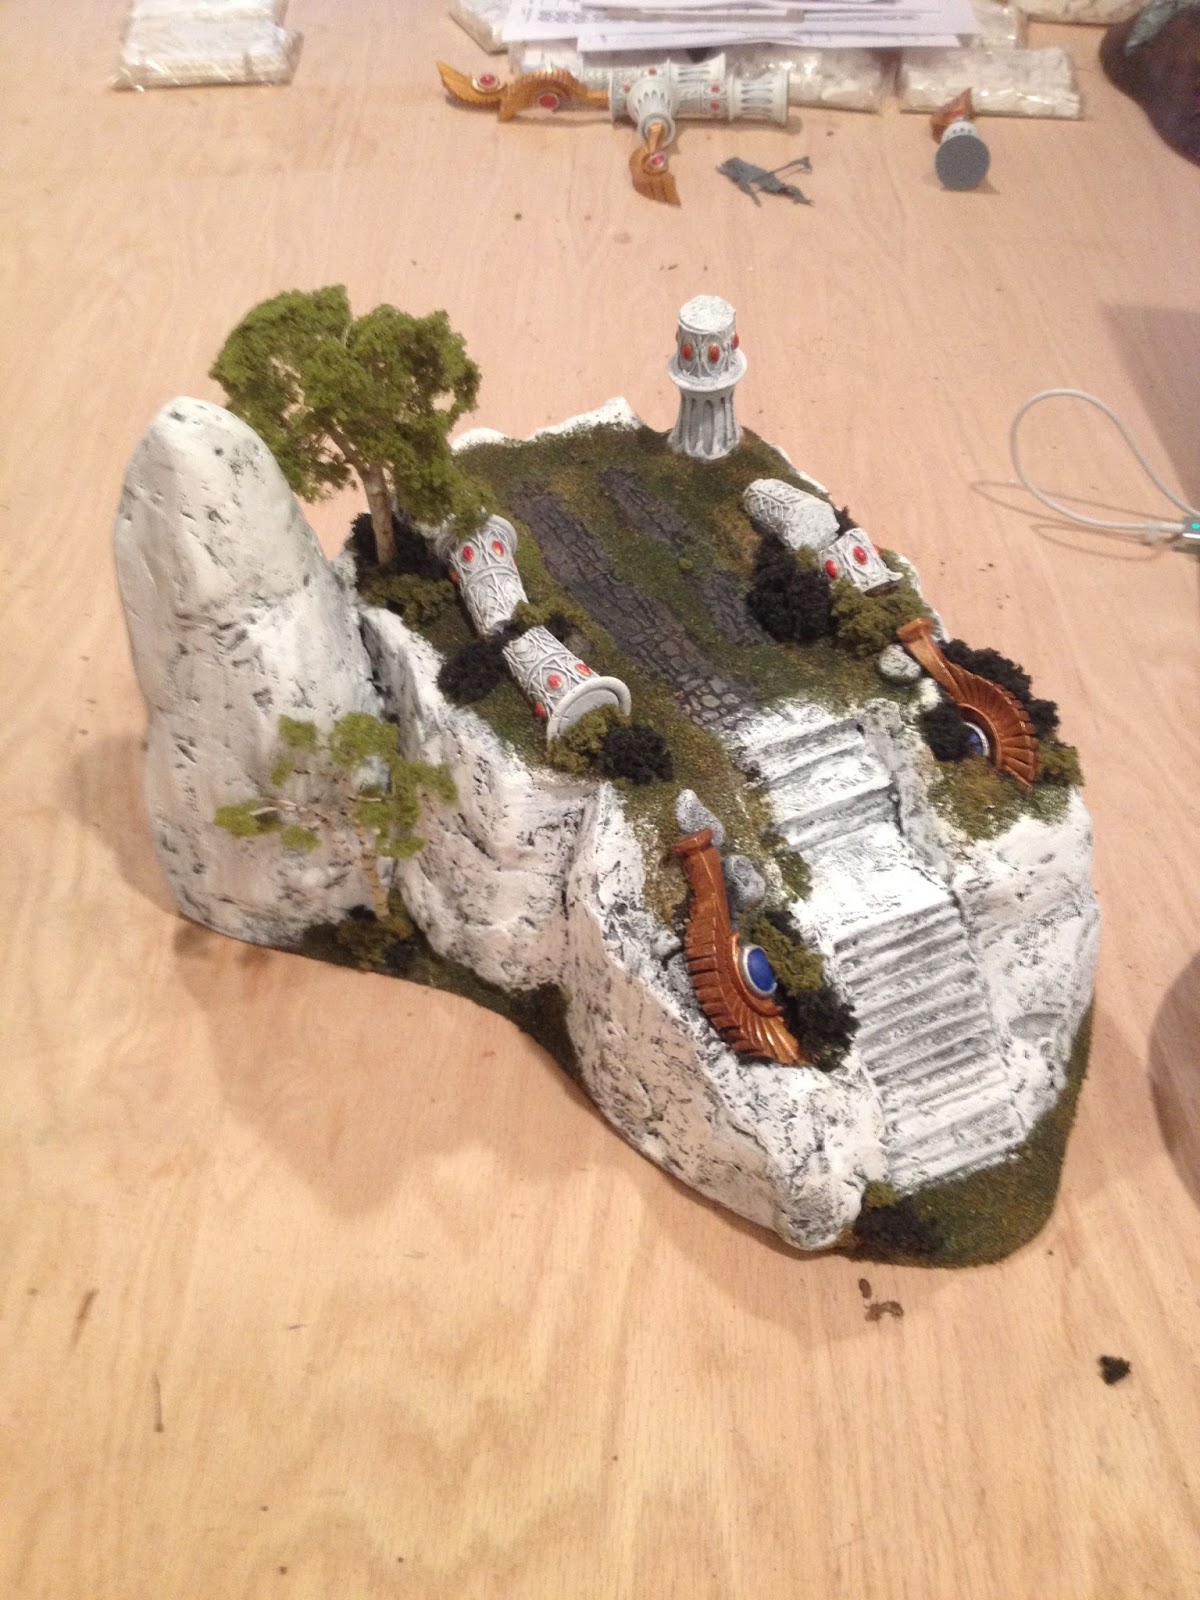
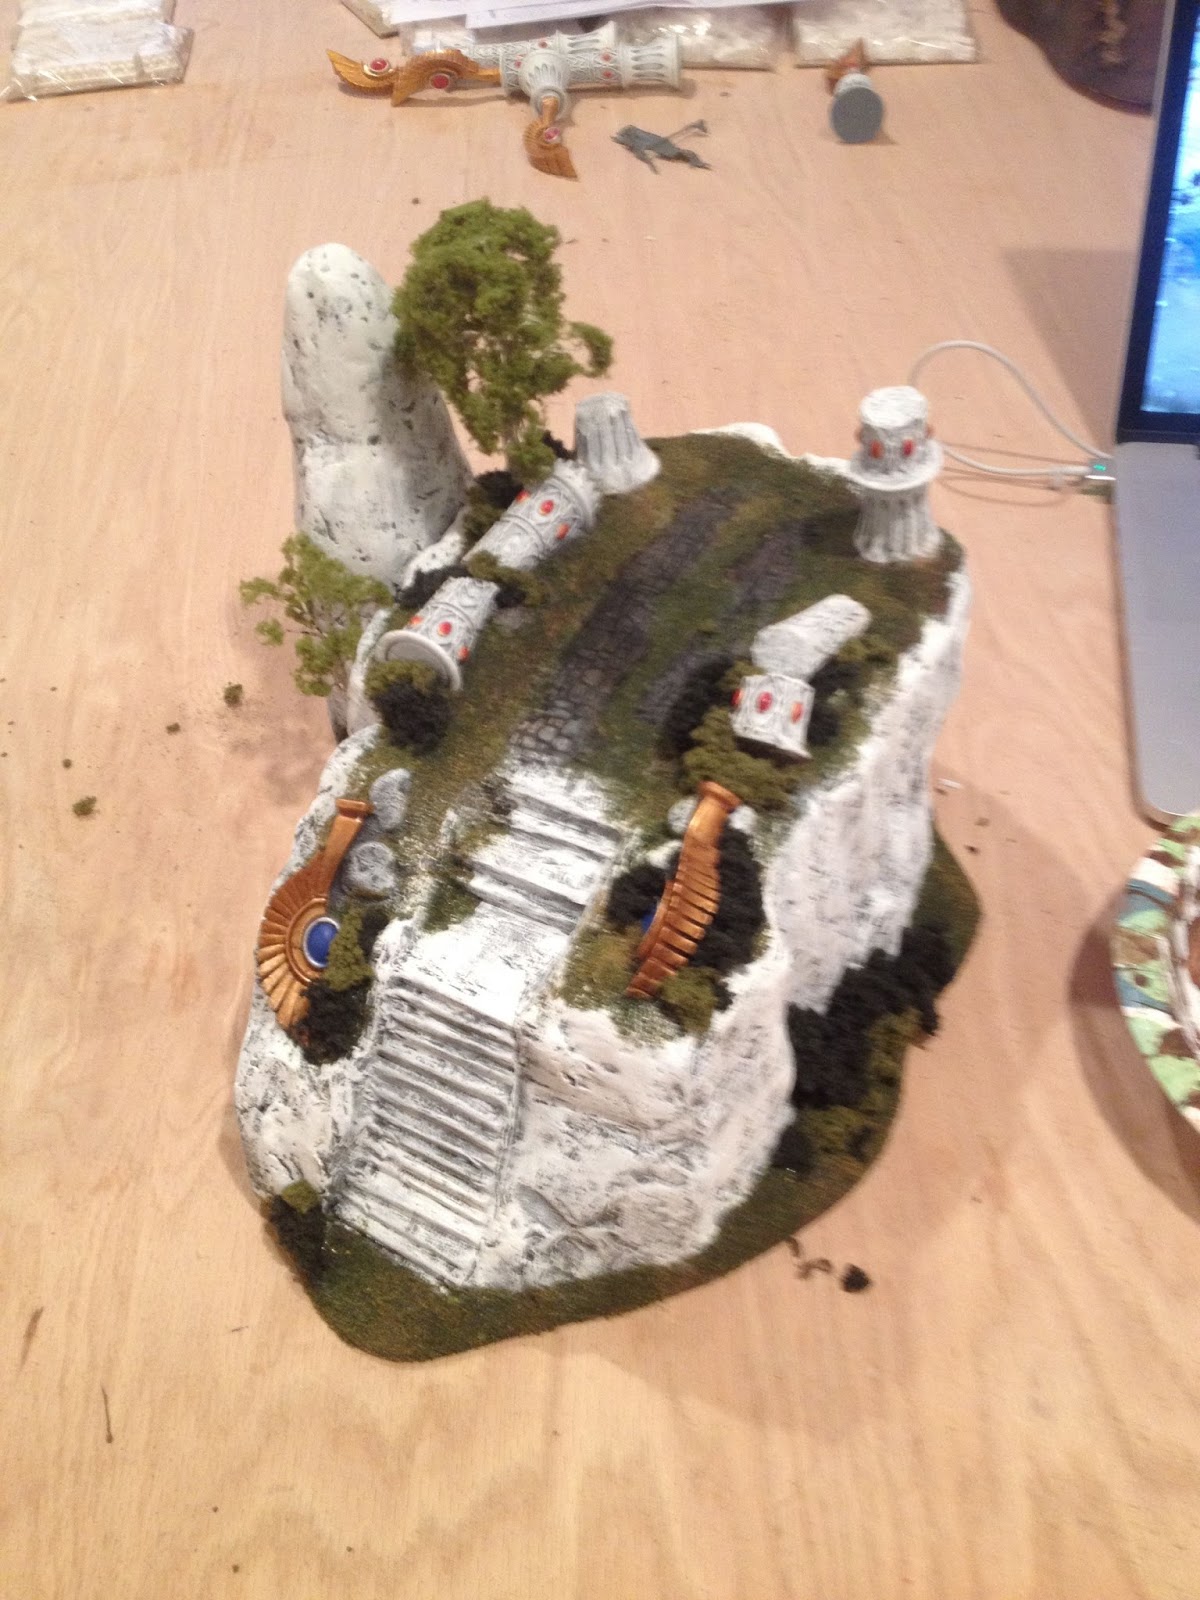
The Cliffs of Ulthuan and The Anvil Vaul
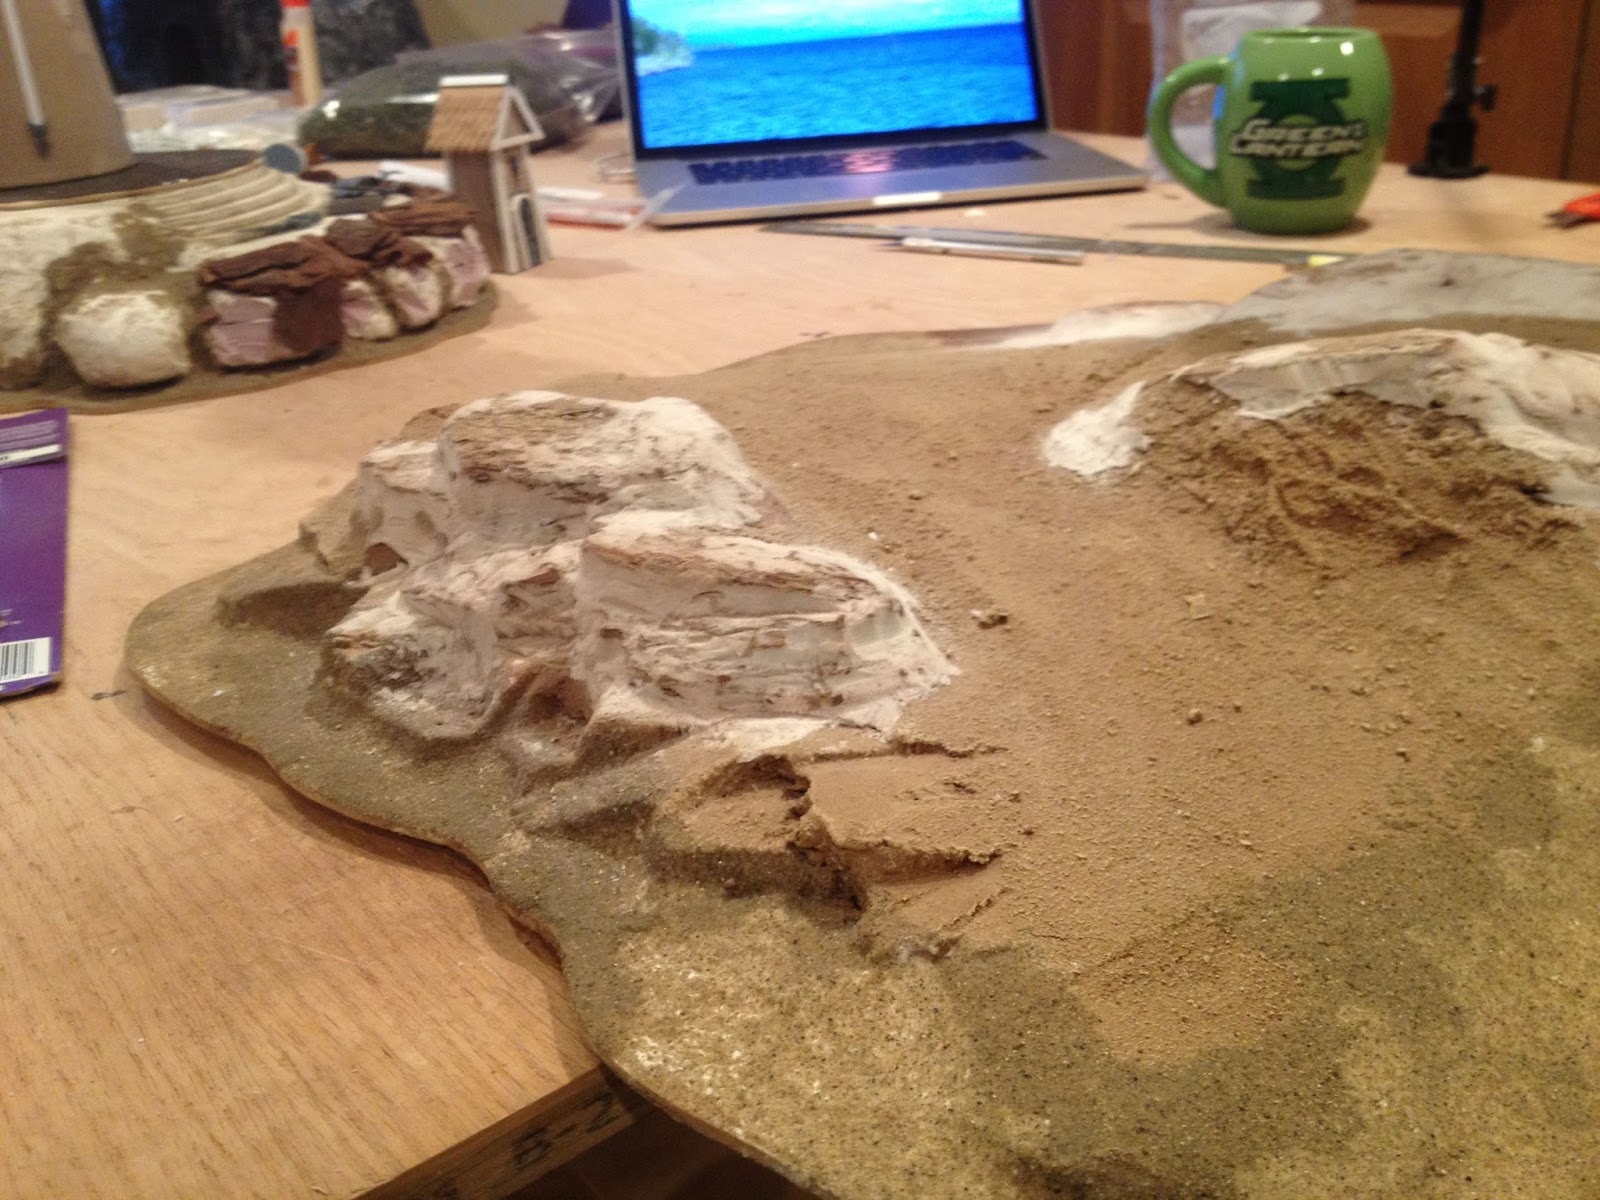
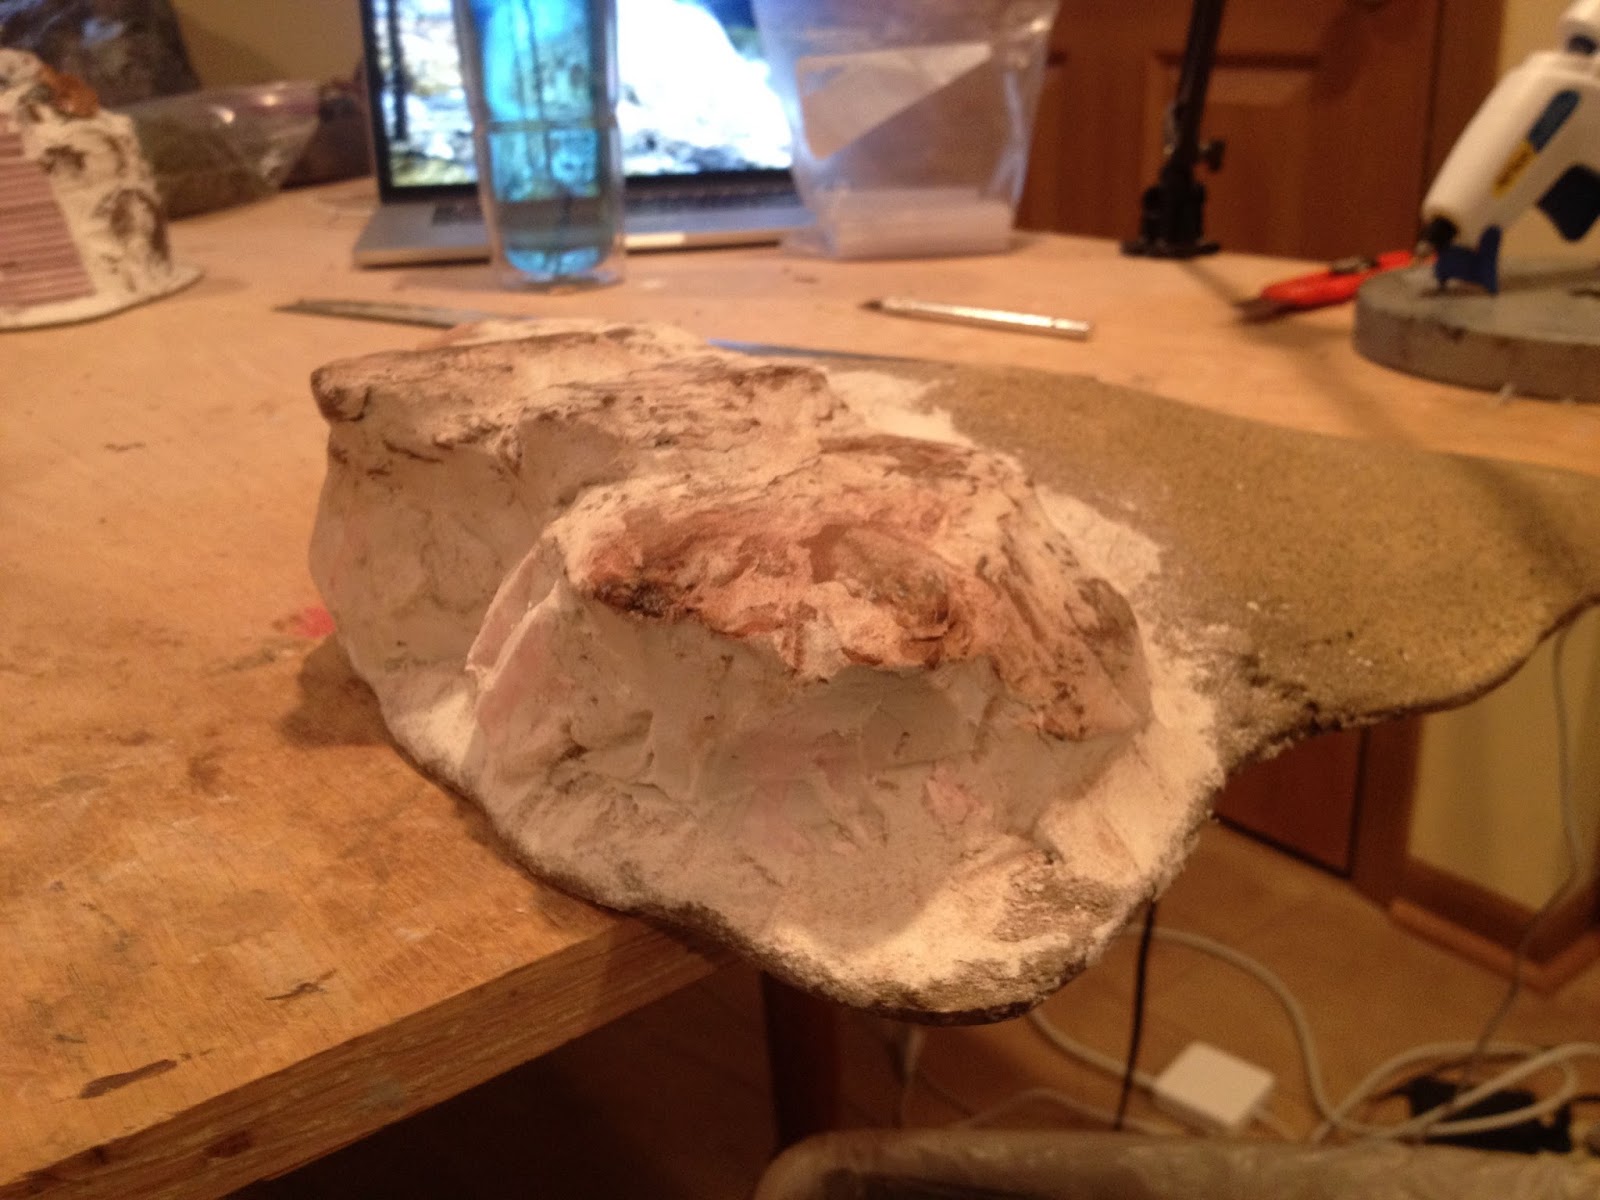
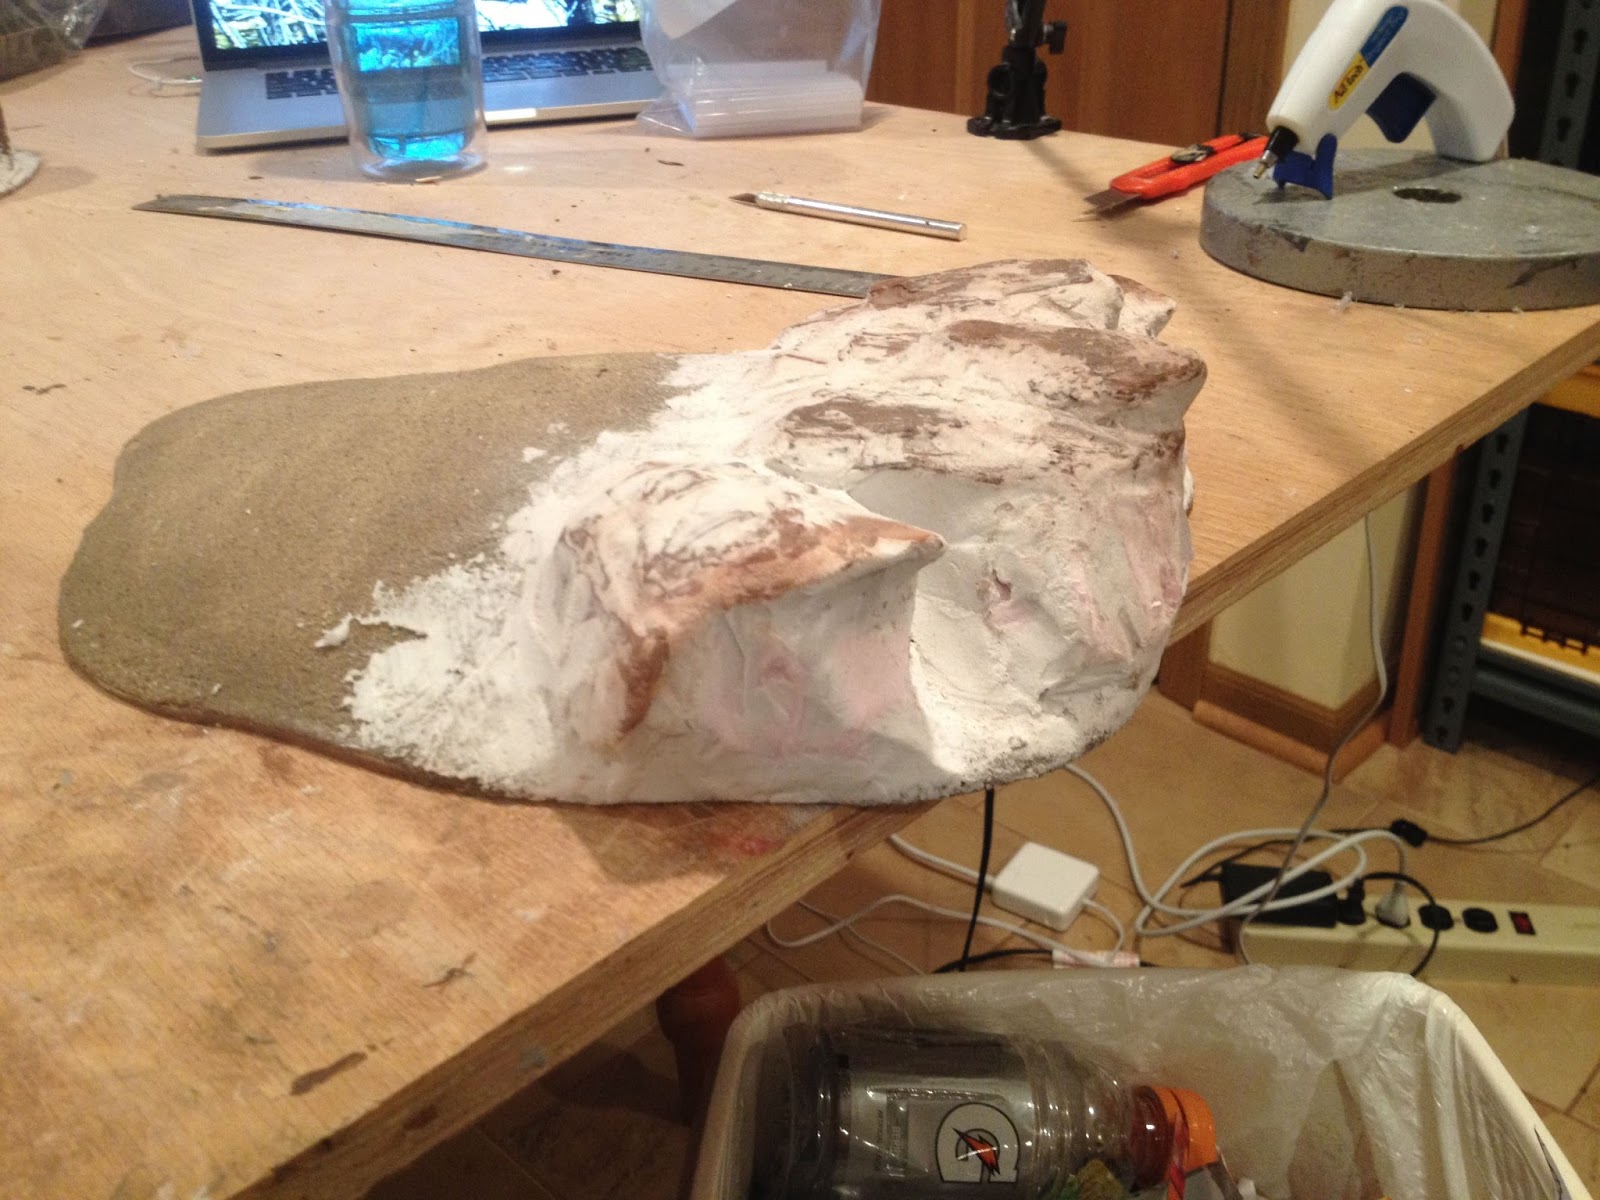
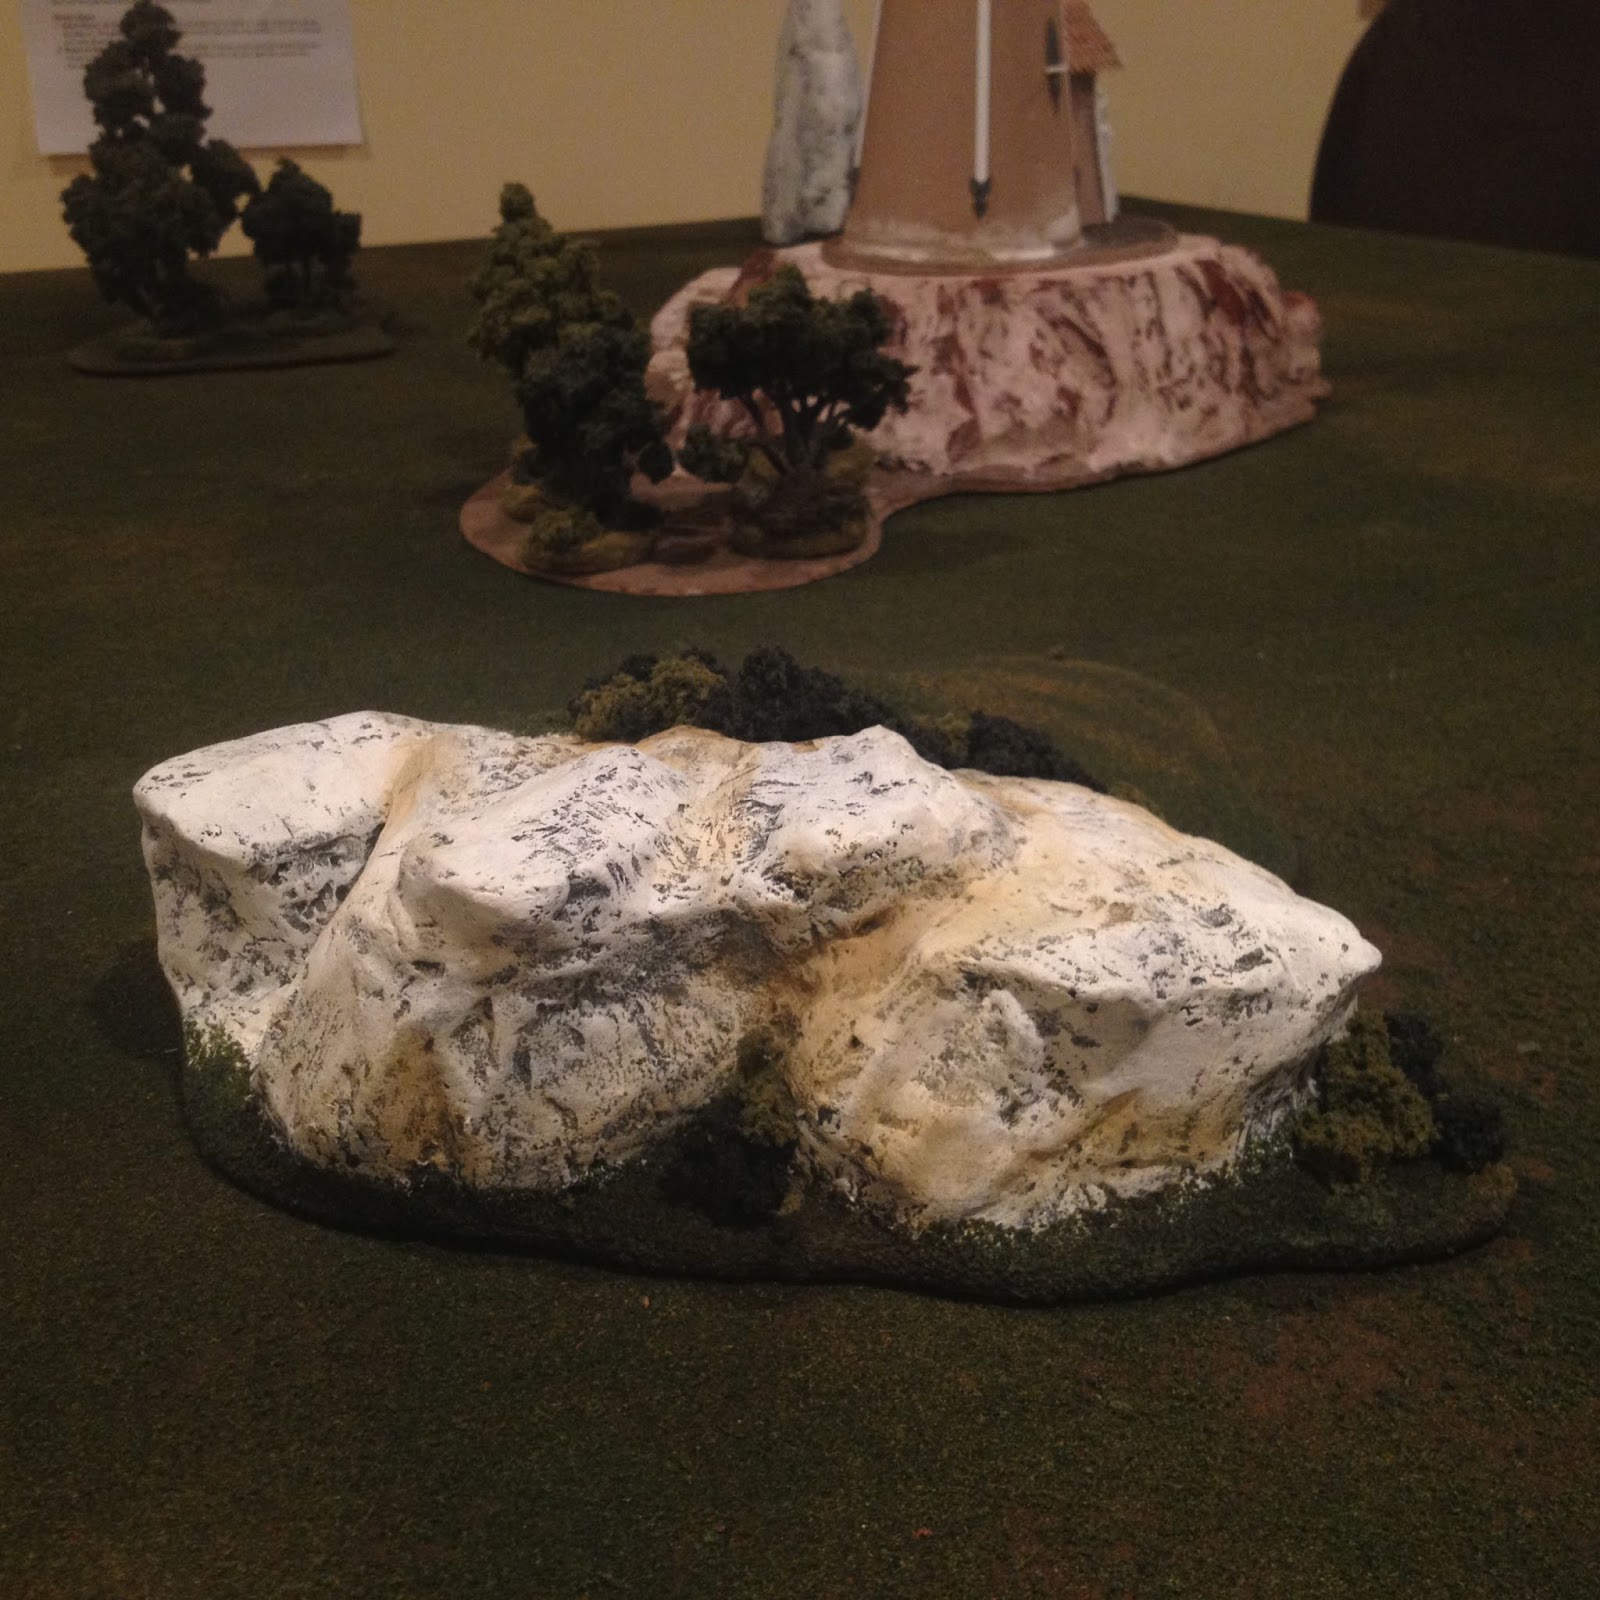
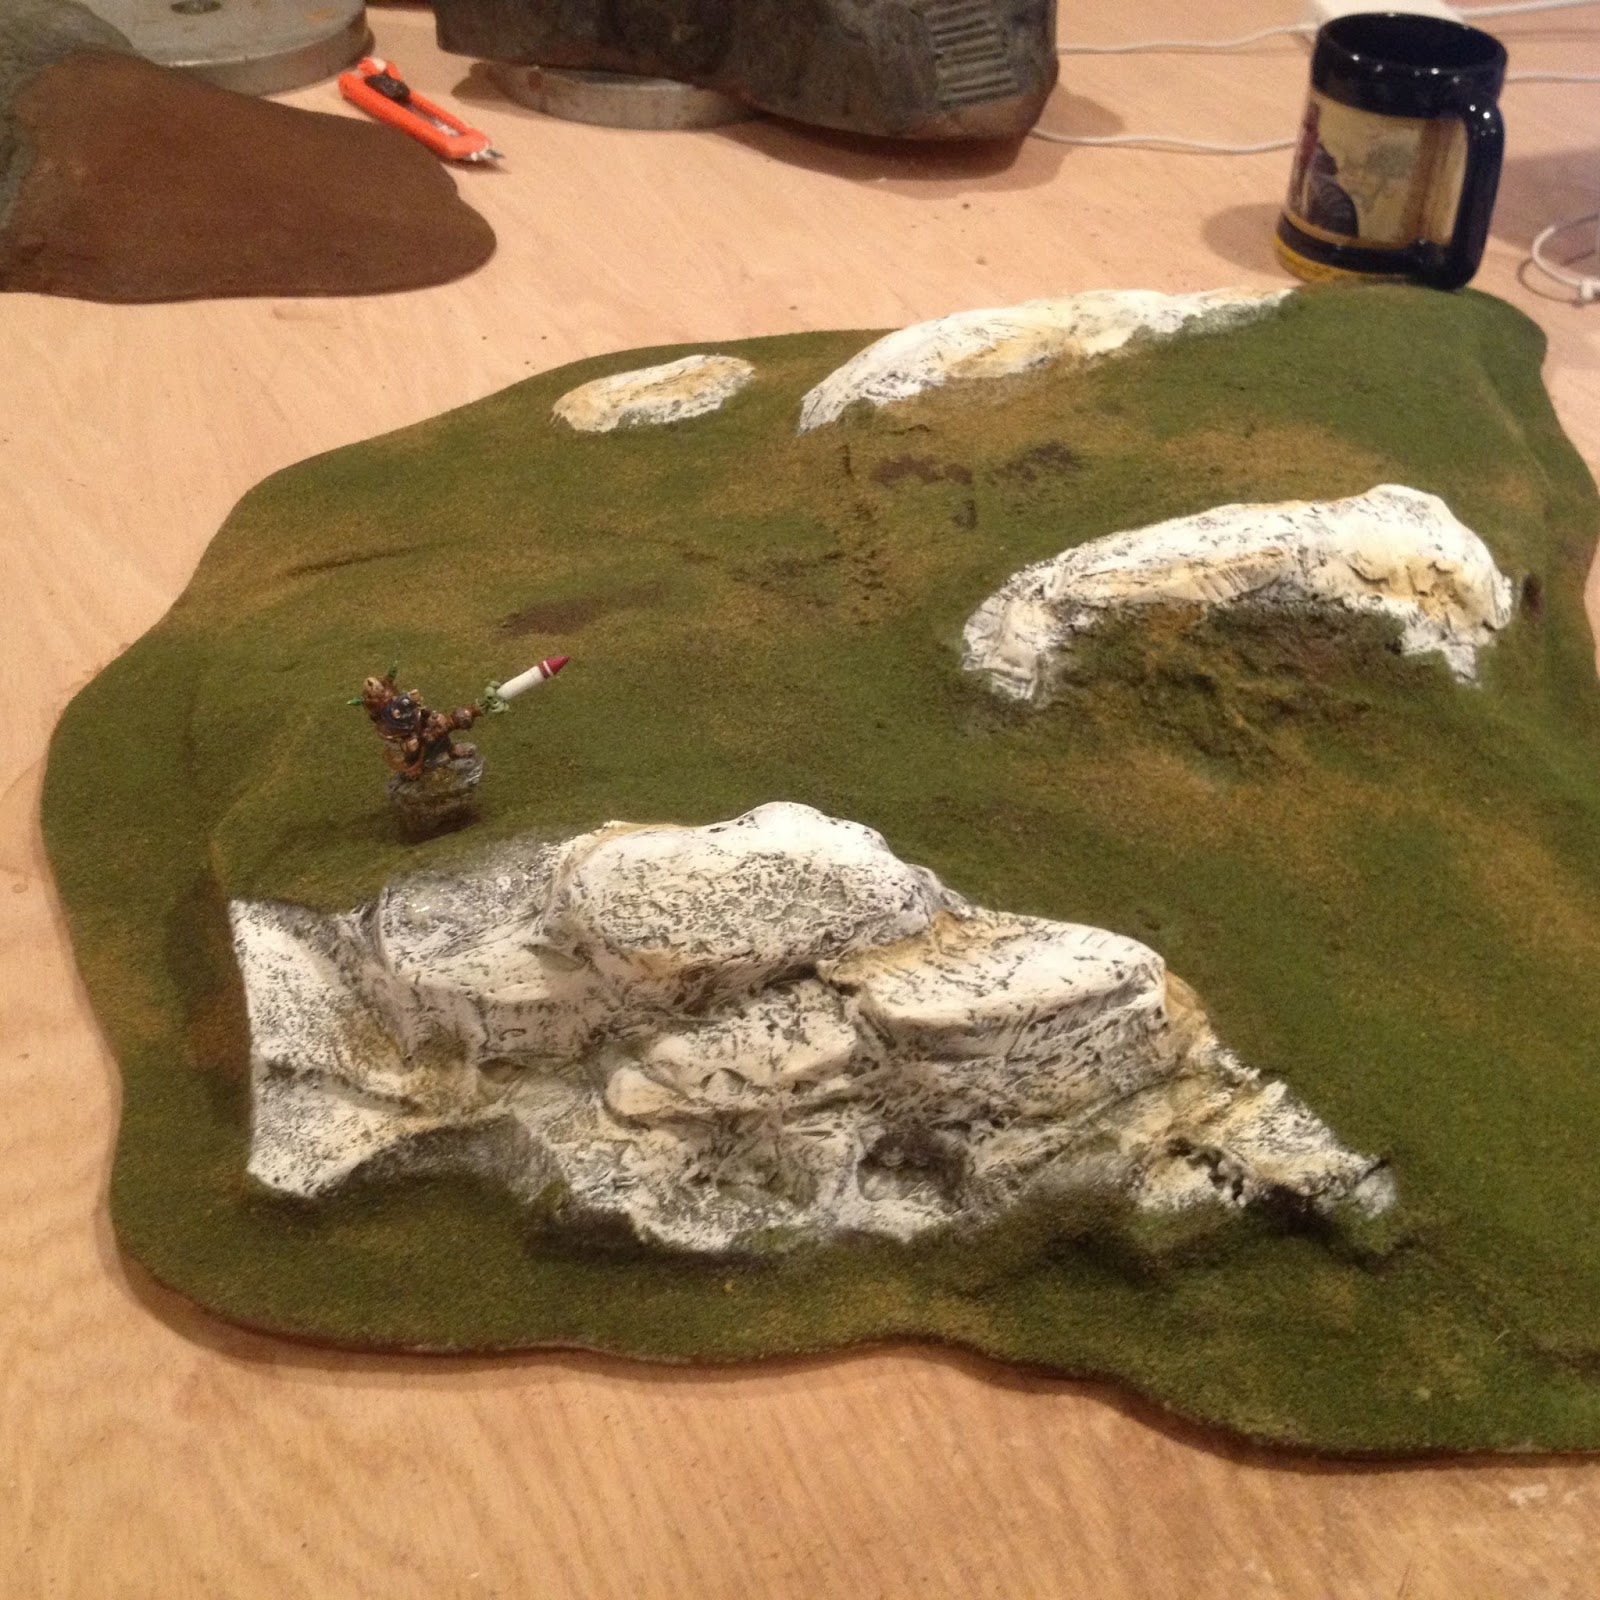
For the cliffs I used both foam and pine bark nuggets to build out the hills and rock crags.
Spackle was used to fill in the gaps once it was dry these were sanded and shaped. These were painted and flocked using the recipe listed under the Boards section of this post.
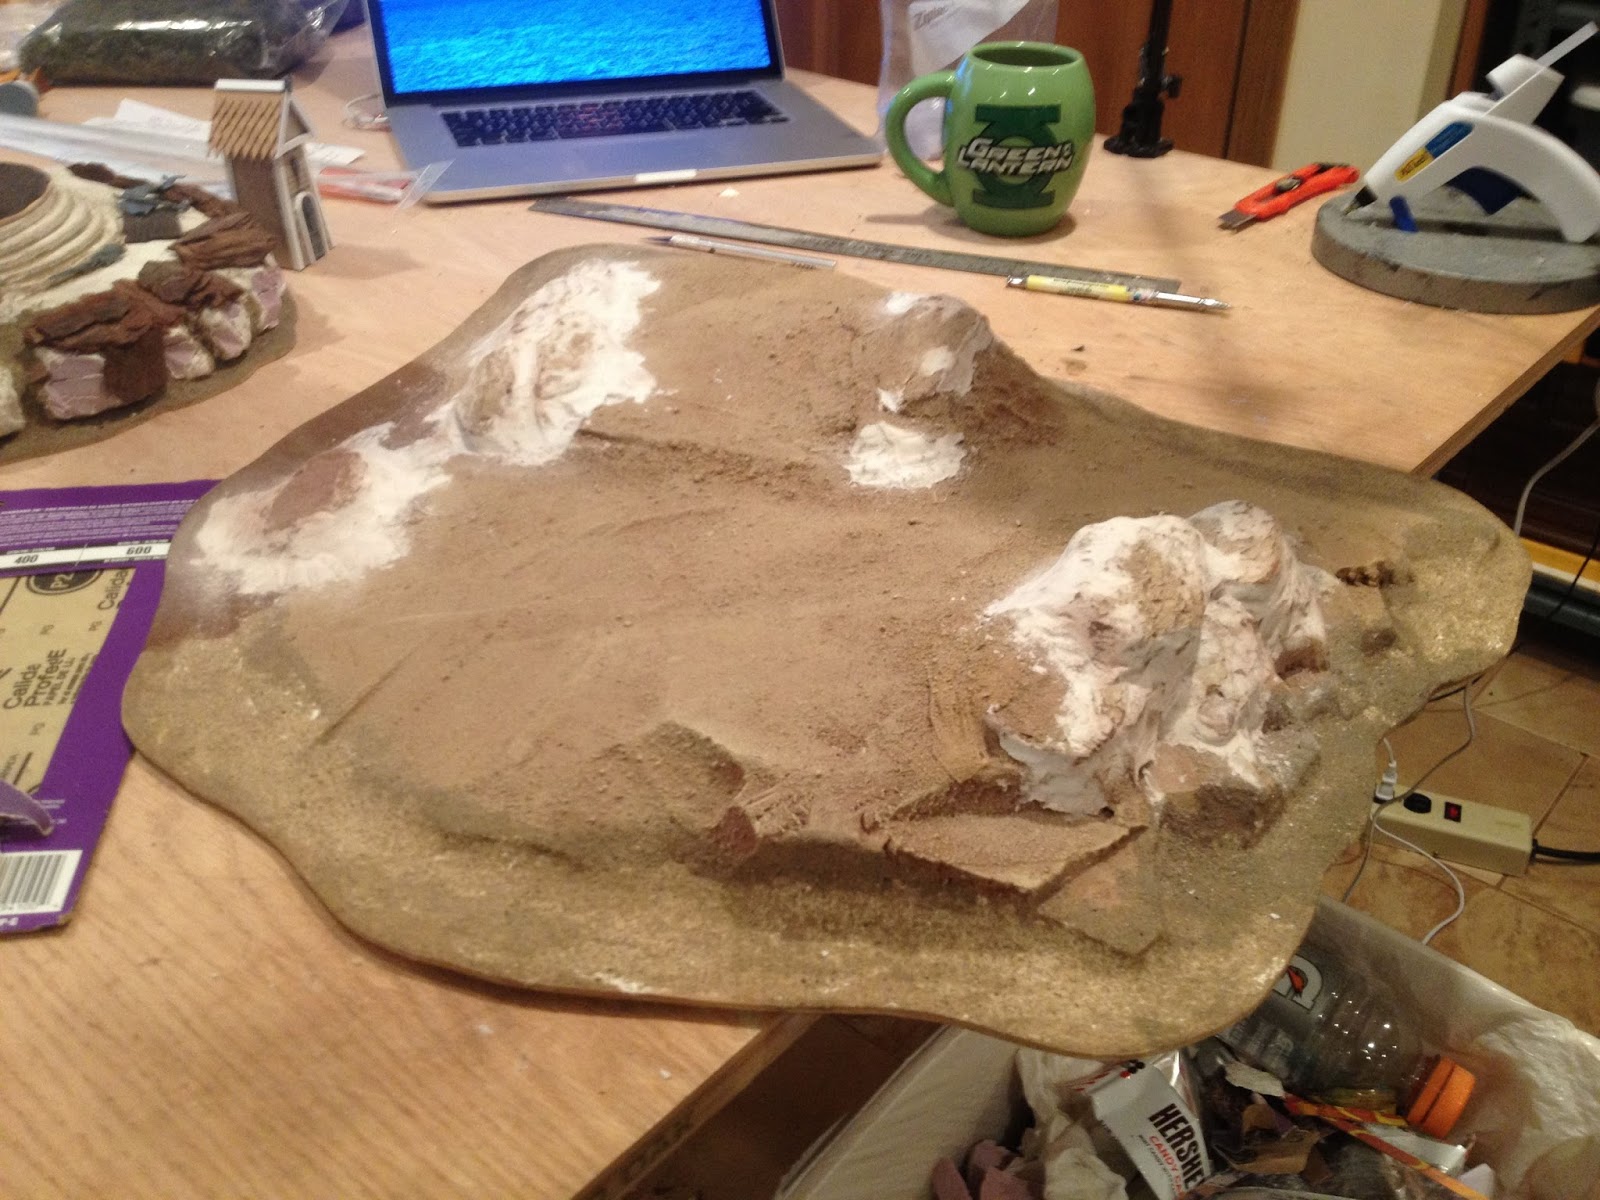
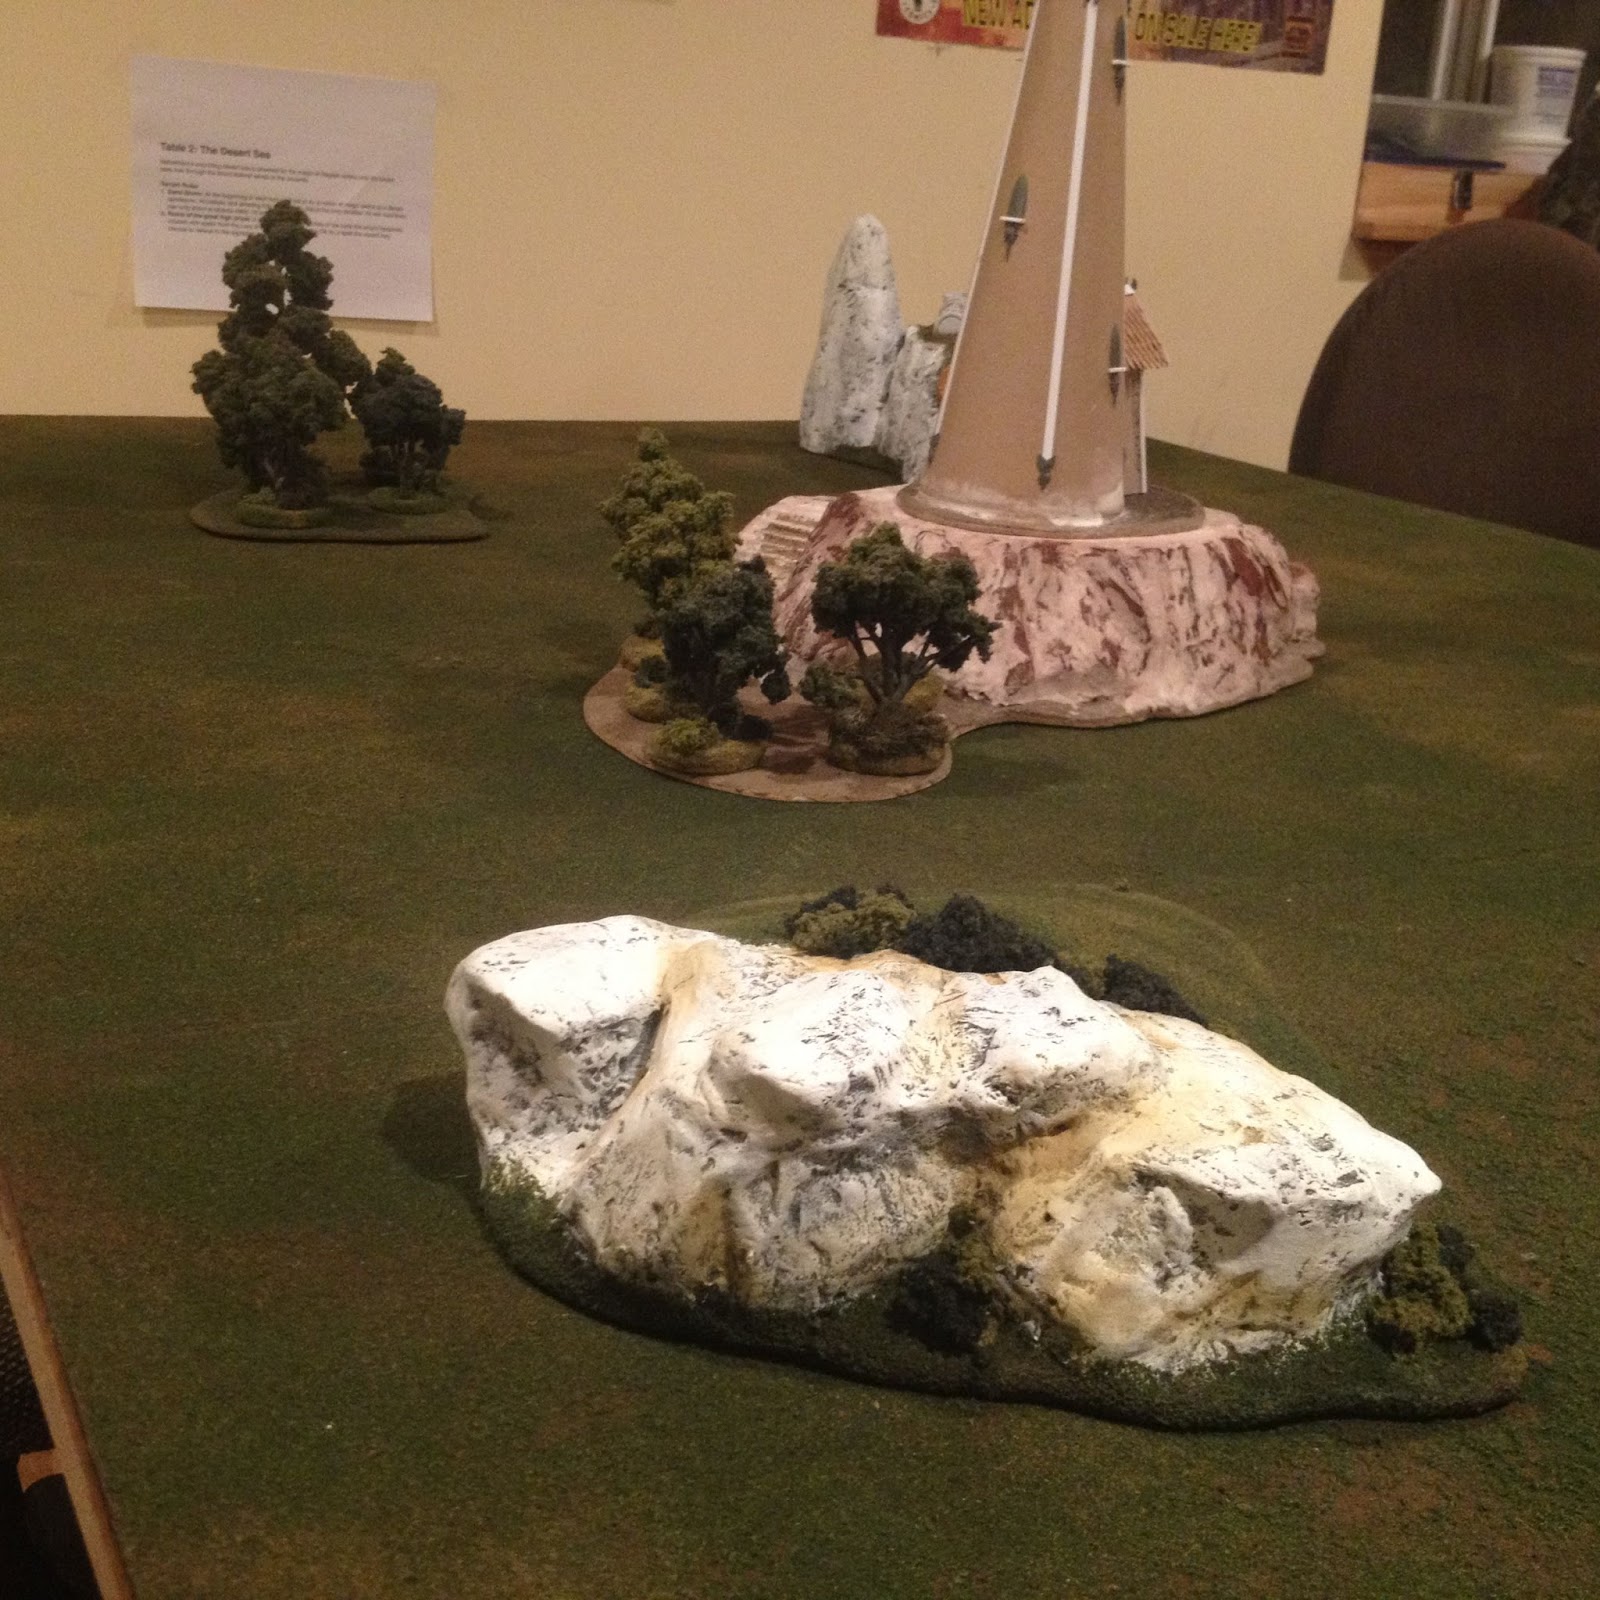
For the Anvil Vaul the same process was used in addition to using the GF9 elf ruins. I typically try a couple of layouts before gluing everything into place. Eventually I realized I wanted to have a tall spire of stone rising from the ground so I moved the ruins off the side.
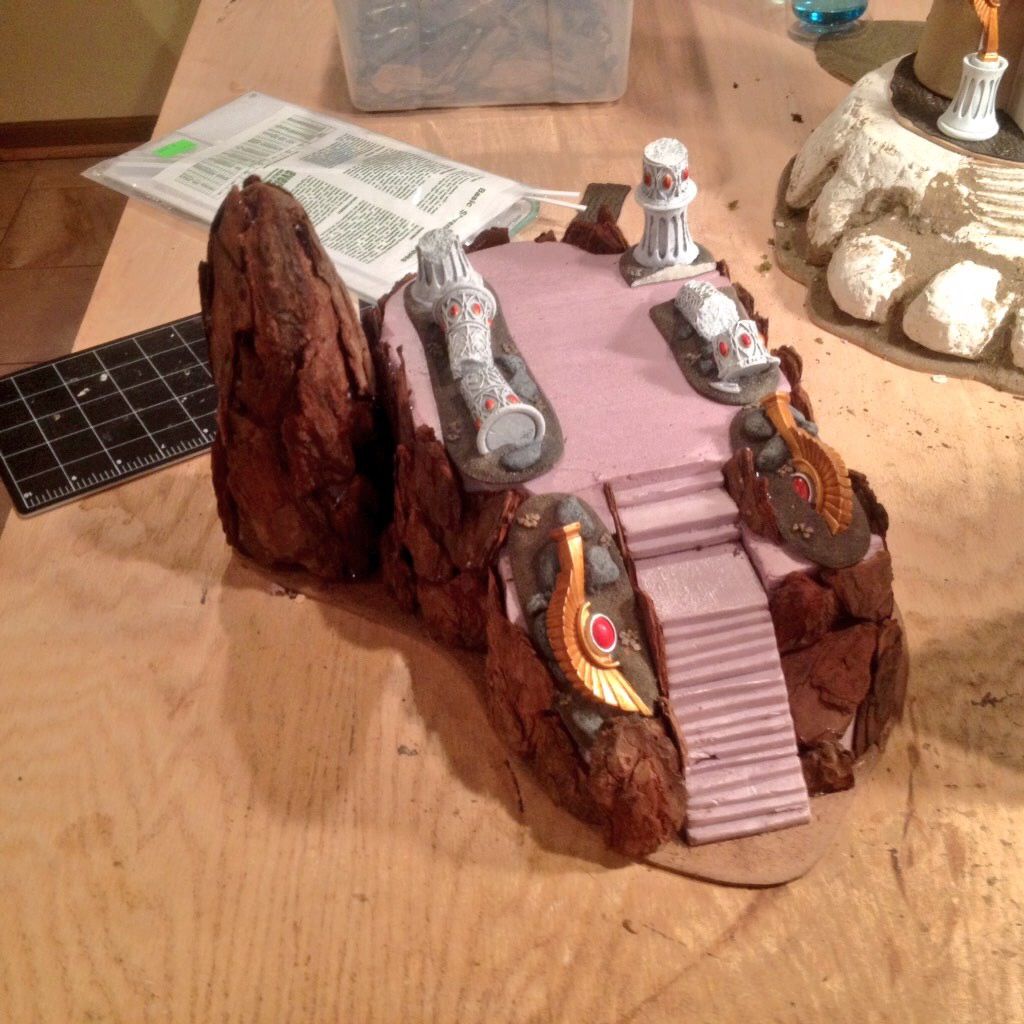
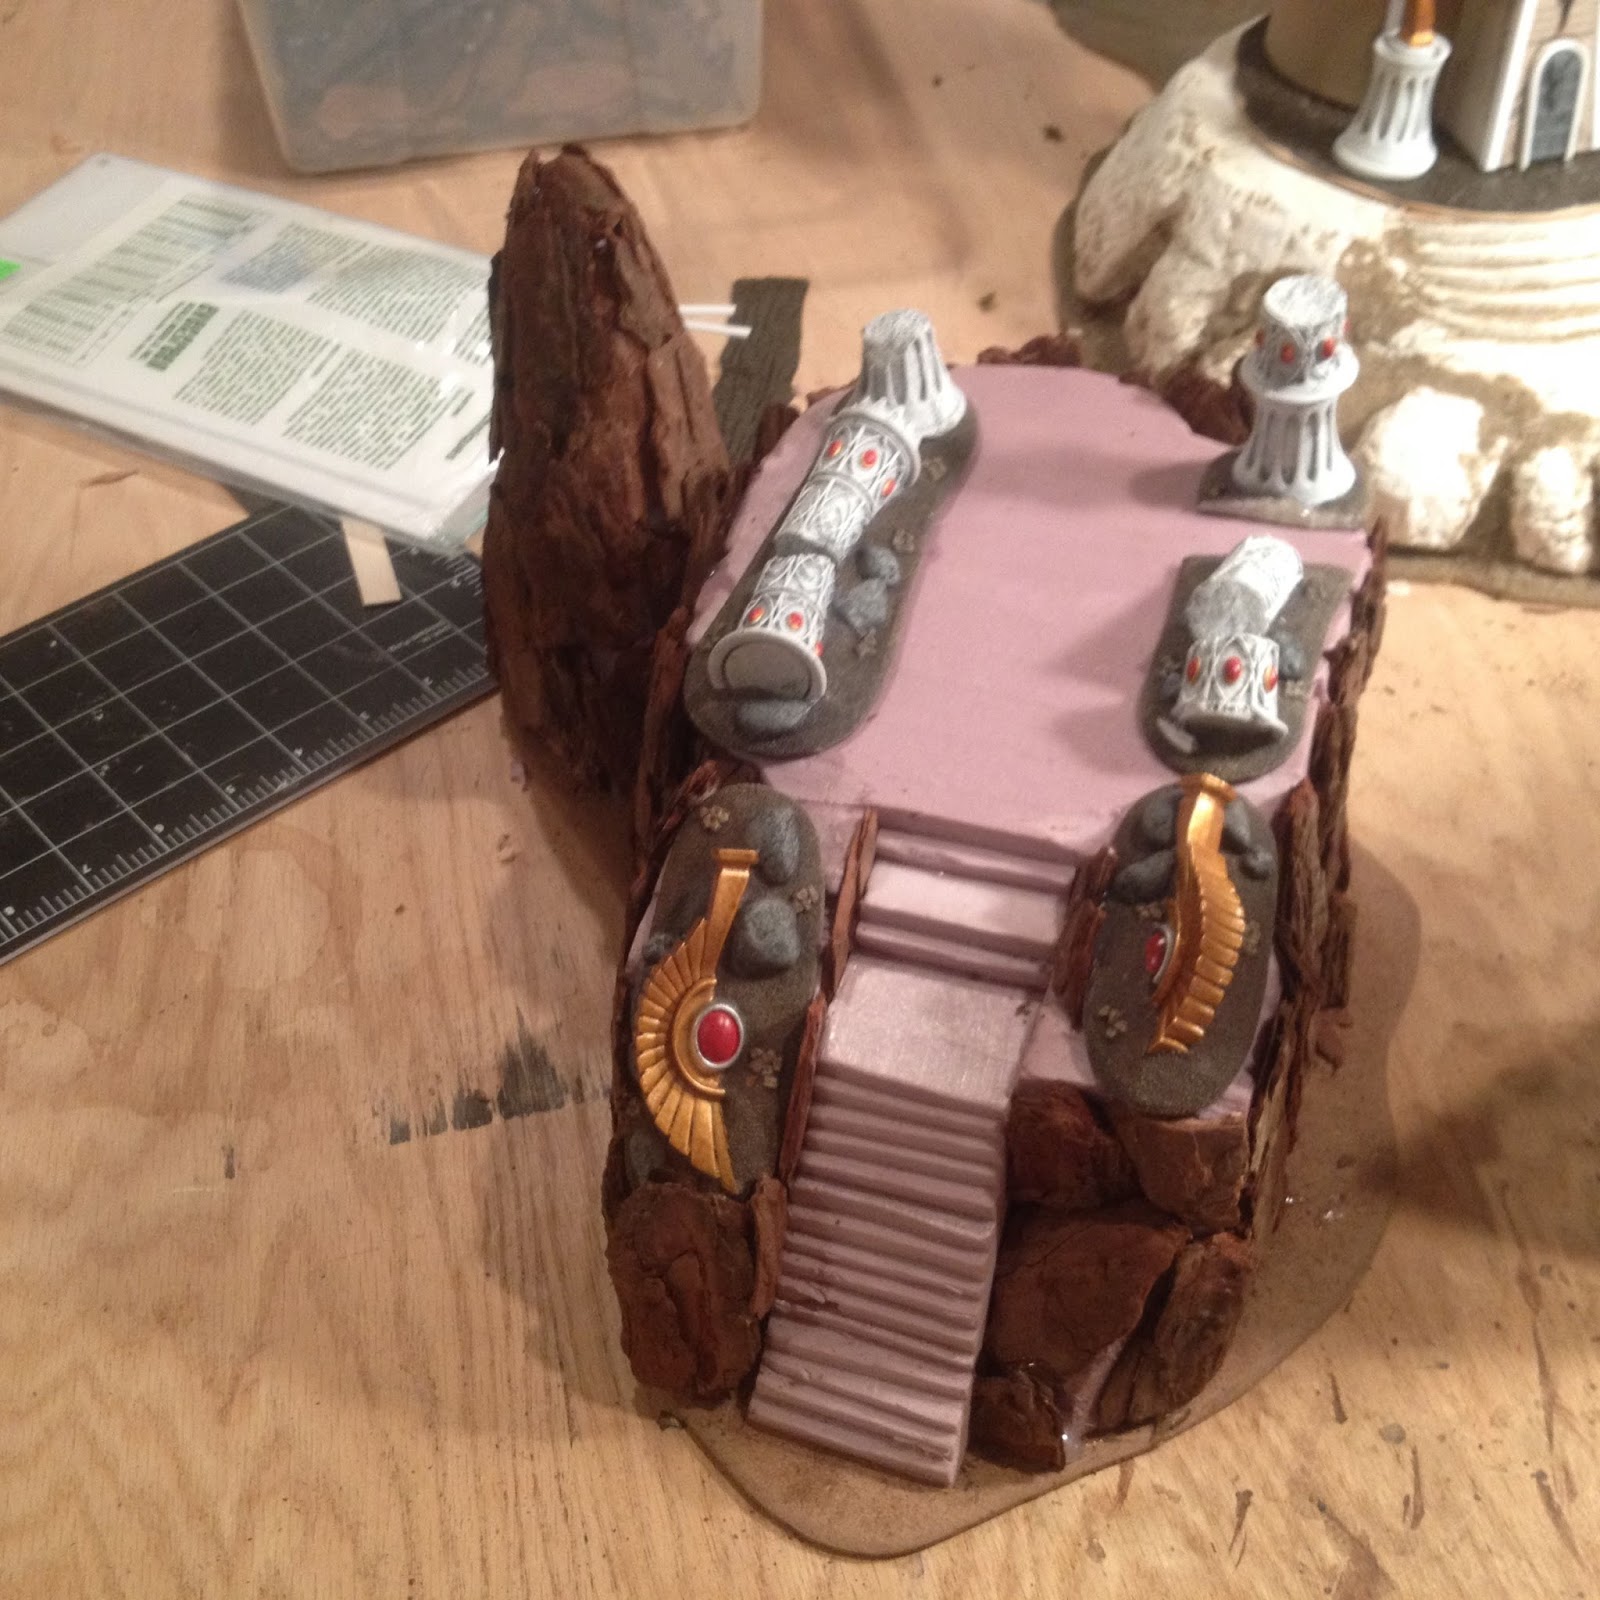
After getting all the pine bark nuggets in place the process of spackling begins. It’s the messy part of the process. It’s a good idea not to get to worried about this part ultimately it doesn’t really matter what it looks like in the end once it’s sanded it will look 100% better.
When the sanding process is complete I brush on 2-3 coats of PVA the pine bark and spackle really absorb the glue so be sure to use enough till you get a smooth to the touch surface.
The Board
First, all the boards for the Holy Wars GT are built on 1/2 inch 2×4 MDF sheets with dowel pins inset on each. This step keeps the boards from sliding during game play.
The pinning is done before sanding. Three 1/4 inch dowel rod pins are glued in place, one on center and 2 inches from each side.
After the pins are set the table is sanded using PVA and play sand. After the glue is set the entire board is sealed with watered down PVA this is mixed to a consistency of cream. The watered down PVA makes sure the sand is locked in and I have found it provides a better surface for painting.
Once I have painted the board with the base coat of paint I ALWAYS use a wash of watered down black I do this on all my boards I have found this gives the board a quality of realism and I have always strived for as playable realistic terrain as possible. When have you ever seen soil that was all one shade of color? After the wash was applied I hit the board with a light dry brush for addition depth.
After the paint has dried it’s time to flock. I randomly paint on PVA be sure to break up any long swishy edges I do this a 1/4 of the the table at a time. For this board I applied Woodland Scenics Turf: Green Blend over the PVA first making sure to allow some PVA showing through then I immediately applied Woodland Scenics Fine Turf: Earth Blend. Then I applied yet another application of Green blend to push the Earth Blend back. This gives the flock a deep rich appearance.
Once the flock has absorbed the glue and it’s dry to the touch I then seal it in with watered down PVA the consistency of milk. I know that sounds crazy but I have been building tables for a LONG time and this does work well. The flock will not move and will be durable during the rigors of game play and this step is the most important step for successfully applying the snow effect.
I have used snow flock in the past and I have had mixed results. For this board I wanted to have the feeling that snow was just beginning to gather and was blowing across the battlefield. So I attempted something very risky that if it failed I would have a big problem. I painted all the snow using dry brushing and over brushing.
Here is the recipe and the steps.
Board
- Craft Smart: Brown (base coat)
- Craft Smart: Black (heavy wash)
- Craft Smart: Tan (light dry brush)
Flock
- Woodland Scenics Blended Turf: Green Blend
- Woodland Scenics Blended Turf: Earth Blend
Rock Crags
- Apple Barrel: Pewter Grey (base coat)
- Craft Smart: Black (heavy wash)
- Craft Smart: White (over brush)
- Woodland Scenics Blended Turf: Green Blend
- Woodland Scenics Blended Turf: Earth Blend
- Woodland Scenics Clump Foliage: Conifer Green
- Woodland Scenics Clump Foliage: Olive Green
Let me know if you found this post helpful.
Thanks.