Here we go.
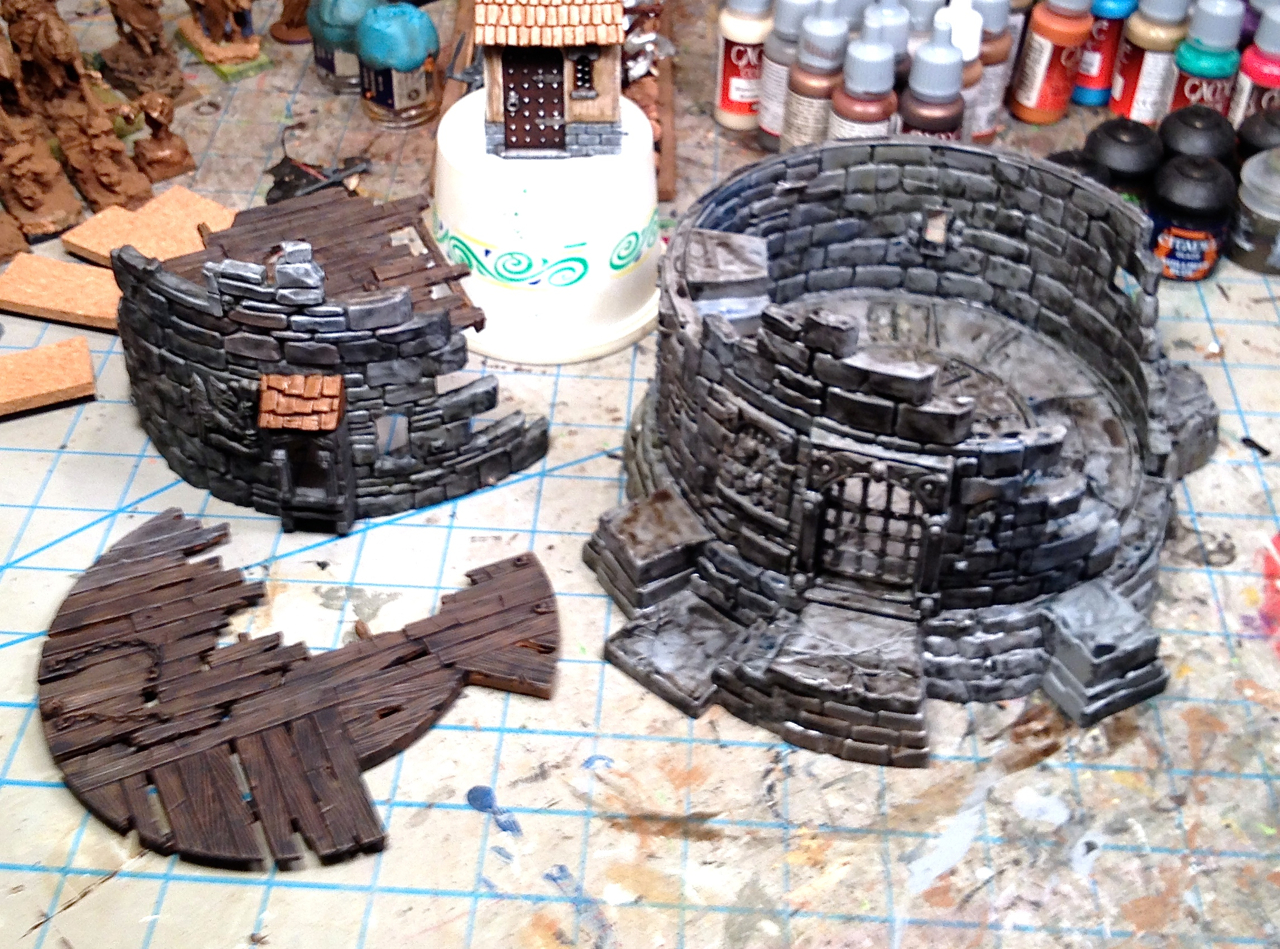
First step is pretty straight forward. After priming I base coat the entire model using Game Color paints from the Vallejo. Let me give you a quick note about paint. I’m not a paint snob I use all ranges each range has pros and cons just like everything in life. You need to experiment and find what works best for you and your techniques.
For this project I used the following colors for the base tones.
- Stone structure: Vallejo, Cold Grey 72050
- Wood: Vallejo, Beasty Brown 72043
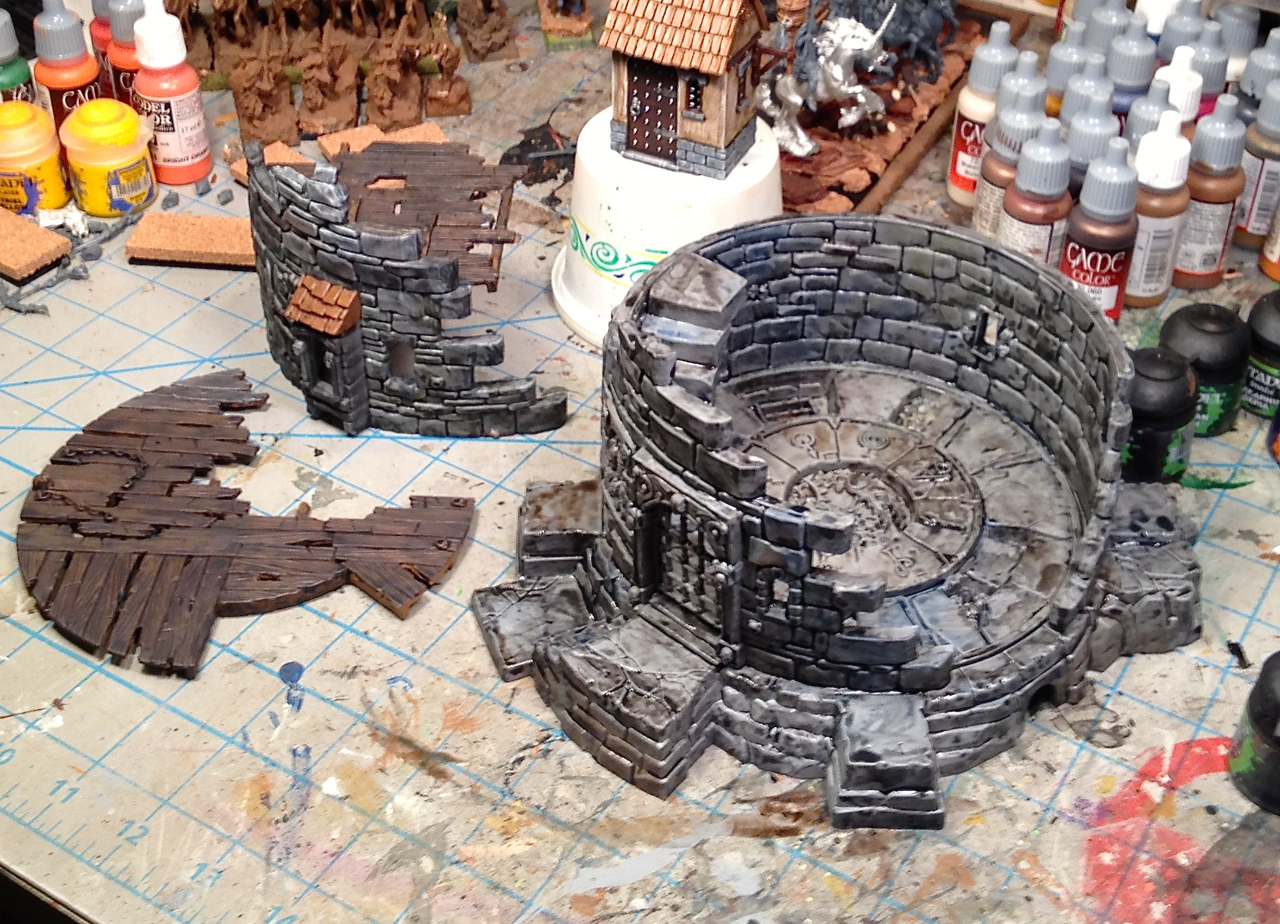
Once dry I move onto the washing. Most of my armies and terrain are painted as close to realism as possible. It’s just my style I’m not into “cartoony” crazy highlighting and outlining. To achieve the realism effect it starts with what I call the “sloppy wash” (insert bad joke here).
The following are the “Sloppy Wash” colors.
- Citadel Shade: Drakenhof Nightshade
- Citadel Shade: Agrax Earthshade
- Citadel Shade: Arthonian Camoshade
- Citadel Shade: Nuln Oil
The washing is applied by having all the paint pots open at the the same time randomly mixing as I apply it to the model. There is no plan I just let the colors flow into each other randomly for a natural look. Essential think of it as wet blending with shades. Push the colors together and they blend creating depth in the shading.
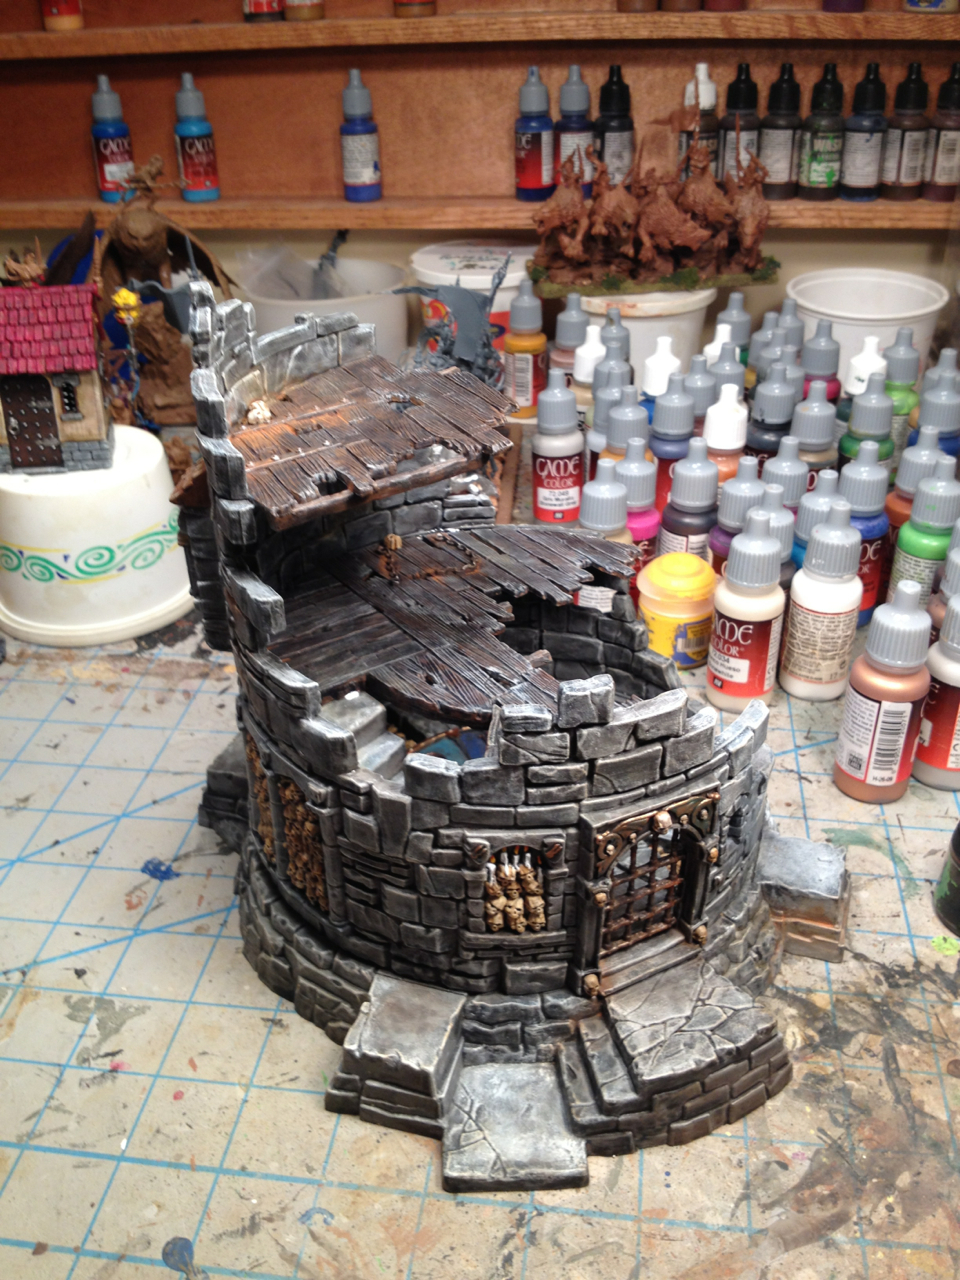
The photos below show you the end of the “Sloppy Wash”.
Notice how the colors are blending throughout the model? Can you see the random collisions of colors in the shading? This is what you want to see.
Once the model is dry I move onto dry brushing, highlights and pigments. Now I don’t use pigments in the typical way. Most people will apply pigments at the end I apply it as I’m dry brushing.
At this stage I used the following.
- Dry Brushing & Highlights: Vallejo, Dead White
- Dry Brushing & Highlights: Vallejo, Stonewall Grey
- Dry Brushing & Highlights: Bonewhite
- Pigments: Secret Weapons: Terracotta
- Pigments: Secret Weapons: Ancient Earth
- Pigments: Secret Weapons: Yellow Earth
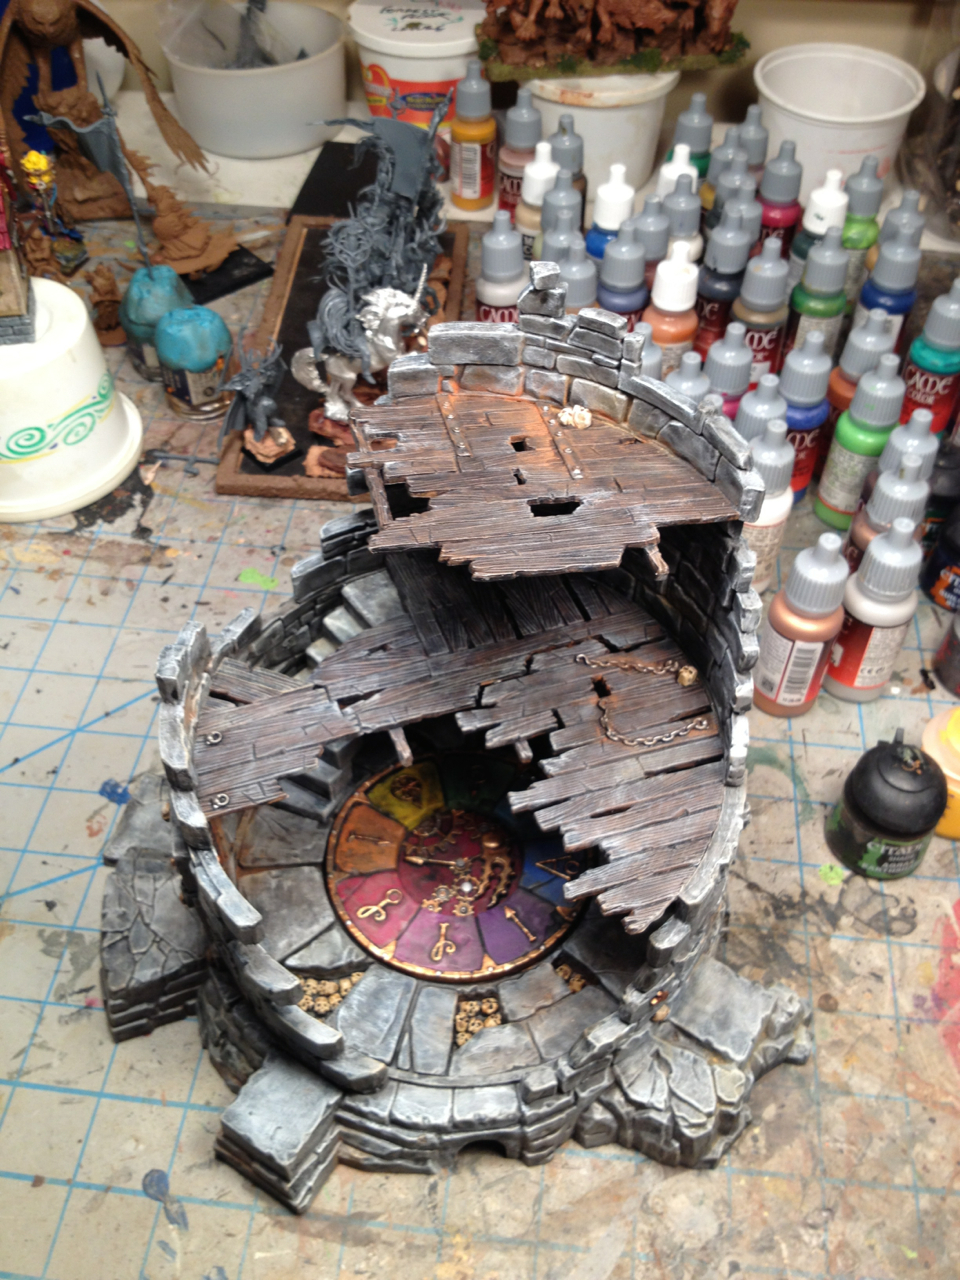
First I look for areas where the wash has dried extremely dark. I begin slowly dry brushing with tiny bit of stonewall grey working up to white. For the remaining dry brushing I primarily use white and making sure dark and lighter areas are blended together. I will study the model for the best areas for the pigments. I will apply these and lightly dry brush over them just a tiny bit. This pushes the pigment back so it feels like it’s ground into the surface of the stone or wood.

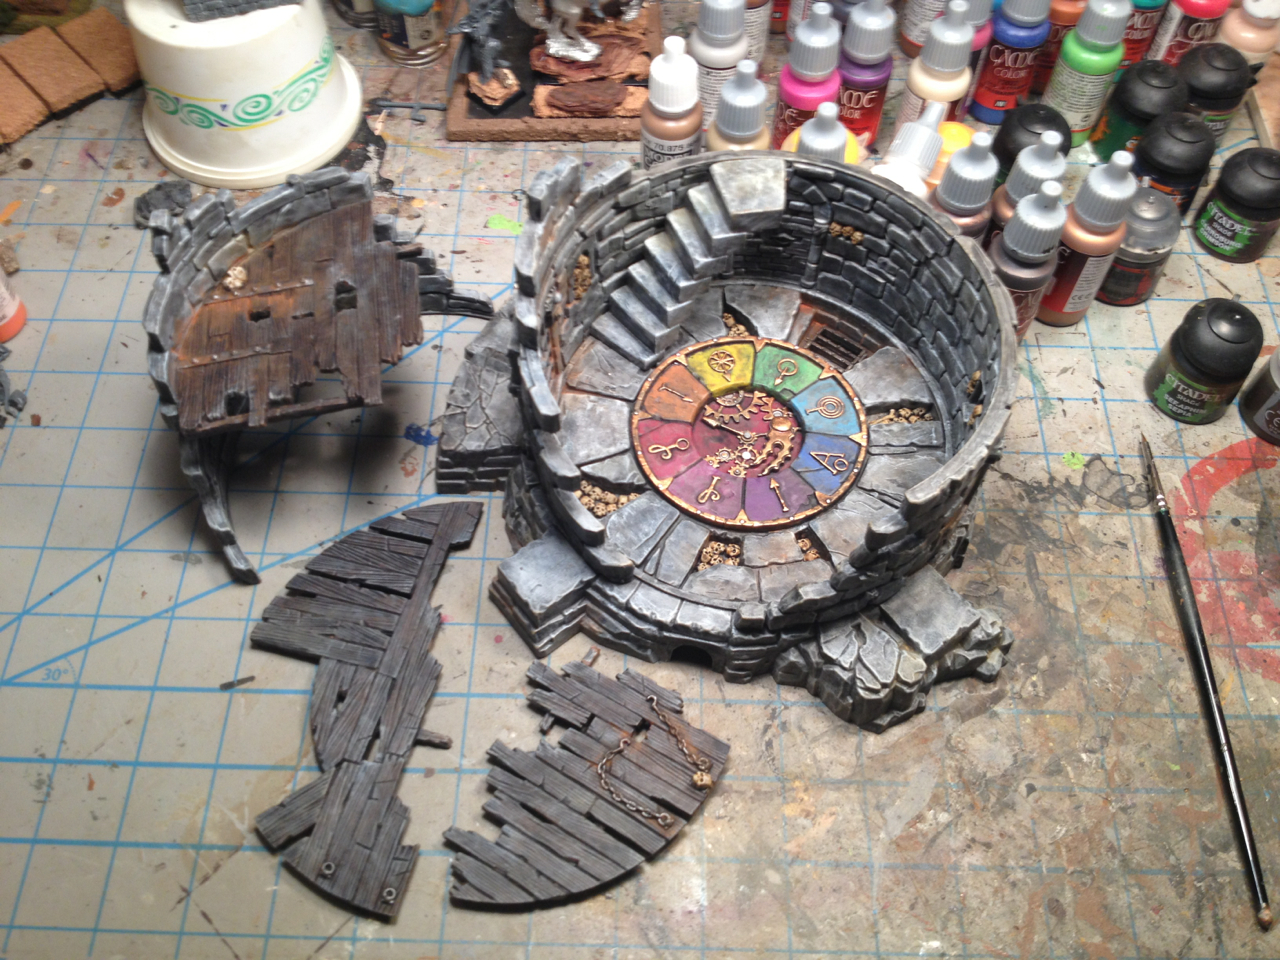
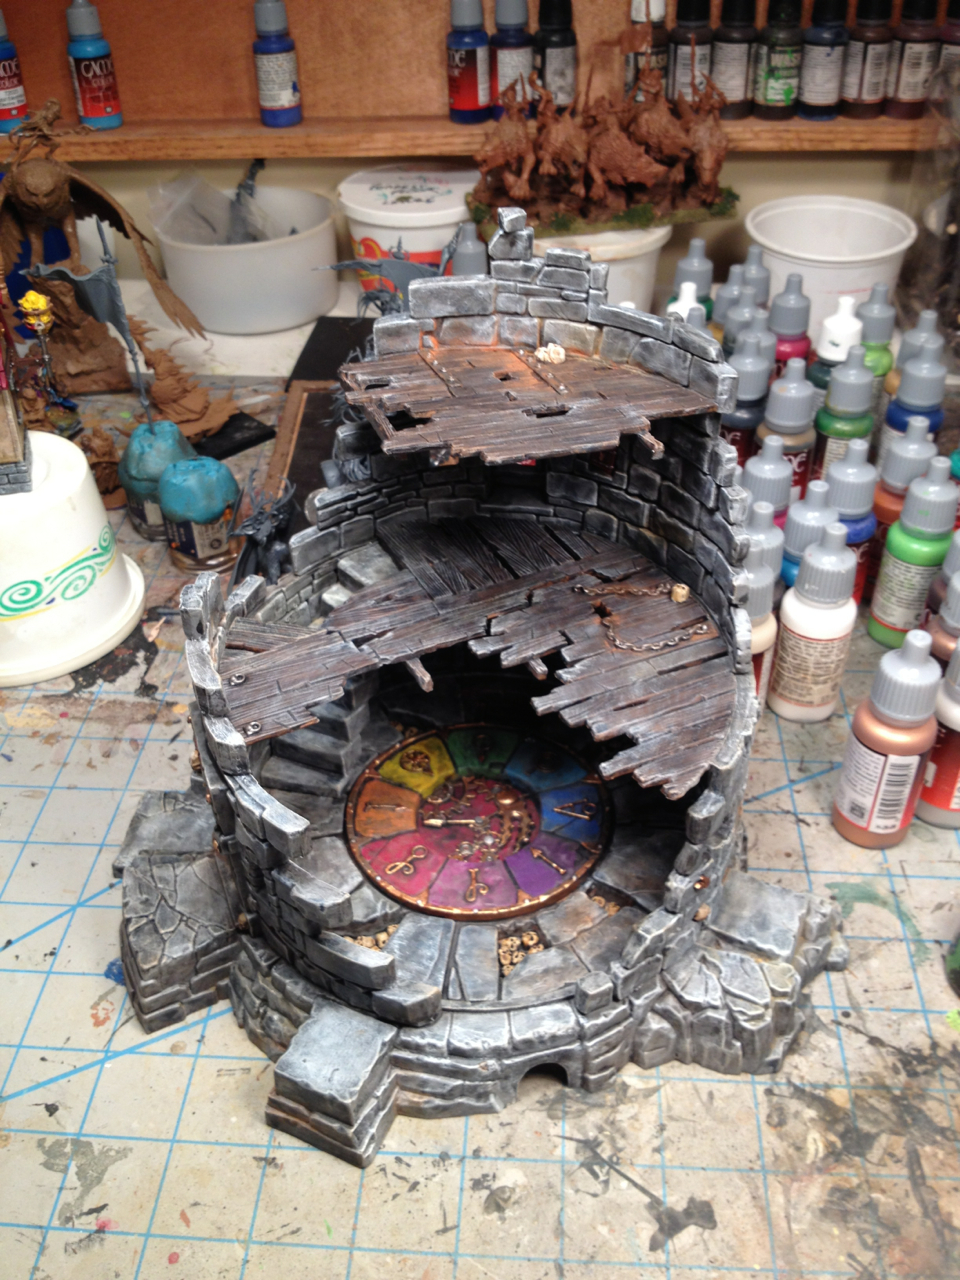
After all the dry brushing and pigments are in place I will start painting up the details and that’s the best part.
For the magic circle I painted the sections with very watered down colors to give the appearance that the colors have faded overtime. This is done by thinning down the paints to a 2:1 or 3:1 ratio depending on the paint thickness. Paints that have a high level of opaqueness will require more water to create the effect. When you apply the pain to the model be sure to push the paint around don’t paint using strokes you want to dab and lightly push the color over the stone. You want to be able to see the washing and dry brushing through the paint.
Surface pigments were applied for added pop particularly for the rust staining.
So I have been asked to give a write up on how I painted up The Dreadstone Blight kit from Games Workshop.
Well this was the first “How To” I have ever written up on this blog and perhaps the most I have ever written. If you liked this let me know and as always feedback is welcomed.
Please let me know if you would like to see more posts like this in the future.
Thanks for wasting time with me today and happy hobby.